Engine installation – Great Planes Reactor .46 EP/GP 3D ARF - GPMA1021 User Manual
Page 17
Detailed installation instructions are provided in this manual
for both the Great Planes C42-60-480kV RimFire brushless
motor and the O.S. FS-70 Surpass II four-stroke glow
engine. A two-stroke engine can also be installed, but
detailed instructions are not included. Use the four-stroke
instructions as a guide for a 2-stroke installation.
The Reactor .46 ARF can be changed from a glow engine
setup to a brushless motor or vice-versa with little difficulty,
so your power plant choice during original assembly does
not have to be permanent. To switch from one to the other,
simply remove the components installed specifically for the
original power plant and follow the instructions in this
manual for the other type. The mounting pattern for the
electric motor mount recommended for the Great Planes
C42-60-480kV RimFire motor is the same as the included
.40-.70 nylon engine mount, so new holes don’t need to be
drilled into the firewall when making the switch.
❏
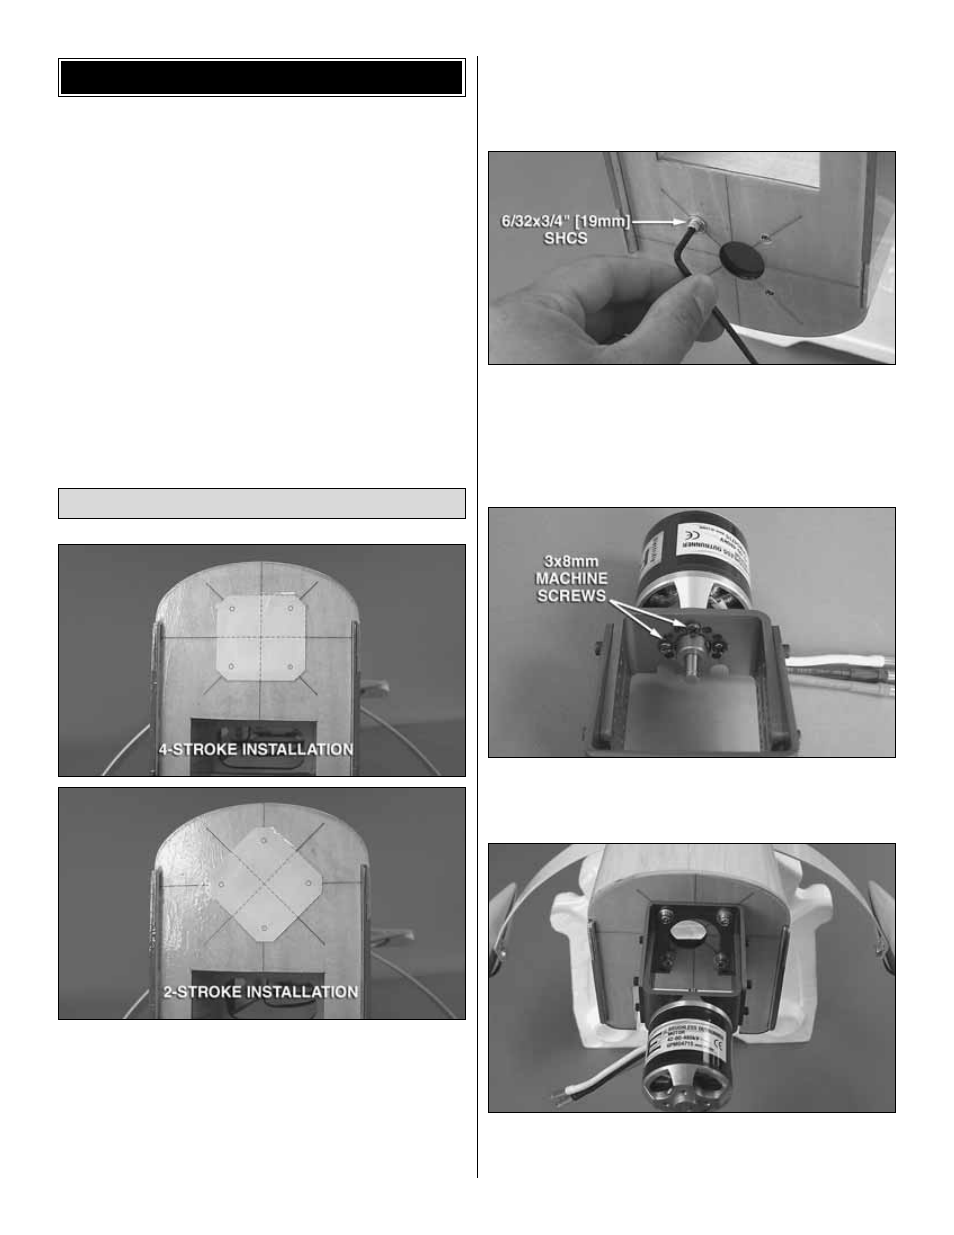
1. Cut out the mounting template from the back of this
manual. Before using the template to mark your holes on the
firewall, consider now if you may install a two-stroke or four-
stroke engine in the future. If you prefer using a four-stroke
engine, align the mounting template over the vertical and
horizontal lines on the firewall and use clear tape to hold it in
place. If you prefer a two-stroke, position the template over
the lines on the firewall set at a 45 degree angle (making this
choice now will prevent you from having to drill new mounting
holes when switching to a glow engine). Push a sharp T-pin
into each of the four mounting hole locations on the template
marking their position on the firewall.
❏
2. Drill 3/16" [4.8mm] holes at the marks you made. To
reduce tear-out from the back of the holes and to ensure
accuracy, drill smaller pilot holes at the marks first, then
enlarge the holes to 3/16" [4.8mm]. Insert a 6-32 blind nut into
each of the four holes and draw them tight into the firewall
using a 6-32 x 3/4" [19mm] SHCS and #6 flat washer.
❏
3. Using the four 3 x 8mm machine screws included with
the kit and threadlocking compound, secure the motor to the
motor mount as shown.
❏
4. Attach the motor mount to the firewall using four
6-32 x 3/4" [19mm] SHCS, four #6 flat washers, four #6 lock
washers, and threadlocking compound.
Brushless Motor Installation
ENGINE INSTALLATION
17