Assemble the wing – Great Planes Matt Chapman Eagle 580 ARF 1/3 Scale - GPMA1286 User Manual
Page 8
8
o o
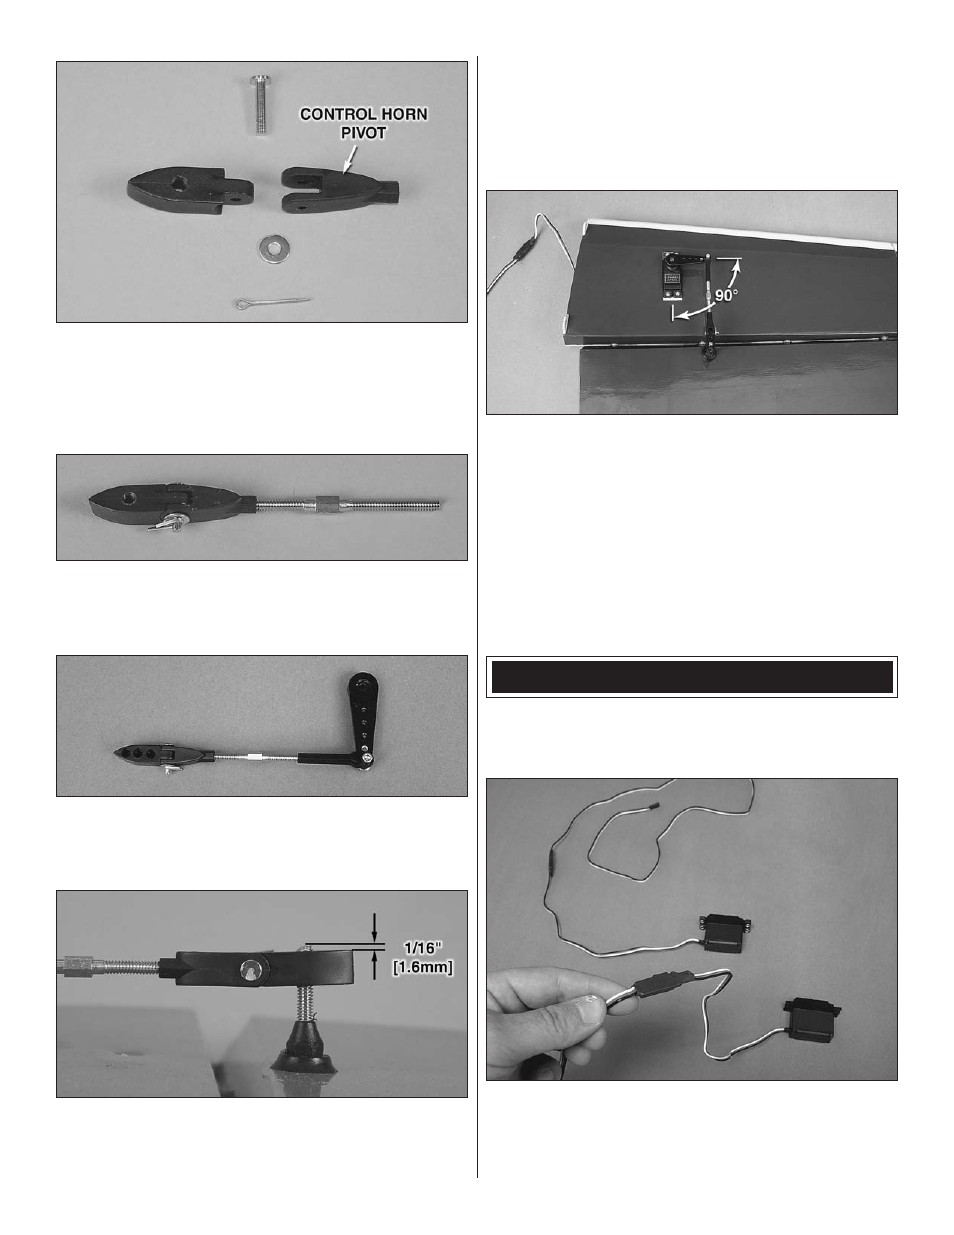
7 . Assemble the control horn parts as shown . Note:
Eight total control horn pivots are supplied .
Two are
standard thread and six are reverse thread . Identify the
two standard thread pivots and set them aside for use on the
rudder system . Do not assemble those now .
o o
8 . Screw the reverse threaded end of the 2-1/2"
[64mm] pushrod 15 full turns into the control horn . (To
tighten, turn counterclockwise .)
o o
9 . Screw the “normal” threaded end of the pushrod 15
turns into the ball link that is connected to one of the single-
sided servo arms .
o o
10 . Screw the control horn onto the control horn
bolt, leaving 1/16" [1 .6mm] extending from the top of the
control horn .
o o
11 . Plug the servo into the receiver and turn the
radio on .
o o
12 . Place the appropriate servo arm adapter on the
servo . The inserts have letters stamped on the bottom of
them (A=Airtronics/JR, F=Futaba, H=Hitec) .
o o
13 . Attach the aluminum servo arm to the servo so
that it is 90 degrees to the long side of the servo case . If it
is not, remove the servo arm, rotate the insert 90 degrees
and attach the servo arm again . Use the insert position that
makes the servo arm fit closest to 90 degrees . Be sure to
secure the servo arm with the screw .
o o
14 . Adjust the pushrod by turning it until the elevator is
centered on the stab .
o
15 . Repeat steps 1-14 for the other stab half .
ASSEMBLE THE WING
o o
1 . Remove the covering from the two servo openings
in the bottom of the wing .
o o
2 . Connect a 24" [610mm] heavy duty servo lead
extension to the inboard aileron servo and a 36" [914mm]
extension to the outboard aileron servo . Secure the
connections with heat shrink tubing .