Install the canister mufflers – Great Planes Matt Chapman Eagle 580 ARF 1/3 Scale - GPMA1286 User Manual
Page 18
18
o o
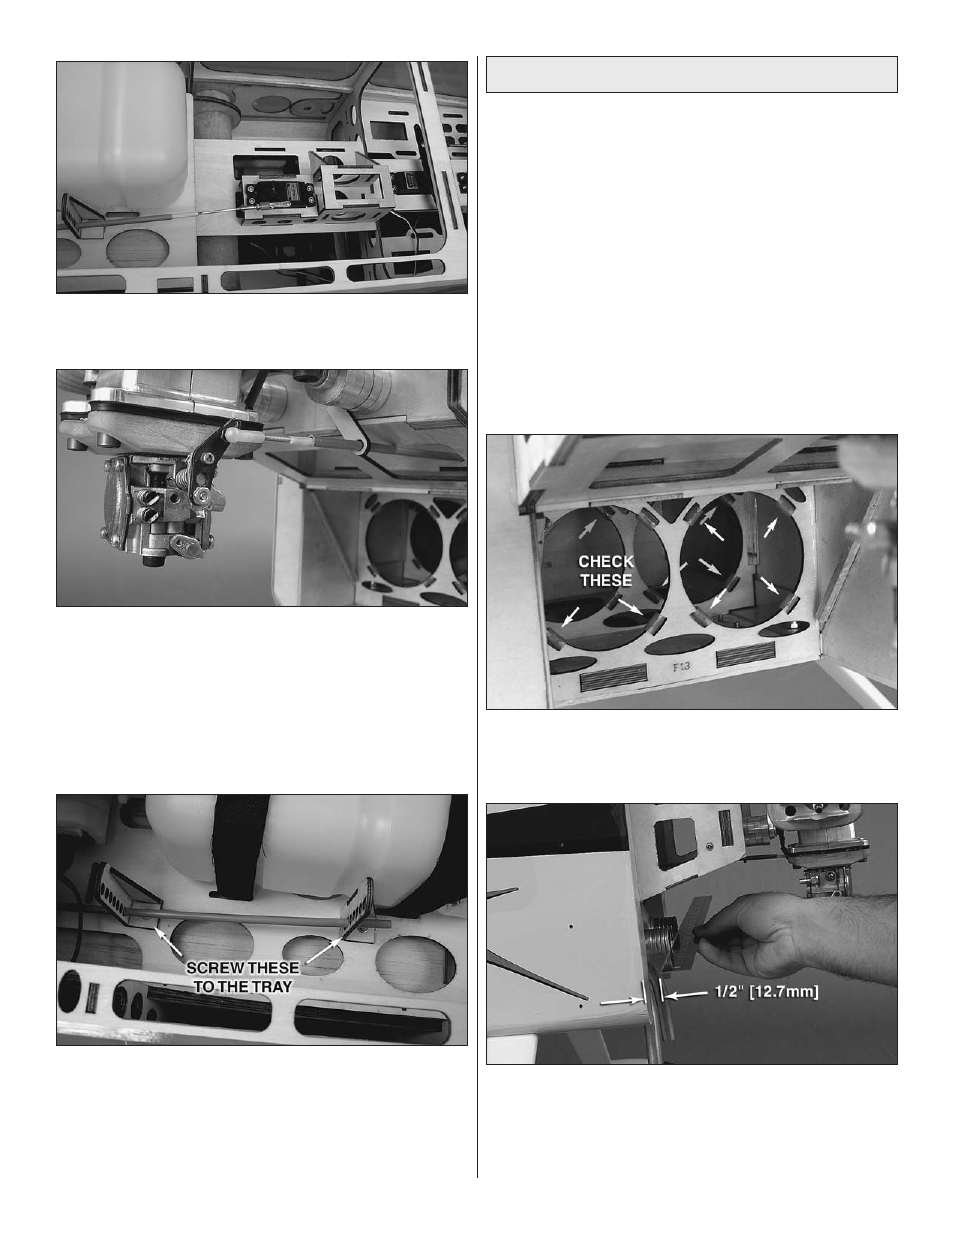
9 . Install the throttle rod and attach the clevis to your
servo arm . Install the servo arm locking screw .
o o
10 . With your radio on and your throttle servo and
throttle set to full open, cut the pushrod to length . Thread a
1" [25 .4mm] threaded rod and a nylon ball link socket onto
the engine side of the pushrod . Attach the ball link .
o o
11 . Test the operation of your throttle and adjust as
necessary . Tighten the 4-40 locking nut on the servo arm
side of the throttle pushrod .
o o
12 . Repeat steps 1 through 11 to install your choke
servo and linkage . When you’re satisfied with the operation of
your throttle and choke setup, permanently glue all pushrod
standoffs in place and use the provided #2 x 3/8" [9 .5mm]
sheetmetal screws and #2 washers to screw the two large
throttle rod standoffs to the tank tray .
Install the Canister Mufflers
(DA-100 only)
This section covers the installation of the optional MTW
short canister exhaust system for the DA-100 . This airplane
was designed around this particular system, but other
short canisters may fit . As is, the model will accommodate
twin 70mm diameter cans whose can lengths are no
longer than 250mm .
As a word of caution, canister style exhaust must not
be considered maintenance free . Periodic inspection is
required (especially after the first few runs and flights) . The
sixteen silicone supports must be replaced when heat has
deteriorated them . Also, the cans should be removed from
time to time to check the surrounding wood support and box
structure for damage, failed glue joints, and dry or charred
wood . For a more maintenance free system, please use the
standard mufflers for your DA-100 .
o
1 . Inspect the silicone supports and replace any that
appear damaged, loose, or are otherwise unusable . These
can be replaced by using any standard silicone glow fuel line .
o
2 . Fit the canister into one of the fuse supports . Slide
it all the way back until it stops, and then slide it forward
about 1-1/2" [38mm] so that the end of the front pipe is 1/2"
[12 .7mm] forward of the firewall face . Do the same for the
other canister .