Assemble and install the fuel tank – Great Planes Matt Chapman Eagle 580 ARF 1/3 Scale - GPMA1286 User Manual
Page 15
15
[6 .4mm] lock washers . You’ll want to inspect these screws
after the first few flights and then periodically after that to
make sure that they’re still tight .
Use the next four steps to mount a DA-85 engine .
Mounting and rigging the DA-85 engine is similar to the DA-
100 with the exception of the required engine mount standoffs .
Desert Aircraft does not allow the use of aluminum standoffs
for this particular engine . We have supplied you with eighteen
wooden standoffs to accommodate your DA-85 .
o
6 . Cut out the DA-85 mounting template we have provided
in the back of this manual . Tape (or use spray adhesive) the
template in position with the arrow pointed up, the text toward
you, and the crosshairs aligned with their corresponding
marks on the firewall .
o
7 . Drill four 5/16" [7 .9mm] diameter holes for the engine
mounting bolts . Install four 1/4-20 blind nuts on the back side
of the firewall .
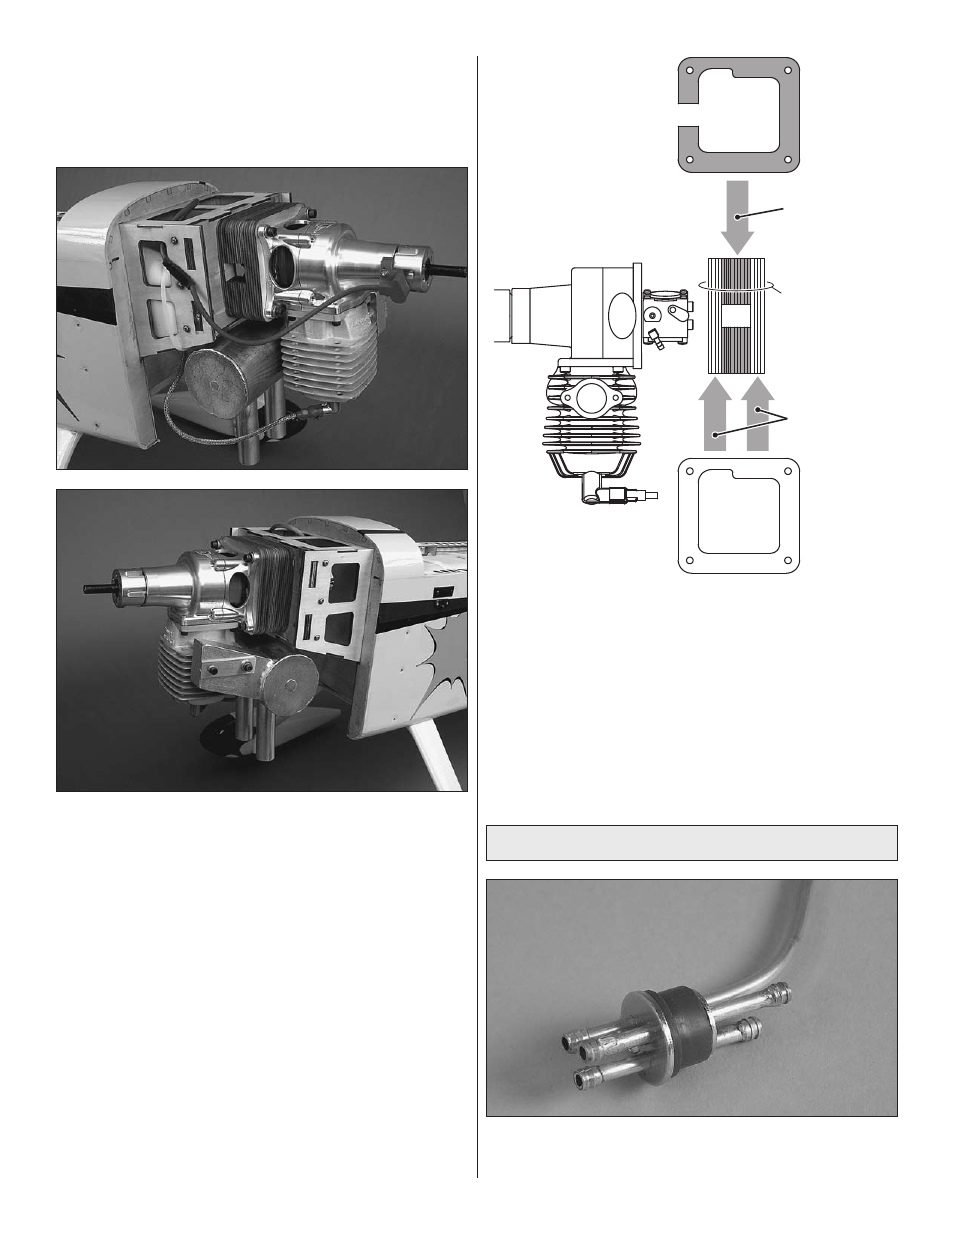
2mm & 3mm
Thicknesses
Ten
Notched Ply
Spacers
DA-85 Engine
Plywood Shim
Stackup
(Allow carb
adjustment)
Four
Closed Ply
Spacers
o
8 . Use the sketch above to help you stack the ply standoffs
in the correct order . Four closed standoffs go on either side of
the ten notched standoffs . Coat the threads and the shank of
the four 1/4-20 x 2-3/4" [70mm] SHCS bolts with petroleum
jelly and fit a 1/4" lock washer to each . Apply a thin layer of
30-minute epoxy between each layer and bolt your DA-85 to
the firewall .
o
9 . After the epoxy has cured, remove the engine and
clean off the bolt threads . Fuel proof the plywood standoffs
with finishing resin or thinned epoxy . Reinstall the engine
applying threadlocker to the engine mounting bolt threads .
Assemble and Install the Fuel Tank
o
1 . Assemble the stopper, brass tubes and steel stopper
end plates as shown .