Install the rudder servos – Great Planes Matt Chapman Eagle 580 ARF 1/3 Scale - GPMA1286 User Manual
Page 11
11
o
6 . When the rudder hinges are fully cured, attach the tail
gear arm to the tail gear with the two springs .
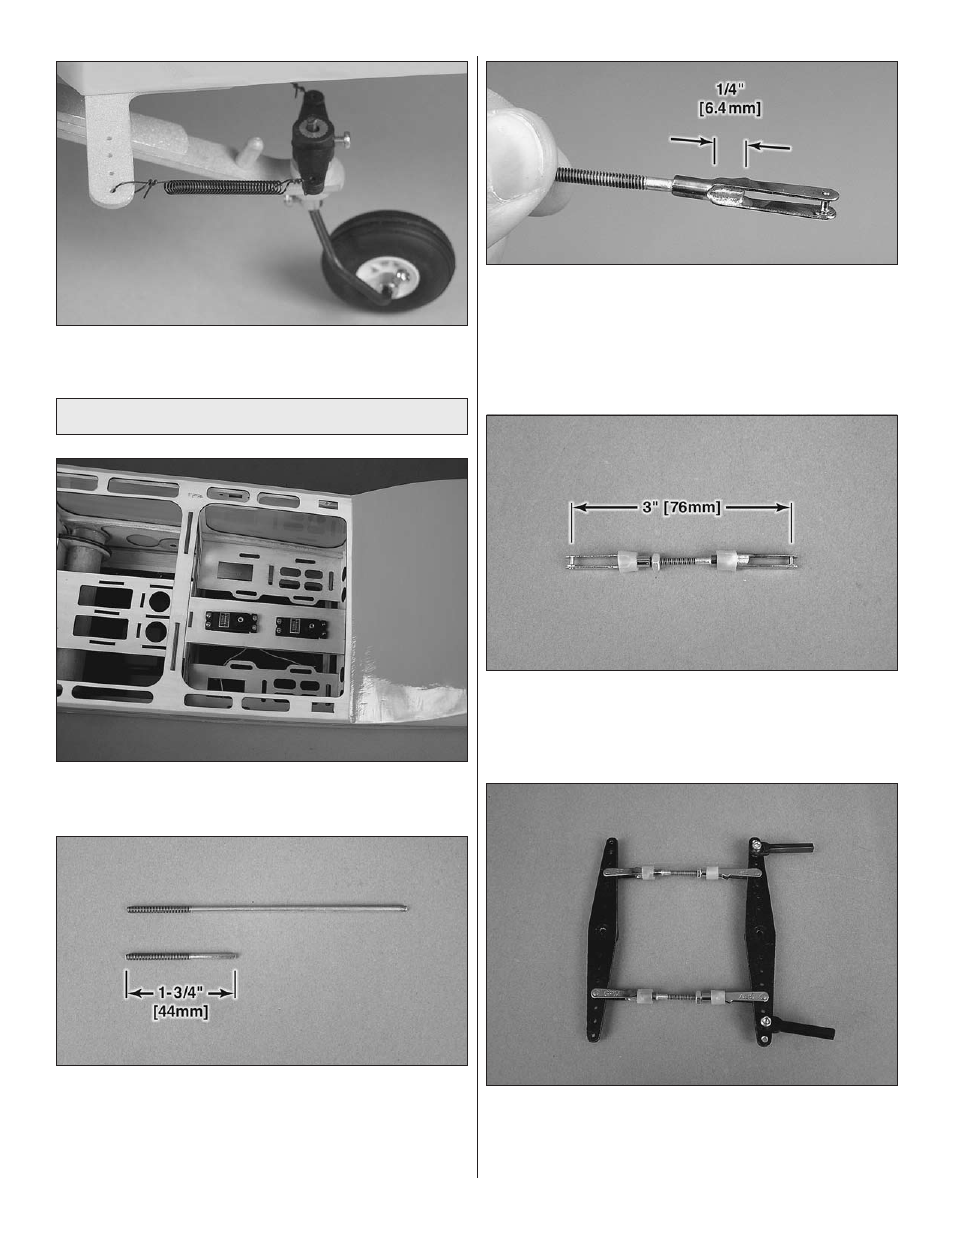
Install the Rudder Servos
o
1 . Install two servos in the rudder tray so that the servo
output shafts are positioned aft .
o
2 . Cut the two 4-40 x 4-1/2" [114mm] one-end threaded
rods down so that they each measure 1-3/4" [44mm] .
Roughen the end of the rod with a green ScotchBrite pad
or sandpaper . Clean the rod with denatured alcohol and a
clean cloth .
o
3 . Using silver solder, flux and your hobby torch, solder
an unthreaded steel clevis onto the unthreaded end of each
pushrod so that 1/4" [6 .4mm] of rod protrudes past the barrel
of the clevis . Wipe away the remaining flux with a damp cloth
while the joint is still warm to prevent corrosion . Apply a thin
film of household oil to the surface of the joint .
o
4 . Fit a 4-40 hex nut, two silicone retainers and a 4-40
threaded clevis onto the threaded end of each rod . Adjust
the length of the rods so that they measure 3" [76mm] from
pin to pin .
o
5 . Drill and tap one of the two 4" [102mm] servo arms and
install two nylon ball links as shown . Link the two servo arms
together by installing the pushrods in the fourth holes out
from the center of each arm .