Great Planes Matt Chapman CAP 580 Giant ARF - GPMA1285 User Manual
Page 9
❏
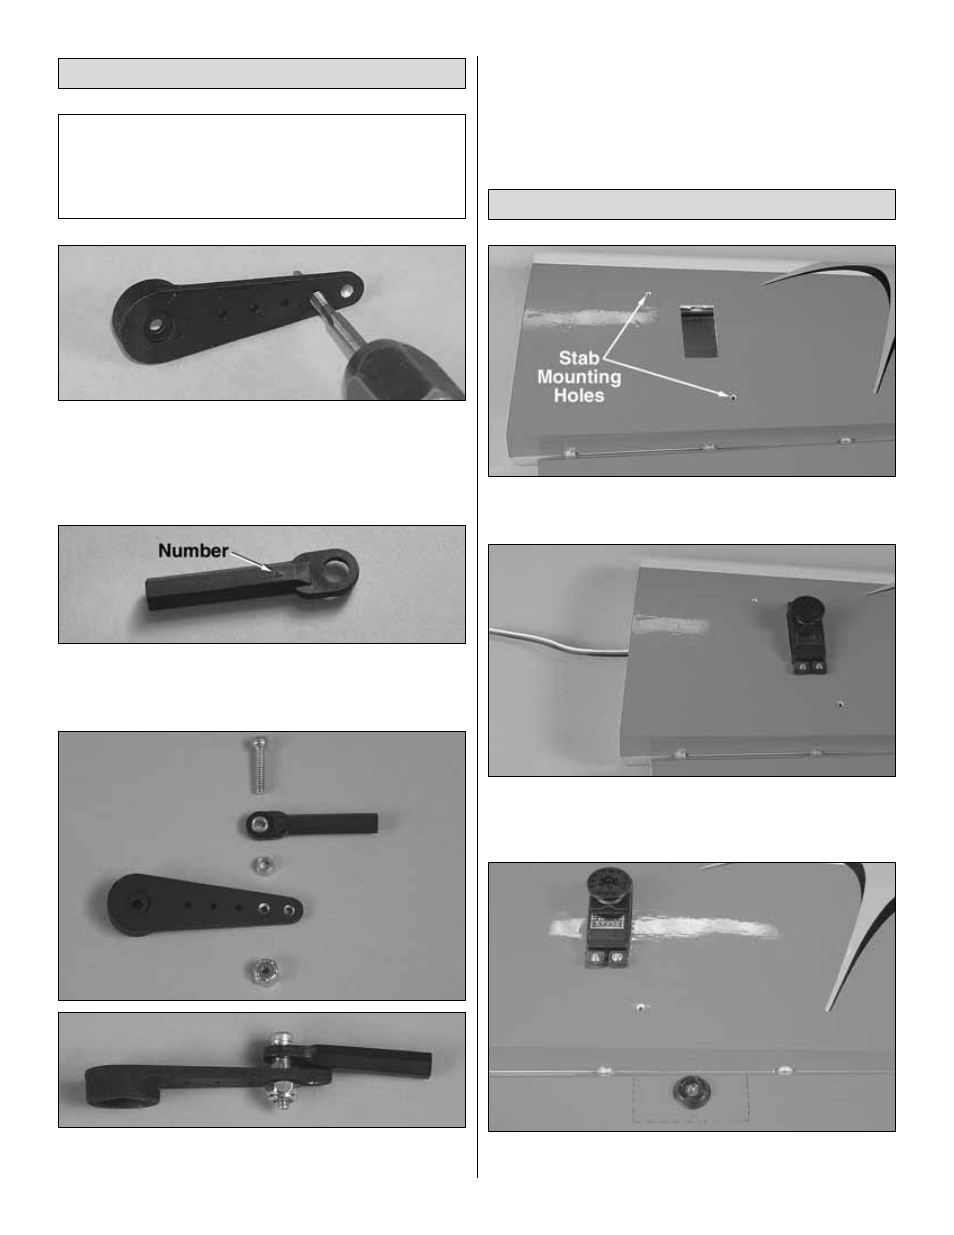
1. Drill and tap 4-40 threads in the two outermost holes
of each of the six single-sided servo arms.
❏
2. Drill and tap 4-40 threads in the outer hole of the 4-1/4"
[106mm] servo arm.
❏
3. The nylon ball links have a number on one side of them.
With the number facing up, press the brass ball into each of
the nylon balls link from the bottom, opposite the number.
❏
4. Attach the ball link to the inner tapped hole of one of
the one-sided servo arms with 4-40 x 1/2" [13mm] Socket
Head Cap Screw [SHCS] brass stand off and 4-40 lock nut.
Note: The number goes toward the servo arm.
❏
5. Attach the ball links to the five other single-sided
servo arms.
❏ ❏
1. Trim the covering from the servo opening and stab
mounting holes in the bottom of one stab.
❏ ❏
2. Mount the elevator servo to that stab half, using the
hardware provided with your servos, remembering to harden
the threads with thin CA.
❏ ❏
3. Center the nylon pivot washer on the plywood
support and align it with the leading edge of the elevator.
Mount the Elevator Servos
Note: The included aluminum servo arms are designed with
plastic inserts, allowing the arms to work with all current
Futaba, Hitec, Airtronics and JR servos. The inserts are also
designed so that the centering of the arm can be adjusted
by rotating the insert and then re-attaching the arm.
Prepare the Servo Arms
9