Strap for battery strap for fuel tank – Great Planes Escapade EP/GP ARF - GPMA1200 User Manual
Page 16
16
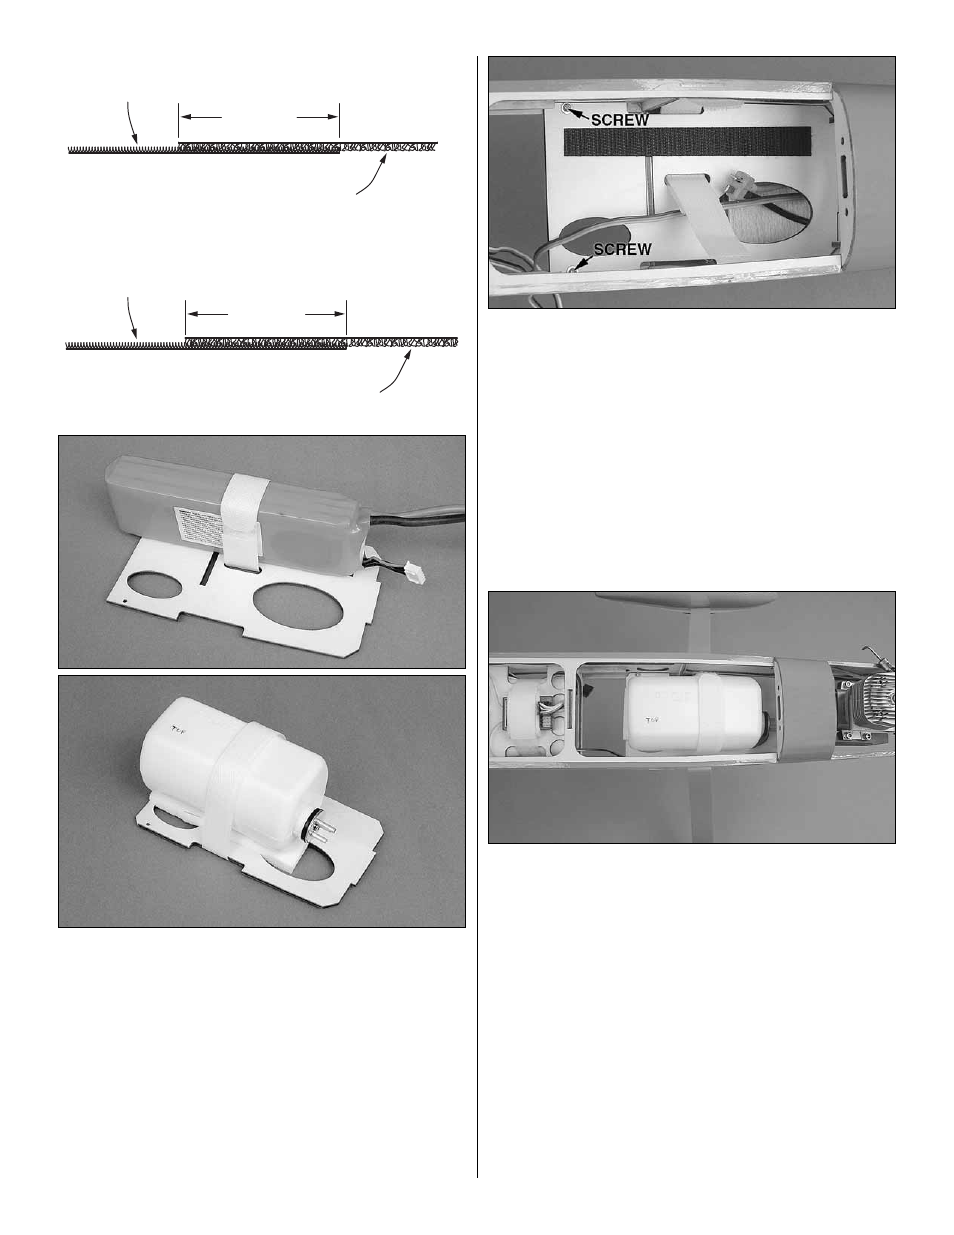
STRAP FOR BATTERY
STRAP FOR FUEL TANK
6" [150mm]
“HOOK” SIDE
7" [180mm]
“HOOK” SIDE
7" [180mm]
“LOOP” SIDE
3" [75mm]
3" [75mm]
4-1/2" [115mm]
“LOOP” SIDE
❏
3. If mounting a battery, make a battery strap from the
included hook-and-loop material by cutting a 4-1/2" [115mm]
strip from the softer loop side and a 6" [150mm] strip from
the rougher hook side. If mounting the fuel tank, make a fuel
tank strap cutting a 7" [180mm] strip from the softer loop side
and a 7" [180mm] strip from the rougher hook side. For either
version, join the straps together with a 3" [75mm] overlap.
Test mount the battery (or fuel tank with the sheet of R/C
foam rubber you cut) to the battery plate with the strap.
❏
4. While the battery or fuel tank is still mounted with the strap,
use medium CA to glue the strap to the bottom of the plate. This
will make it easier to remount the battery (or fuel tank) later.
❏
5. Remove the battery (or fuel tank) from the mounting
plate. Test fi t the plate into the fuselage and make sure the
front end keys into the slot in the fi rewall. If building the electric
version, guide the wires coming from the ESC through the
hole in the battery plate. Also, temporarily screw the battery
plate into position with a #2 x 3/8" [9.5mm] wood screw and
#2 washer on both sides of the tray near the back end.
❏
6. Remove the mounting plate, then reinstall, only this
time securely and permanently gluing it into position with
epoxy or medium CA.
If you’ve assembled your Escapade as an electric
version, proceed to Final Assembly on page 19.
❏
7. If using a glow engine, mount the fuel tank with the strap
and foam rubber sheet. The fuel lines will be connected later.