Great Planes Escapade EP/GP ARF - GPMA1200 User Manual
Page 15
15
❏
5. Drill #36 (or 7/64" [2.6mm]) holes through the engine
mount at the marks you made for the mounting screws. Mount
the engine with four #6 x 3/4" [19mm] Phillips screws and
#6 lock washers. Alternate method: Some modelers prefer
machine-thread screws rather than sheet-metal screws for
mounting the engine. But this requires an additional step—
tapping threads into the mount. If you prefer to use machine
screws instead, use a 6-32 tap to tap threads into the holes
after drilling them. Then, use 6-32 x 1" socket-head cap screws
(SHCS) and #6 lock washers for mounting the engine. Note:
Four-stroke engines may have to be temporarily dismounted
later while hooking up the throttle.
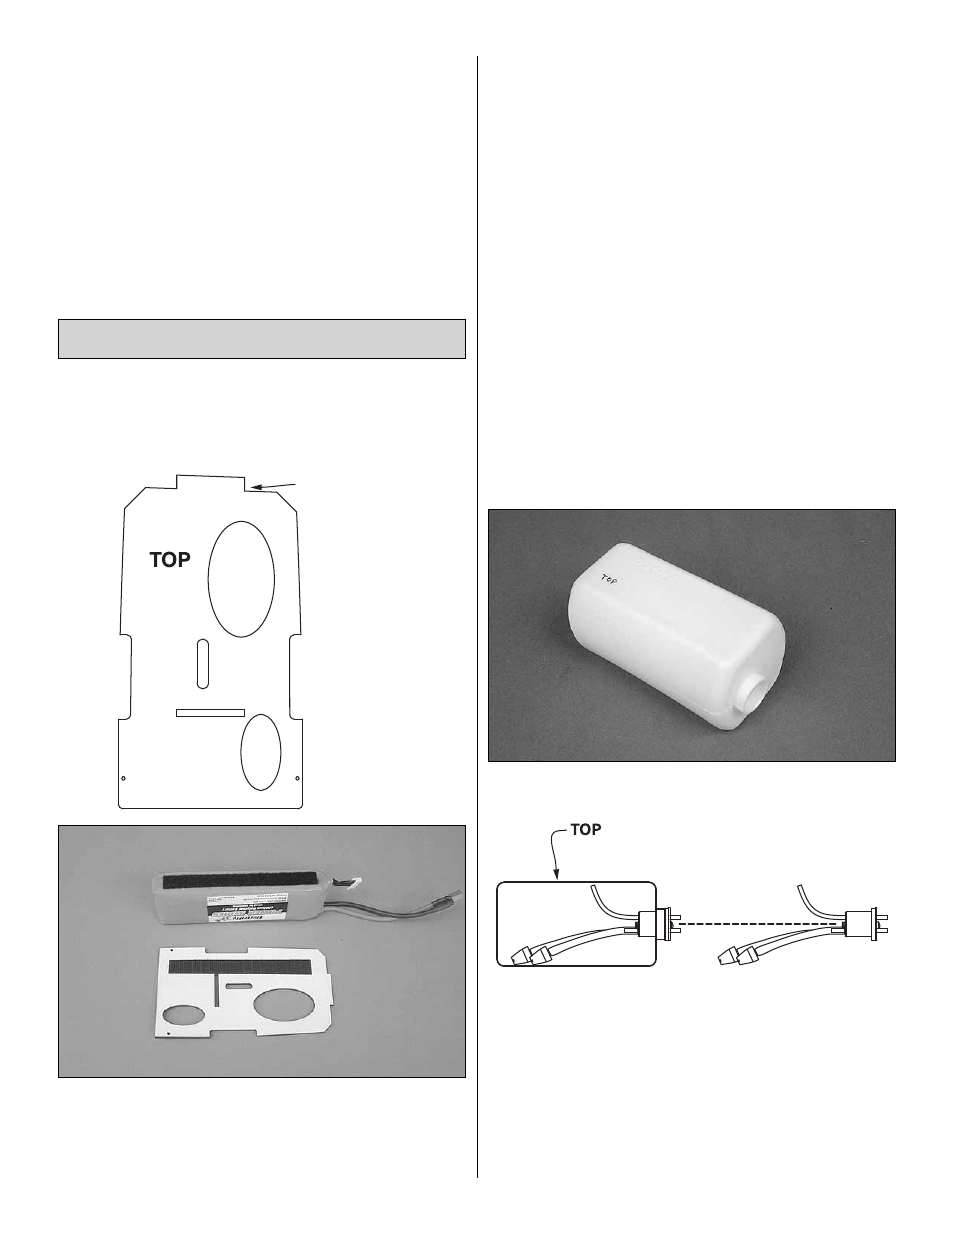
Mount the Fuel Tank (or Motor Battery)
IMPORTANT: If powering your Escapade with an electric
motor, before experimenting with different motor battery
combinations and connecting multiple battery packs with
adapter plugs, refer to the Battery Precautions on page 20.
THIS SIDE
SLANTS BACK
❏
1. Lay the plywood battery/fuel tank plate on your
workbench so the right side of the front edge will be slanted
back. If mounting a battery, cut a 1/2" x 5" [13 x 130mm]
strip from the rougher, or “hook” side of a strip of Great
Planes adhesive-back hook and loop material (not included)
and apply the strip to the upward-facing surface of the
plate as shown. Place an equal-sized “fuzzy,” or “loop” side
of adhesive-backed hook and loop material to the battery
you will be using. If mounting the fuel tank, cut a 2" x 4"
[50 x 100mm] sheet from the supplied foam rubber sheet.
Skip the following step if mounting a battery.
VENT TUBE
❏
2. Use a fi ne-point felt-tip pen to write “TOP” on the same
side of the fuel tank that has the molded-in label “270cc” (or,
just remember that the surface that has the “270cc” is the
top). Loosen the Phillips screw in the stopper assembly a few
turns and temporarily remove the stopper assembly from the
tank. Be certain the vent tube is toward the top of the tank.
Then, reinsert the stopper assembly and tighten the screw to
squish the rubber stopper and seal the tank.