Great Planes Escapade EP/GP ARF - GPMA1200 User Manual
Page 11
11
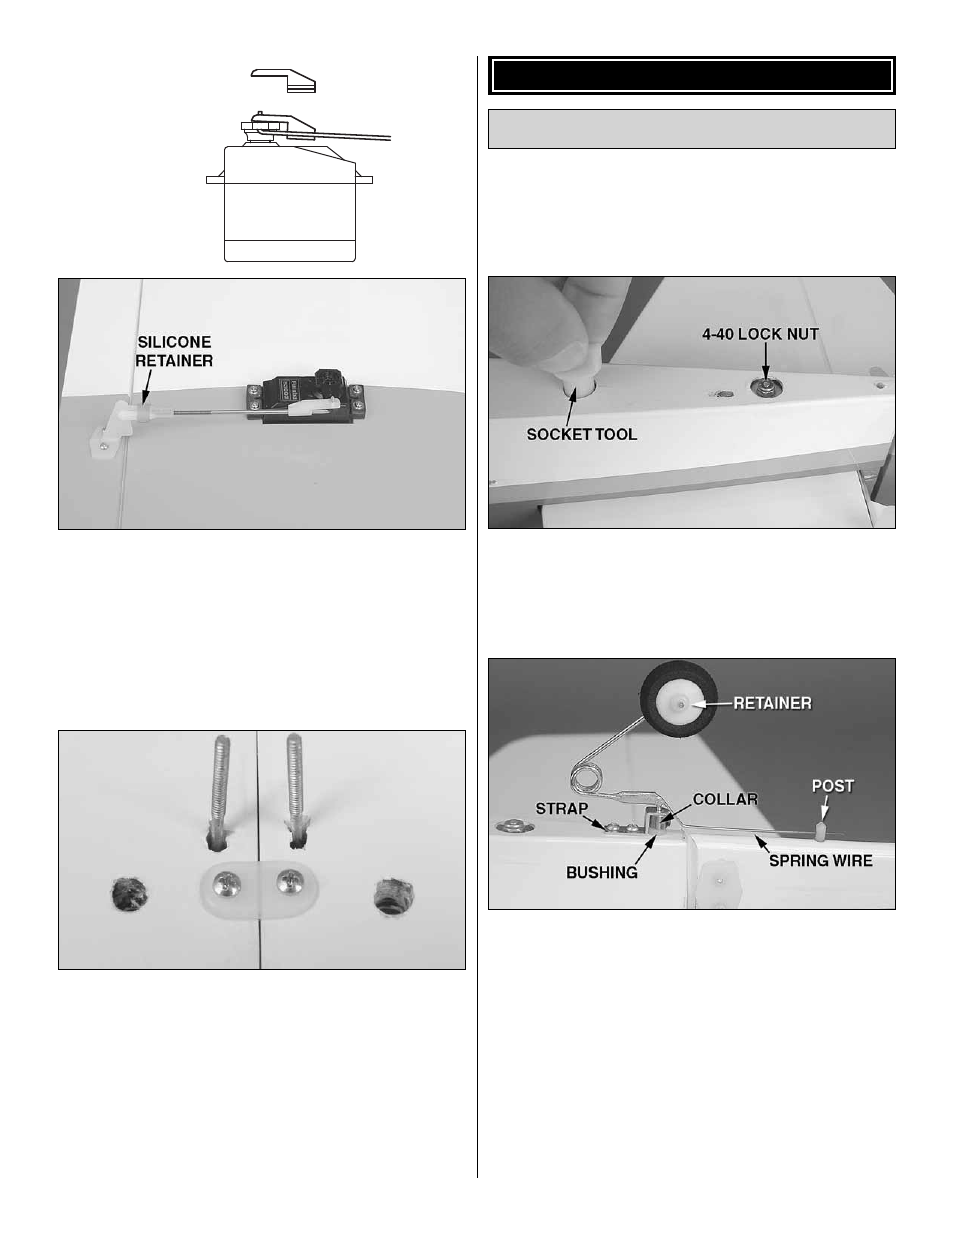
90° PUSHROD
CONNECTOR
❏
10. Make a 90° bend in the wire at the mark. Enlarge the
holes in the aileron servo arm with a #48 (.076" [1.9mm])
drill or a hobby knife. Fit the pushrod into the outer hole
in the servo arm, then attach a 90° pushrod connector to
the assembly. Cut the excess wire 1/16" [2mm] above the
connector. Install the servo arm screw and slip the silicone
retainers over the pushrod.
❏
11. If you haven’t yet done so, hook up the other aileron
the same way.
❏
12. Slide the wings together with the wing tube. Temporarily
mount the nylon strap to the wings with two #4 x 3/8" [9.5mm]
Phillips screws. Same as when installing the servo screws,
remove the screws from the strap, harden the holes with a
few drops of thin CA and allow to harden before putting the
wings together and installing the screws.
Later, during fi nal radio and control throws set up, the
pushrods will be adjusted so the ailerons are centered when
the radio is on (or, you could reconnect your aileron servo to
the radio and do this now).
ASSEMBLE THE FUSELAGE
Hook Up the Elevator & Rudder
❏
1. Fit the vertical stabilizer (frequently referred to as
the “fi n”) to the vertical stabilizer (stab). Guide the fi n rods
through the holes in the bottom of the fuselage and make
sure the stab is fully seated to the fuselage and that the fi n is
fully seated onto the stab.
❏
2. Even though the nuts used on the fi n rods are locking
nuts, a drop of threadlocker on the threads is recommended.
Add a drop of threadlocker to the threads of the fi n rods.
Then, tighten the assembly to the fuselage with a #4 fl at
washer, a #4 lock washer and a 4-40 lock nut on each rod.
The included socket tool may be used to tighten the nuts.
❏
3. Mount the tail gear assembly in the following order:
❏
A.
Fit the bushing into the hole in the fuselage and glue
it into position with a few drops of thin CA. Allow to
harden before the next step.
❏
B. Add a small drop of threadlocker to the threads on
the 4-40 set screw for the collar. Then, thread the set
screw into the collar. Fit the tail gear wire through the
hole in the strap, then the collar, but don’t tighten the
set screw yet.
❏
C. Fit the assembly into the bushing in the fuselage.
Then, press the post into the bottom of the fi n. Place
the spring wire into the notch in the post. Glue the post
into position with a few drops of thin CA.