Great Planes Escapade EP/GP ARF - GPMA1200 User Manual
Page 12
12
❏
D. Using the holes in the strap as a guide, drill 1/16"
[1.6mm] holes into the bottom of the fuselage. Install,
then remove two #2 x 3/8" [9.5mm] Phillips wood
screws into the holes, apply a few drops of thin CA to
the holes, allow to harden, and remount the strap with
the screws.
❏
E. Tighten the set screw in the collar.
❏
F. Mount the tail wheel with the small, nylon retainer.
❏
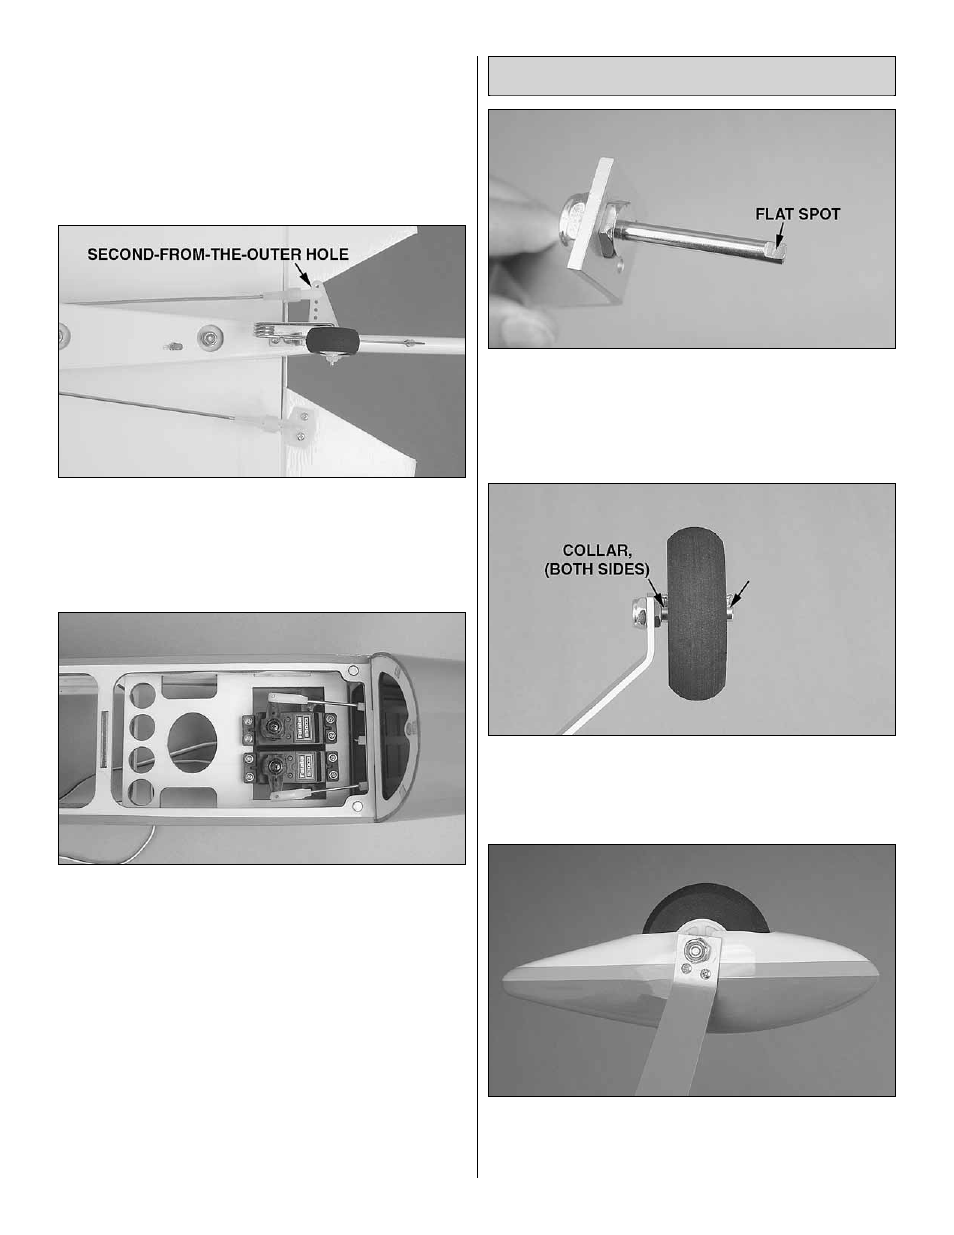
4. Slide the elevator and rudder pushrods into the guide
tubes in the fuselage. Connect the clevises to the second-
from-the-outer holes of the horns. Slide the silicone retainers
over the clevises.
Refer to this photo for the following three steps.
❏
5. Place the elevator and rudder servos in the servo tray
in the fuselage. Same as you did with the aileron servo(s),
connect the rudder and elevator servos to your receiver and
battery and turn on the radio. Center the trims and fi nd the
correct orientation for the servo arms that will be 90-degrees.
Cut off the unused arms.
❏
6. Mark, cut, bend and connect the pushrods to the
servos the same way you did for the ailerons. After you mark
the pushrods, it will be easier to bend and cut them if you
disconnect the clevises from the horns on the other end.
❏
7. The same way you mounted the aileron servo(s), mount
the elevator and rudder servos with the servo screws that came
with them—don’t forget to harden the screw holes with a few
drops of thin CA after installing, then removing the screws.
Mount the Main Landing Gear
❏
1. Use a 1/2" and 7/16" open-end wrench to mount an
axle to each landing gear. Use a metal fi le to grind a fl at spot
on the end of both axles.
❏
2. Mount the wheels to the axles with a collar on both sides
held on with the 3mm screws and threadlocker on the threads.
❏
3. Mount each wheel pant to the landing gear with two
4-40 x 1/2" [13mm] Phillips screws and threadlocker on the
threads. Be certain to use threadlocker because there are
no lock washers.