Parts & assembly sheet – Golden Lighting 8981-SF GRM User Manual
Page 2
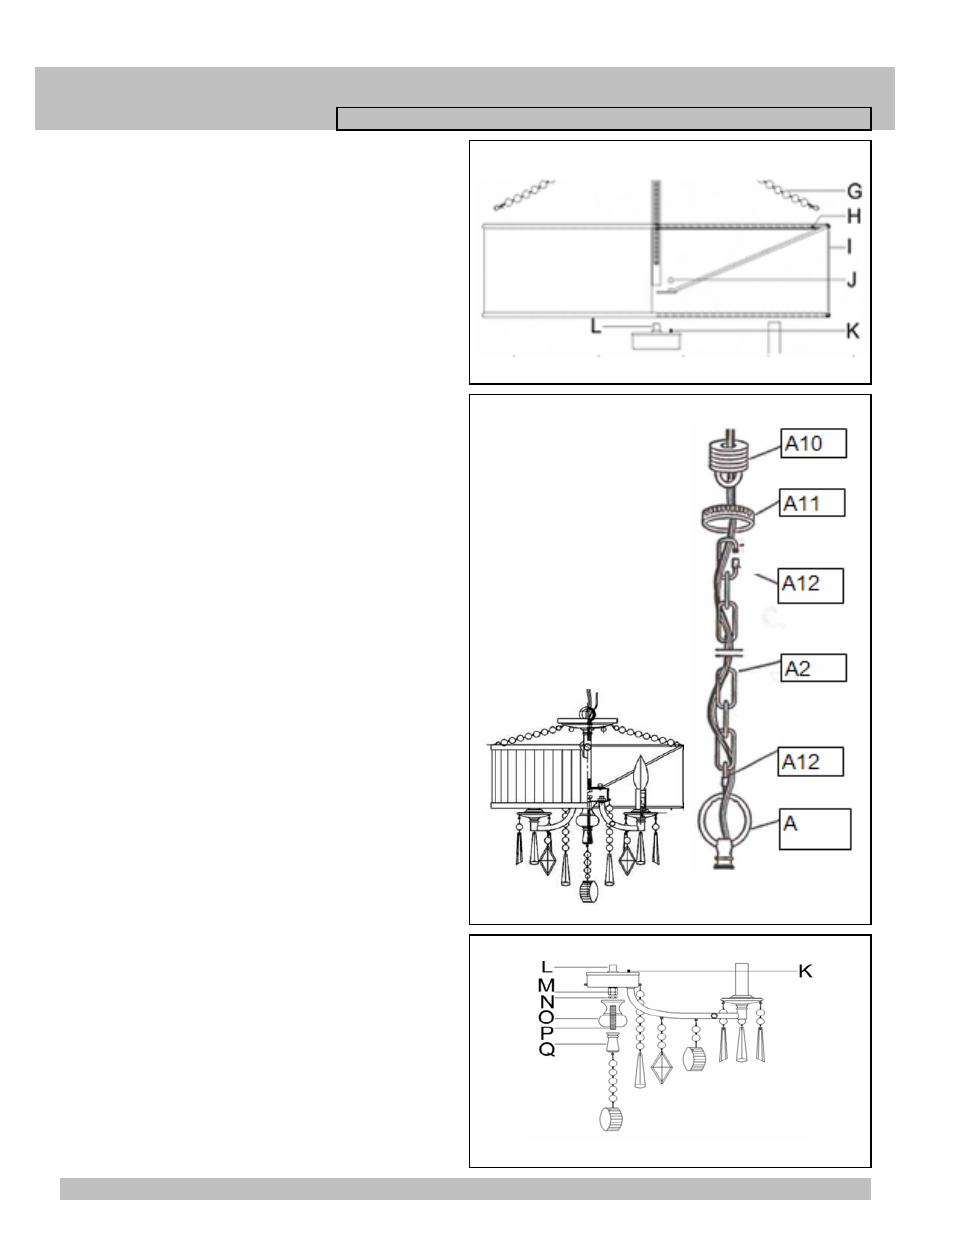
Note: Complete these remaining steps after the fixture is
hung.
14. Secure threaded nipple (P) to bushing(M) of housing
and screw hex nut (N).
15. Place cap (O) over the threade nipple (P).
16. Screw finial (Q) to threaded nipple (P). (N).
17. Install the light bulbs in accordance with the fixture's
specifications.
(DO NOT EXCEED MAXIMUM WATTAGE RATING)
Fig 4
For Customer Service, contact the place of purchase to arrange for replacement parts.
ASSEMBLING THE FIXTURE as Chain hung (Fig.3)
6. Remove the Circular strap from top of Fixture and
replace the long mounting screws with two short screws to
hold the Deco nuts (R) in place on the fixture Top cap (B).
7. Feed the fixture wires through the Top loop (A) and pull
the wires until taut. Then screw the Top Loop
(A) to the
coupling on the Top cap (B) until tight.
8. By measuring determine correct number of links needed
for proper hanging height. Use a pair of pliers to open one
link of the Chain (A2) then remove the excess Chain (A2)
and discard it.
9. Use one chain connector(A12) to attach one end of the
chain to the Top loop (A) and close the chain connector.
10. Feed the fixture wires through the Chain (every three
links) and pull the wires until taut.
11. Slip Canopy loop collar (A11) over the chain, then do
the same with the canopy.
Fig 3
12. When ready to complete the installation Use the other
chain connector and attach the other end of the chain to the
canopy loop (A10) and close the chain connector.
13. Make sure the weight of the chandelier is supported by
the chain-not the electrical wire.
* You may now install the fixture.
PARTS & ASSEMBLY SHEET
Fixture Name: Echelon 8981-SF BRI / GRM
* NOTE: The Finial can be scratched or broken if the full
weight of the fixture is placed on it. To avoid damage
attach the Bottom Assembly parts after hanging the fixture.
4.Slide the center support of the Fabric shade(I) over center
tube to the housing, it is open on one side for ease of
assembly. Secure in place by tightening Cap nut (J) to
Frame (K) with frame of shade between them (I).
5. Hang 3 crystal draping chain (G) to hook (H) of shade.
* You may now install the fixture as semi-flush.
Fig 2