Golden Lighting 4230 RBZ-TEA User Manual
Parts & assembly sheet, Parts list
Mounting
Strap
Wire Connector
Green
Grounding Screw
Mounting
screw
Hex Nut
Canopy
Junction Box
Screw
Deco Nut
Nipple
Rod
(ROD-12 RBZ)
Rod
Socket Washer
Part Needed
Quantity
Part Needed
Quantity
Reason why
( missing, scratched, broken glass, bent, bad finish)
Comments
For Customer Service, contact the place of purchase to arrange for replacement parts.
Notice:
Please review the parts listing and check for all parts before assembling the fixture. If any parts are missing or
damaged, please note onthis sheet and contact the place of purchase to arrange for replacement parts.
PARTS LIST
Company Name:_______________________Co. Account #:_____________
to be filled out by retailer
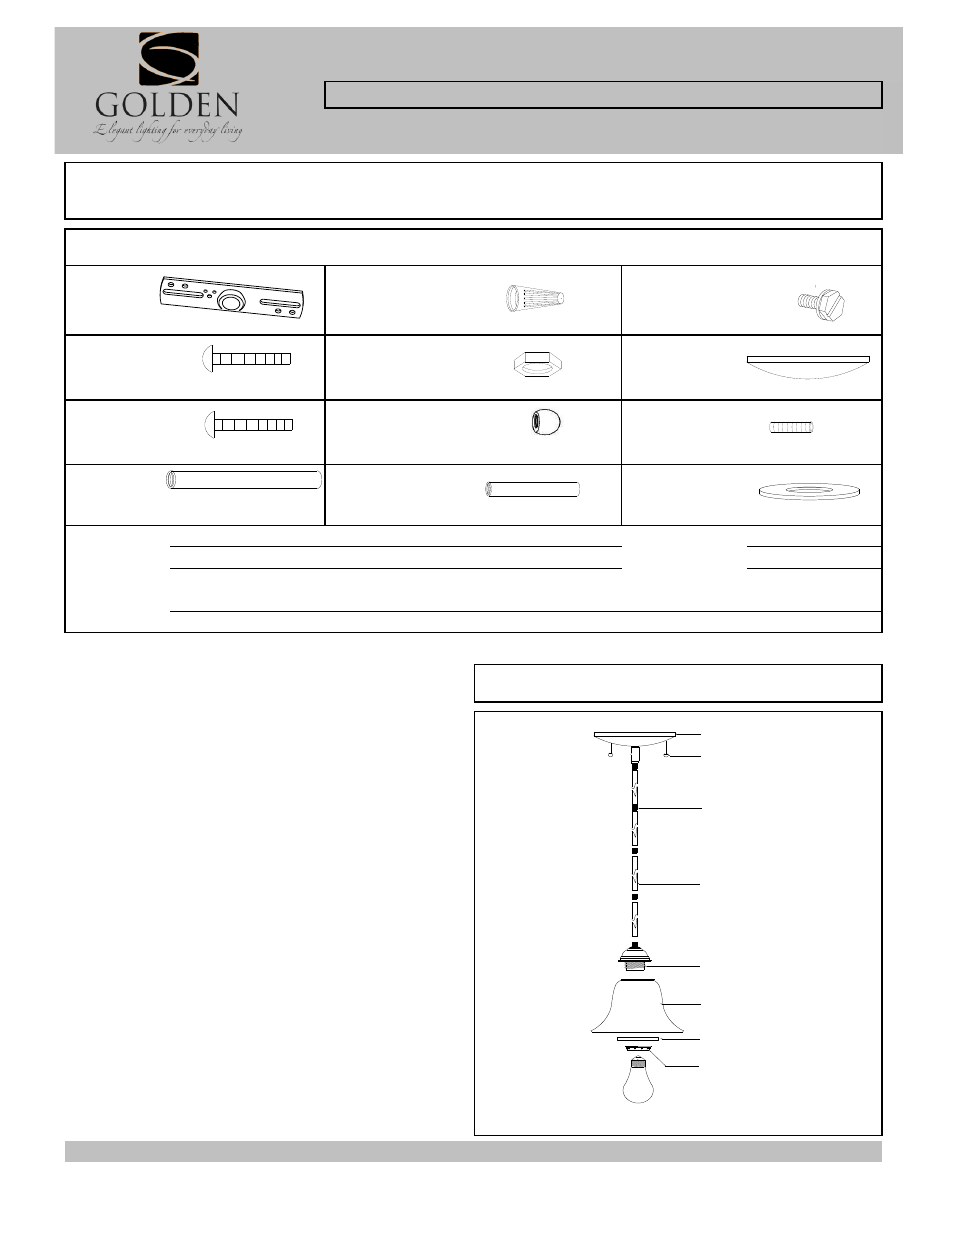
Fig. 1
NOTE: I
NSTALL THE GLASS ASSEMBLY AFTER THE
FIXTURE IS HUNG.
2 ea 5/32"*H38mm
2 ea 5/32"*H3.5mm
PARTS & ASSEMBLY SHEET
4120 PW/RBZ & 4230 RBZ
Read and review installation instruction sheet before
assembling the fixture.
F
IXTURE
A
SSEMBLY
I
NSTRUCTIONS
This fixture assembled PO:__________ Date: ________
Fixture Name: Multi-Family 4120 PW/RBZ, 4230 RBZ
1 ea 4"*H1.5mm
2ea P3 Orange
1 ea #8-32N*10mm
1ea 5"Dia *H1"
2 ea #8-32N*H32mm
2 ea 5/32"*H9mm
4 ea 3/8"*H15mm
3 ea Ø1/2"*H12"
1 ea Ø1/2"*H6"
1 ea Ø58*H1mm
E
F
G
H
I
J
L
K
1. For adjusting the height of fixture, this fixture
contains 12" Rod x 3pcs and 6" Rod x 1pc. First decide
the height required and thread the Nipple(G) inside of
Rods(H).
2. Put the fixture wire through Rods and connect the
Rods(H) and Nipples (G) together. Pull fixture wire until
taut.
3. Thread the rods to fixture frame (I) and Canopy(E).
4. Raise Canopy (E) against ceiling and tighten
securely with Deco Nuts(F).
5. Slide Glass Shade (J) and Socket Washer (L)to
Socket (I) and tighten with Socket Ring (K)
6. Install light bulb in accordance with fixture's
specifications.
(DO NOT EXCEED MAXIMUM WATTAGE RATING)
4120_4230PartsInstallation_20110712m.xls