Parts & assembly sheet – Golden Lighting 1648-5 BUS User Manual
Page 2
For Customer Service, contact the place of purchase to arrange for replacement parts.
PARTS & ASSEMBLY SHEET
Fixture Name:
Olympia 1648-5 BUS
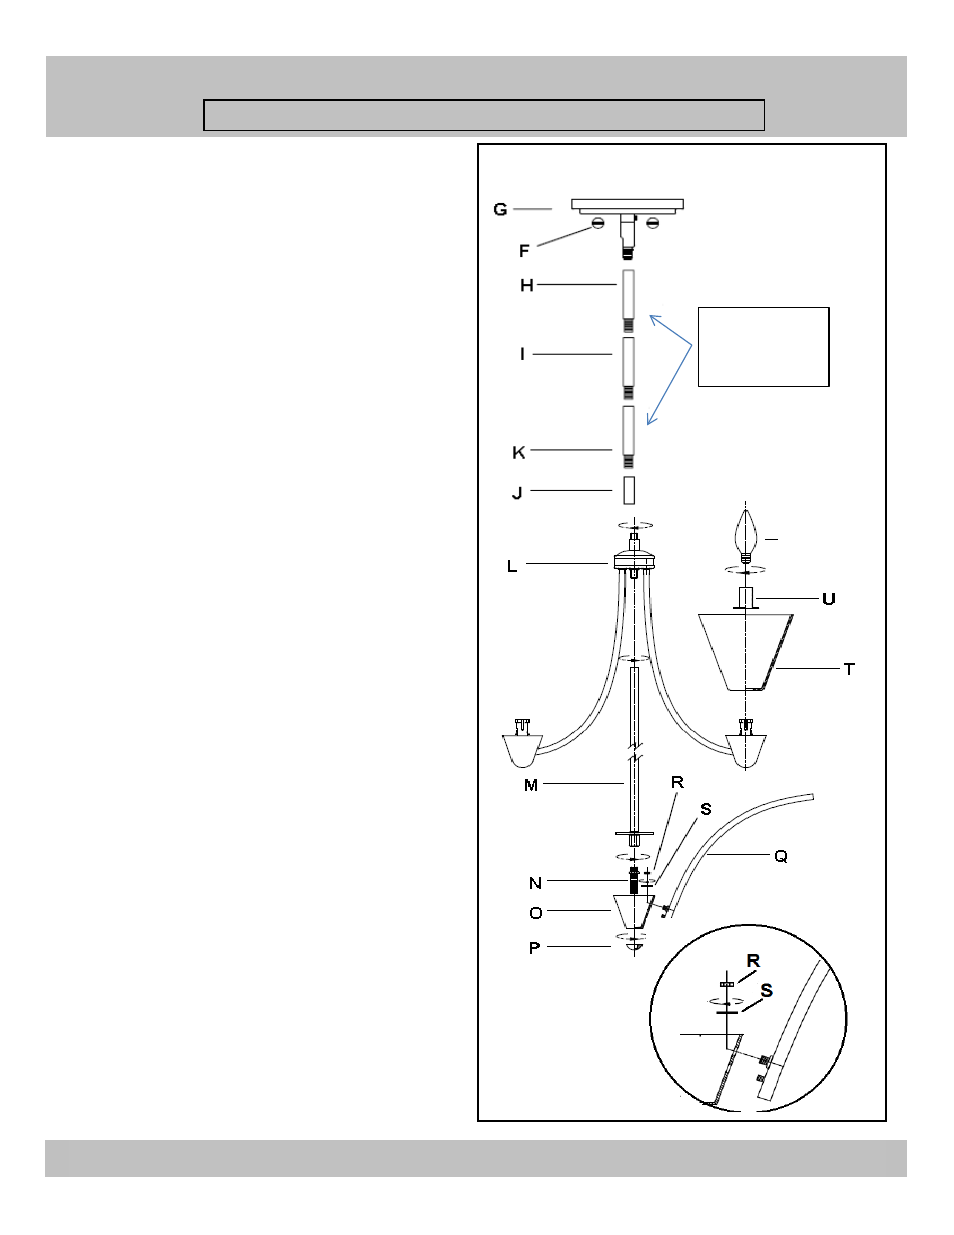
Fig. 2
ASSEMBLING THE FIXTURE (Fig. 2)
4. Locate the nipple and pin on the bottom end of
the arm (Q) through the mounting holes on the
side of the Bottom cap (O).
Secure with hex nut (R) and lock washer (S).
Tighten until snug with pliers. Repeat with
remaining arms.
5. Place the combination of the Bottom cap (O)
with arms (Q) over the nipple (N), aligning the
arm loops around the top arms. secure in place
with the finial (P).
6. By measuring determine correct number of
rods needed for proper hanging height.
* This fixture includes 4 rods (6", 12", 12", 12")
7. To shorten the fixture; slide the excess rods off
the wires. To lengthen add additional rods.
8. Pull the fixture’s wires through the rods
(H,I,J,K) until taut and thread the rods together.
Then thread to the fixture coupler at top of fixture
body (L) and the swivel joint on canopy (G).
* You may now install the fixture.
Note: Complete these remaining steps after the
fixture is hung.
9. Slide the glass shade (T) and candle sleeves
(U) over the socket of fixture body (L).
10. Install the light bulbs in accordance with the
fixture's specification.
(DO NOT EXCEED THE MAXIMUM WATTAGE)
Bulb
(Not
provided)
These three
rods may be
removed.