Attach launch lug, Attach large and small tanks, Leg assembly – Estes 2110 - Outlander User Manual
Page 4: Prepare gear housing covers, Continued)
4
9
18. ATTACH LAUNCH LUG
A. Apply glue bead to Launch Lug.
B. Attach Launch Lug to body
tubes centering on "LL" line.
Let dry.
19. ATTACH LARGE AND SMALL TANKS
A. Apply glue bead to Lower Body Tube
on line marked "T" for Tank. Attach
Large Tank. Repeat for other three
Large Tanks. Let dry.
FLUSH WITH
LOWER BODY
TUBE
TOP OF TANK AT
3 3/8" (8.6 cm)
MARK
B. Apply glue bead to Upper Body Tube
on line marked "T" for Tank. Attach
Small Tank. Repeat for other three
Small Tanks. Let dry.
C. Apply glue bead to center of Small
Tank. Attach Small Tank-center over
Gear Housing. Repeat for other three
Small Tanks. Let dry.
COMPLETED
ASSEMBLY
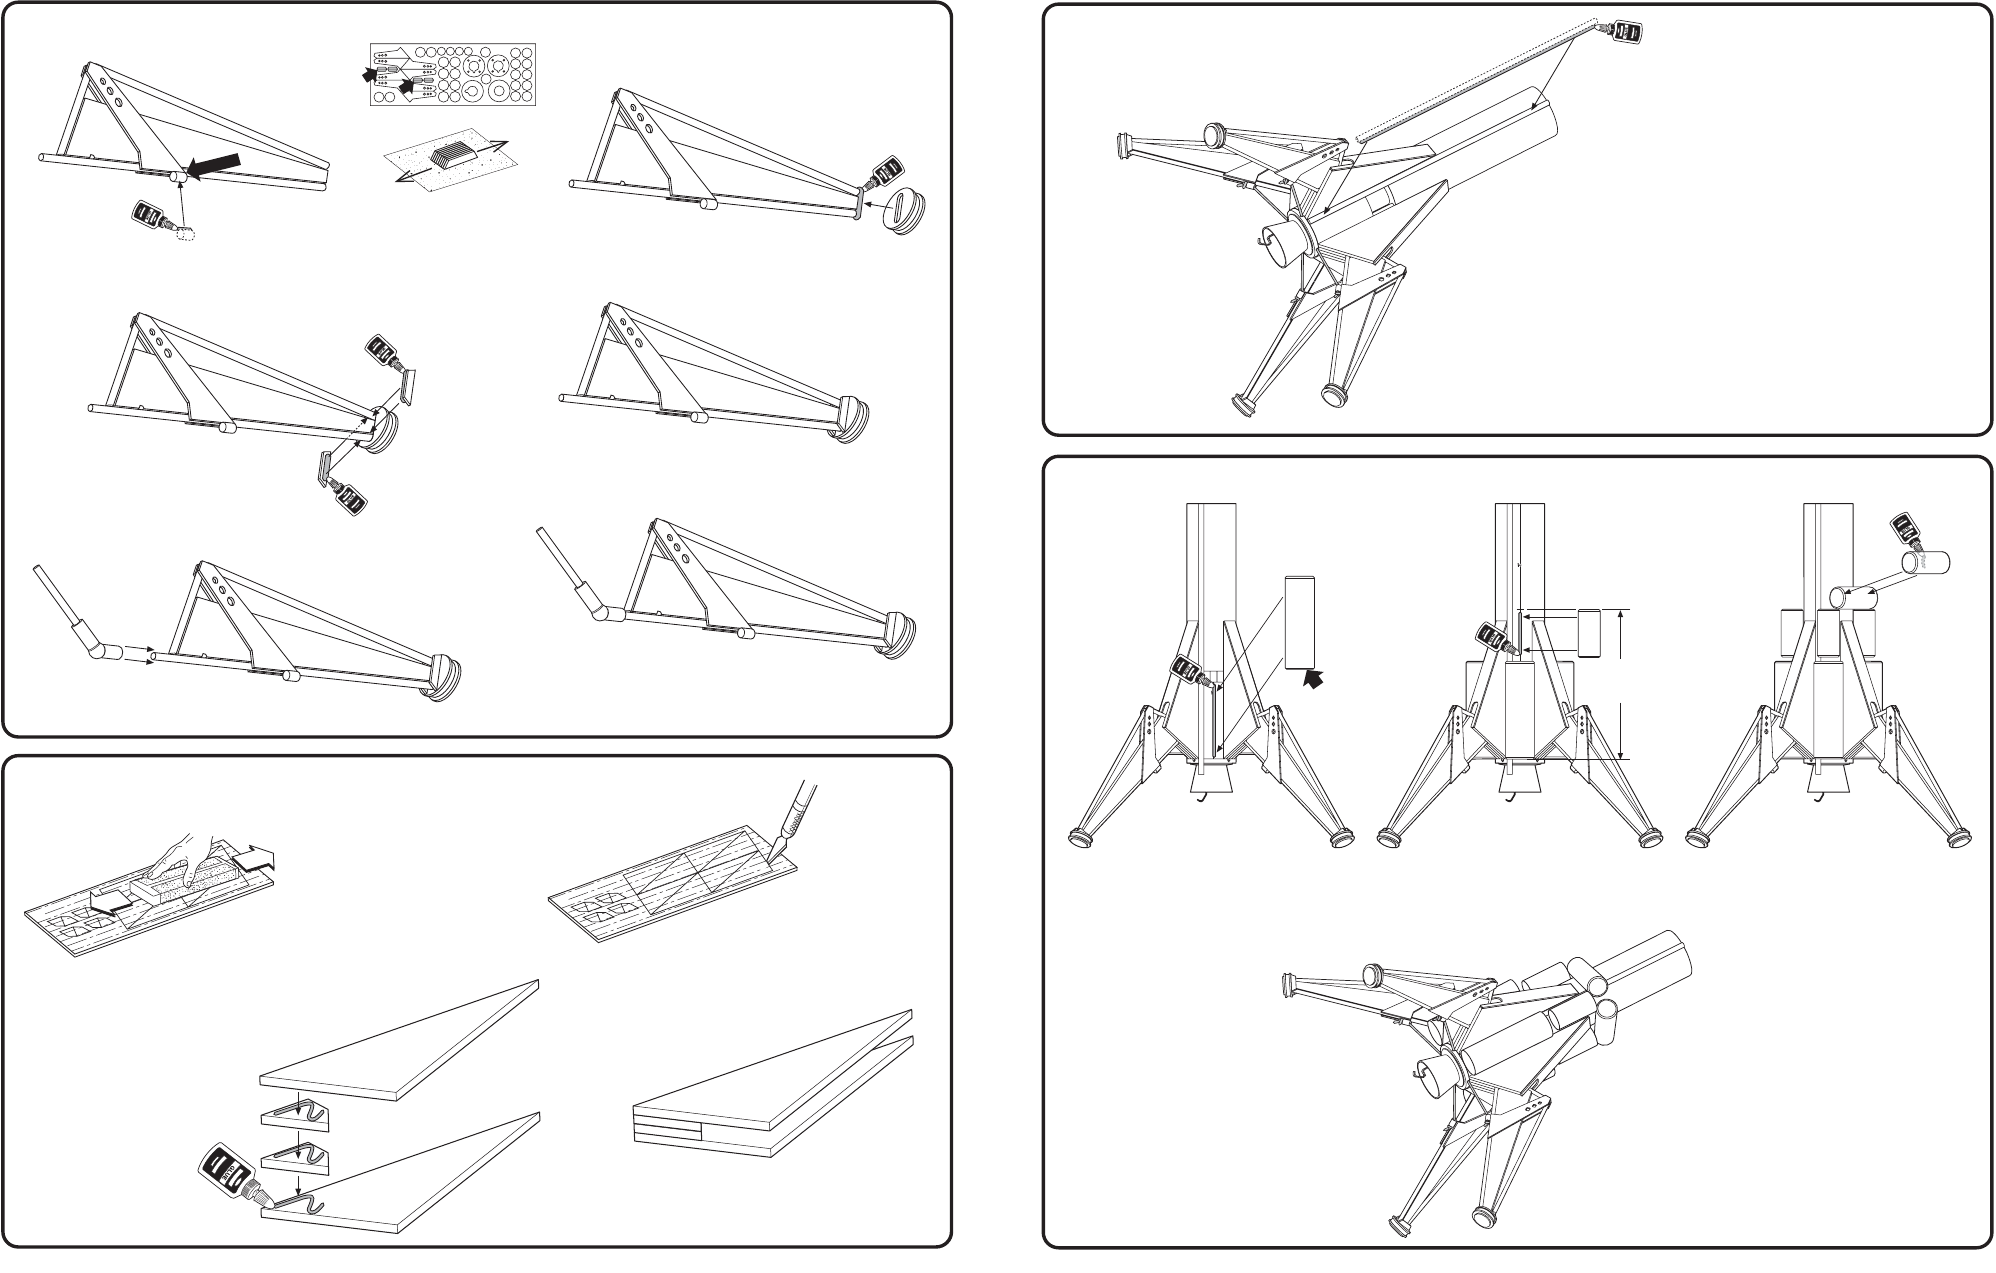
4. LEG ASSEMBLY
(continued)
COMPLETED ASSEMBLY
Set aside to let dry.
NOTE: You may want to primer, sand, and paint the
Leg Assembly at this time. See PAINTING
GUIDE (page 2).
5. PREPARE GEAR HOUSING COVERS
(Four needed for assembly)
I. Glue 1/4" (6.4 mm) Launch Lug to inside leg
dowel using Carpenter's Glue. Repeat for
all four legs. Let dry.
FLUSH
J. Remove and sand smooth foot
supports from die-cut card.
K. Glue foot to leg using Carpenter's Glue.
Repeat for other three legs. Let dry.
L. Glue foot supports to leg using
Carpenter's Glue. Repeat for
other three legs. Let dry.
COMPLETED LEG ASSEMBLY
M. Insert hinge tube over dowel as
shown until dowel touches hinge ball.
Repeat for other three legs.
A. Sand smooth the die-cut balsa sheet.
B. Remove the gear housing pieces
from the die cut-balsa using a
modeling knife.
C. Glue Support
Spacers and Gear
Housing Covers
together with
Carpenter's Glue.
Repeat for other
three. Let dry.
COMPLETED HINGE/LEG ASSEMBLY