Hq-r remote - installation, Hq-b precision pre-amplifier / dac blank module – Drawmer HQ-r Remote User Manual
Page 12
12
DRAWMER HQ O
PERATOR’S
M
ANUAL
HQ-r REMOTE - INSTALLATION
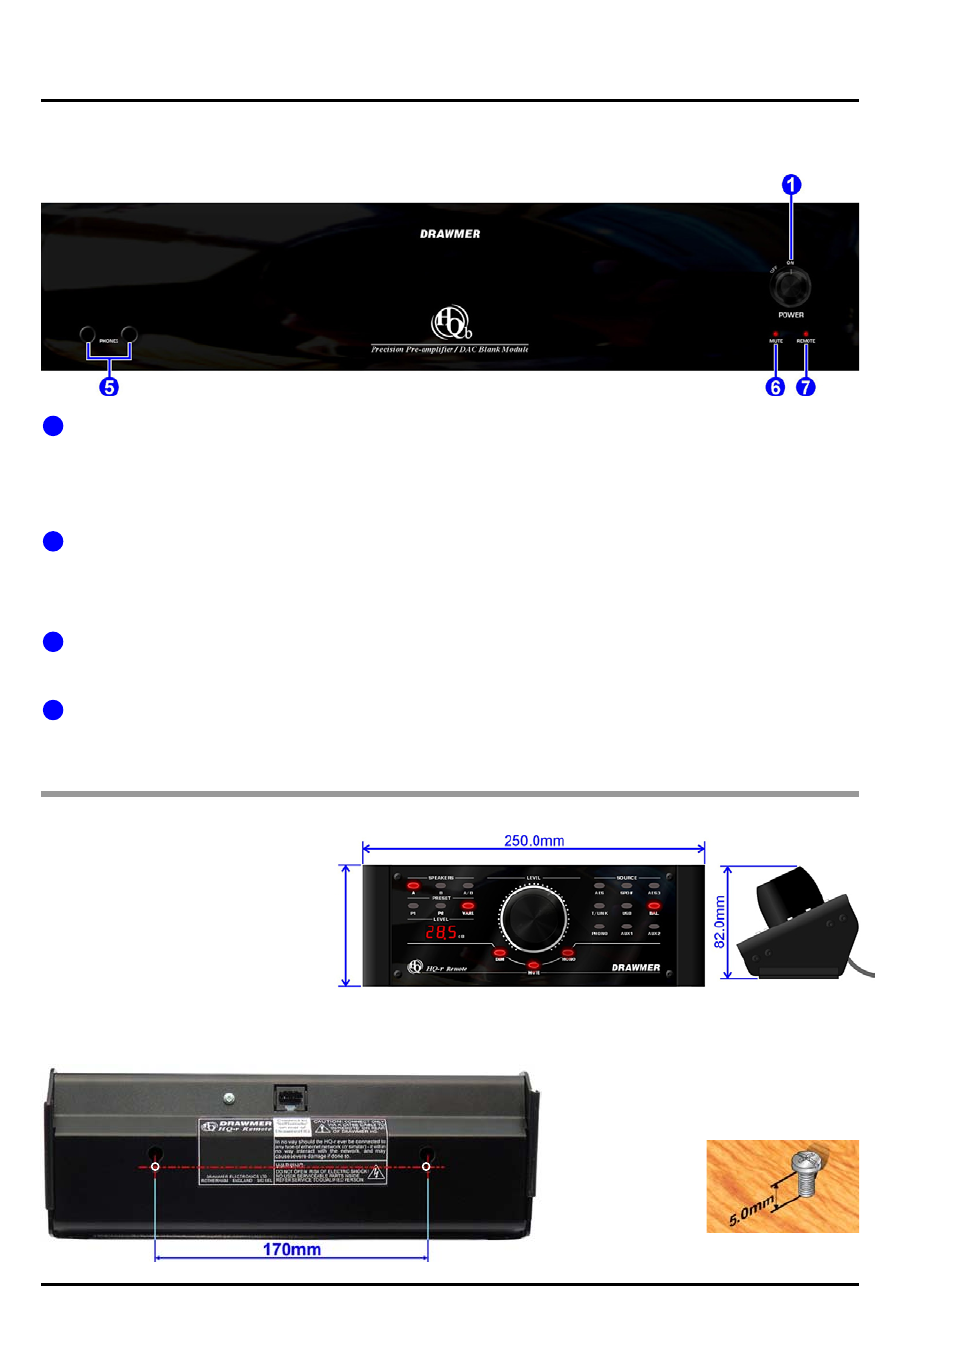
88.0mm (2U)
The HQ-r Remote is a sturdy and compact
control surface (having rubber bumpers
down either edge and measuring 250w x
88d x 82h) to unobtrusively fit on any
desktop.
To connect the HQ-r fit a cat5e cable
between the connector on the bottom side
of the remote, to the ‘IN/REMOTE’
connector on the rear of the HQ or HQ-b.
As well as the control the cable also provides the remote with power, so no batteries or mains connection is required.
With the remote connected and functioning the ‘remote’ led will be lit on the front panel of the HQ or HQ-b to identify that
they are being operated elsewhere.
The remote can be fixed to a desk to provide
further stability via the the two holes on the
bottom of the unit. Screw in to a desk two
screws at a distance of 170mm apart and to
a depth of 5mm to the shoulder, then slot the
remote over the holes.
Tighten as necessary.
In addition, on each
side of the unit are four
M3 screws - the
central ones of these
can be removed from
either side of the unit to provide a fixing point
for additional brackets.
HQ-b Precision Pre-amplifier / DAC Blank Module
The HQ-b is identical in every way to the HQ, but has been designed to be controlled remotely, either from an HQ or the
HQ-r remote (see previous page) and so lacks the controls of the HQ front panel. It is installed in the same way, has
identical power and audio connection on the rear, and the same performance.
The Controls:
POWER:
A rotary switch that turns the HQ-b on or off. When on the soft start procedure will begin - this will take a few
seconds, during which time the HQ-b will not pass audio.
Note that it is a hard powered switch, not standby, and so when in the off position the HQ will draw no mains power,
you should therefore be aware that the HQ-b will take a little while after switch on before it reaches ideal temperature’s
and in turn optimum audio quality.
HEADPHONES:
Two headphone sockets are provided that supply both headphones simultaneously. The volume is controlled by the
main volume control level, in the same way as the analogue outputs. As factory standard the right headphone
socket will mute these main outputs when plugged in, whilst the left socket leaves the outputs as is (see audio
connections).
MUTE:
The mute led will be lit whenever the relay attenuation volume control is prevented from passing audio. See “SAFETY
FEATURES” on the following page
REMOTE:
Whenever a RJ45 cable is plugged into the ‘In/Remote’ socket on the rear of the unit the ‘Remote’ LED will light to
show that the unit is being controlled elsewhere.
All other controls are performed remotely.
1
5
6
7