D.A.S. Audio Variant Series Systems Guide User Manual
Page 5
3
Assembling a system with flown subwoofers
3
3
0º
5º
-5º
0º
VA
RIANT
25
VA
R
IA
N
T
18
AX-V25
0º
5º
-5º
0º
VARIANT
25
VARIANT
18
AX-V25
1
2
1
4
5
6
4
9
7
8
6
EN
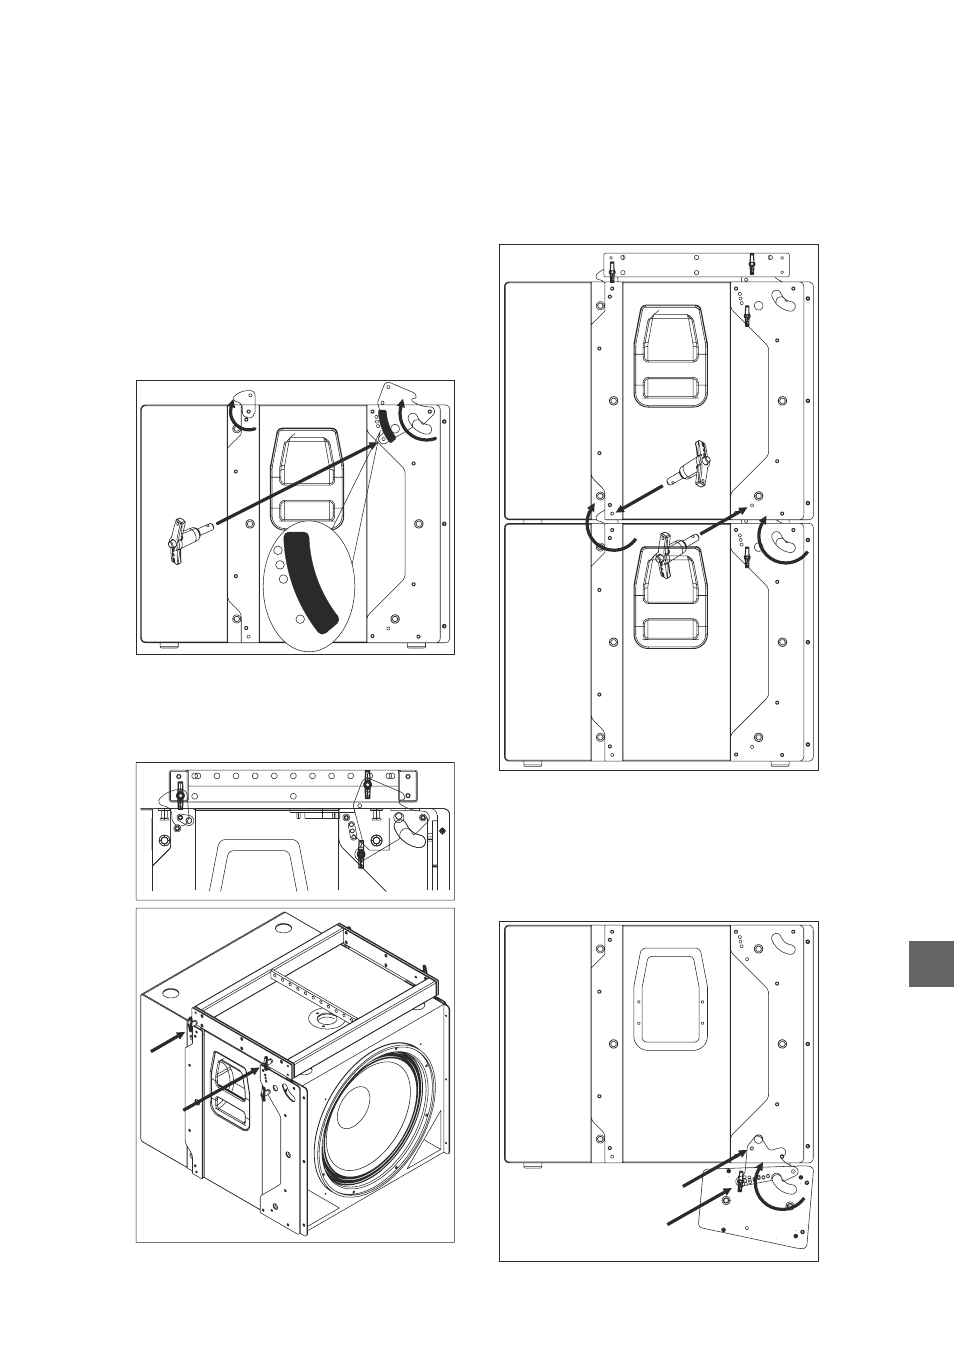
To secure the enclosure to the grid (3) two
more safety pins are needed on each side. Check
that the position of the connecting links are as
shown in the image below.
If
units are to be hung from the
subwoofers, first the connecting links
have to be rotated (7), then the safety pin must be
inserted into the hole that provides the desired
angle (8), and finally the connecting links have to
be introduced into the rigging hardware of the box
above and be secured by means of a safety pin on
each side (9).
variant 25A
variant 18A
The next step will be to hang one more
unit below the first one. To do so first both
connecting links will be rotated (4), then a safety
pin will be inserted into the hole labeled
(5) on the front side connecting link, and finally
both connecting links will be introduced into the
rigging hardware of the box above and secured by
means of two more safety pins (6).
variant
18A
variant 18A
The
units feature integral rigging
hardware allowing them to be flown independently
or above
enclosures.
The first step will be to mechanically connect
the first
to the
grid. 6 safety pins
are included in the rear side of the box in order to
do so. First rotate the rear side connecting links by
180º, and then the front side connecting links until
the
labeled position has been
reached. After that, insert the pin through the hole
labelled
(2).
variant 18A
variant25A
variant18A
AX-V25
variant 18A AX-V25
variant18AAX-V25
variant S
uide
ystems G