Crosman MAR177 User Manual
Page 5
5
c. Overfill
Do not attempt to repair or disassemble a pressurized airgun to correct for overfill
or valve lock. Doing so may cause parts to fly from the airgun at dangerous speeds. Failure to fol-
low these instructions may result in serious injury or death.
• Over filling does not improve performance. It will actually lessen performance and may cause the
valve to lock. If you discover that the airgun has been over filled, depressurize the airgun. Refer to
Section 6a and 6b.
• If the airgun will not discharge air with each shot, the valve may be completely pressure locked and
will require use of the hex wrench included with your airgun to depressurize (Refer to Section 6b).
6. Depressurizing the Airgun
a. Dry Fire Method
1.
Keep the air rifle pointed in a SAFE DIRECTION.
2.
Remove all the air from your air rifle by repeatedly cocking and dry-firing with the airgun pointed in
a SAFE DIRECTION until the pressure gauge on your airgun shows no pressure and air cannot be
heard when the shot is fired.
3.
Put the air gun “ON SAFE”.
b. Hex Wrench Method(Included)
4.
Make certain the airgun is not in the cocked position by:
5.
To check for cocked position:
a. Point the airgun in a SAFE DIRECTION.
b. Remove the rotary magazine.
c. Close the airgun bolt by sliding forward and latching.
d. Pull the trigger.
6.
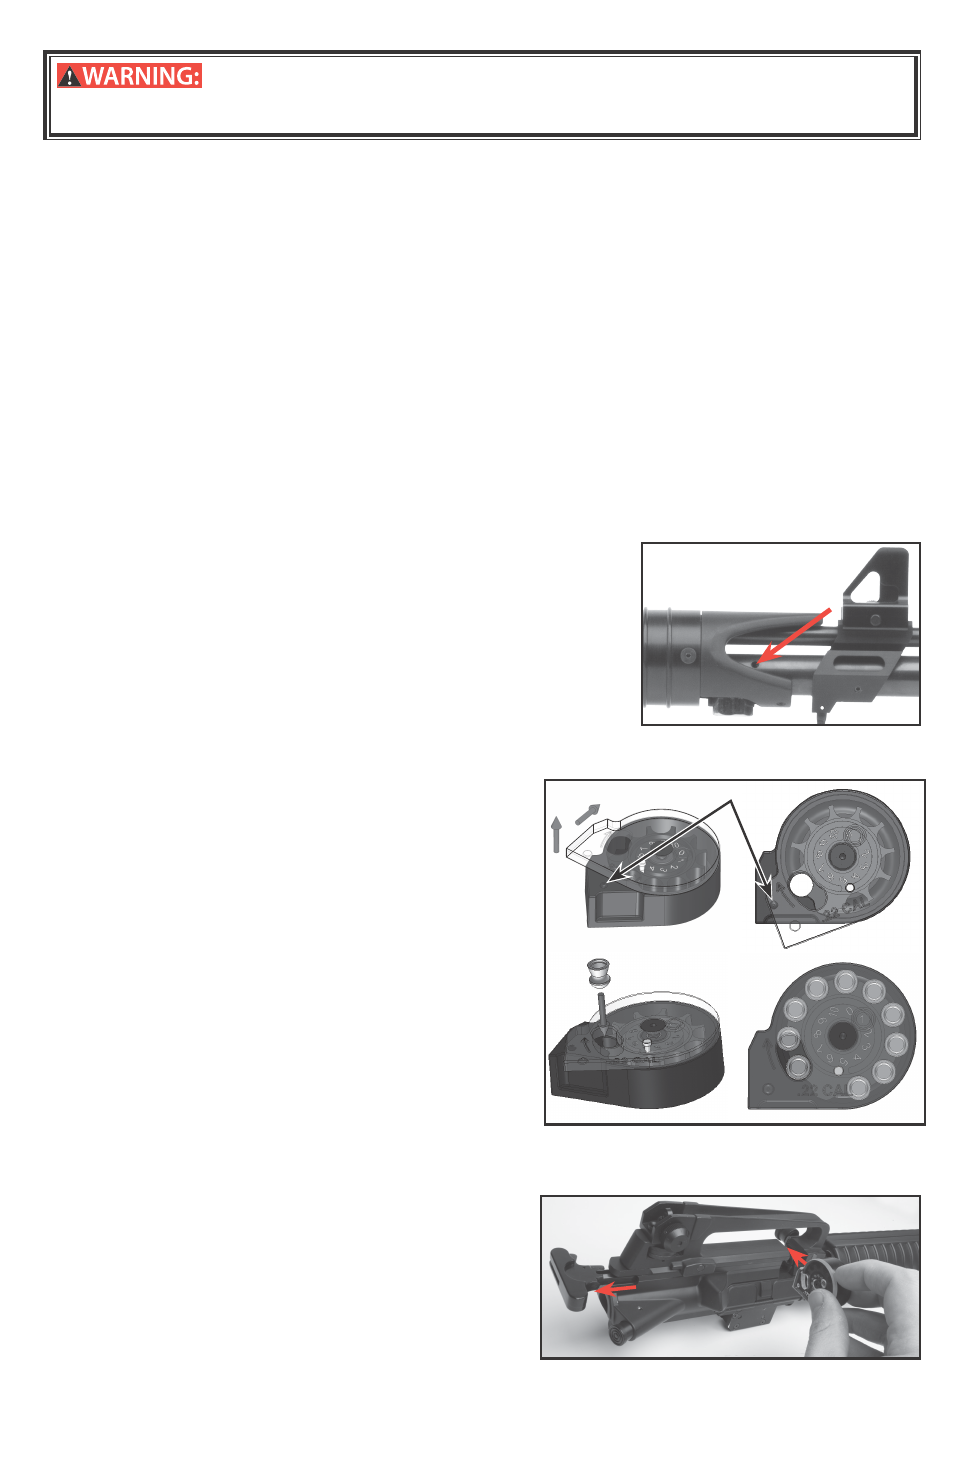
Insert the hex wrench (included with your MAR177 upper) into the
plug port as shown in (Fig. 7).
7.
Turn the wrench counter clockwise until venting is heard. This
will indicate that the pressure is being relieved from the gun.
It will only take approximately 1/8 turn to properly vent the
pressure.
8.
Turn the tool in a clockwise direction until the set screw is com-
pletely snug.
9.
Pressure gauge should read empty (red- left side)
10.
Check the gauge to make certain all pressure has been re-
lieved from the airgun.
11.
With the airgun pointed in a safe direction cock the airgun and
dry-fire (no pellet) to make certain all pressure has been relieved from the airgun.
7. Loading the Airgun
CAUTION: Use .177 caliber pellets only in your Model
MAR177 Conversion Kit. Never reuse ammunition. Use of
any other ammunition can cause injury to you or damage
your airgun.
a. Loading the Rotary magazine
1.
Lift the clear cover over the catch point and rotate in
the direction of the arrows (clockwise) per (Fig. 8A).
Turn until the cover appears as show in (Fig. 8B).
2.
Place a finger under the rotary magazine cover-
ing the hole, place the first pellet in the rotary
magazine, nose first (Fig. 8C). Make certain the
pellet does not protrude out the back of the rotary
magazine. In the event the pellet does protrude
simply push the pellet inward.
3.
Rotate the cover counter clockwise and place the
remaining pellets into the rotary magazine. Upon
completion of filling the remaining positions rotate
the cover until it comes to rest at the catch point
as shown in (Fig. 8D).
b. Inserting the Rotary magazine
NOTE: Following these directions will result in your gun
being loaded and ready to fire.
1.
Put the air gun “ON SAFE” (see Firearm lower
manual) and point in a SAFE DIRECTION.
2.
Pull the bolt back to the cocked position.
3.
With the clear cover of the rotary magazine facing
the butt of the airgun insert the rotary magazine
from the right side and push it inward until it snaps
into place (Fig. 9).
4.
The airgun is now ready to fire.
5.
To chamber a pellet, push the bolt forward fully and then down to latch.
Fig 7
8C
8D
8A
8B
catch point
Fig 9