Crosman MAR177 User Manual
Page 4
4
5. Pressurizing the Airgun
This owner’s manual describes operating the gun with air or N
2
(Nitrogen) only.
This airgun is designed for use at pressures between 1000 PSI and 2900 PSI (200Bar)
Explosion Danger. Use only compressed air or Nitrogen in this airgun. Use of other
gases, including Oxygen, can cause a fire or explosion that may result in serious injury or death.
a. Pressurizing (filling) the airgun with a hand pump
Do not disconnect the fill hose before first bleeding the air. Failure to follow these
instructions may result in serious injury or death.
1.
Be sure to wear eye protection.
2.
Make sure the airgun is unloaded and not cocked. (See section 6 for instructions on unloading and
uncocking).
3.
Read all instructions with your hand pump so you are familiar with its operation. Use only a pump
designed for filling a pre-charged airgun and outfitted with a Foster #12FS quick disconnect fitting.
Do not use a standard air compressor or bicycle pump.
4.
Point the airgun in a SAFE DIRECTION.
5.
Remove the pop-off protective cap that covers the fill
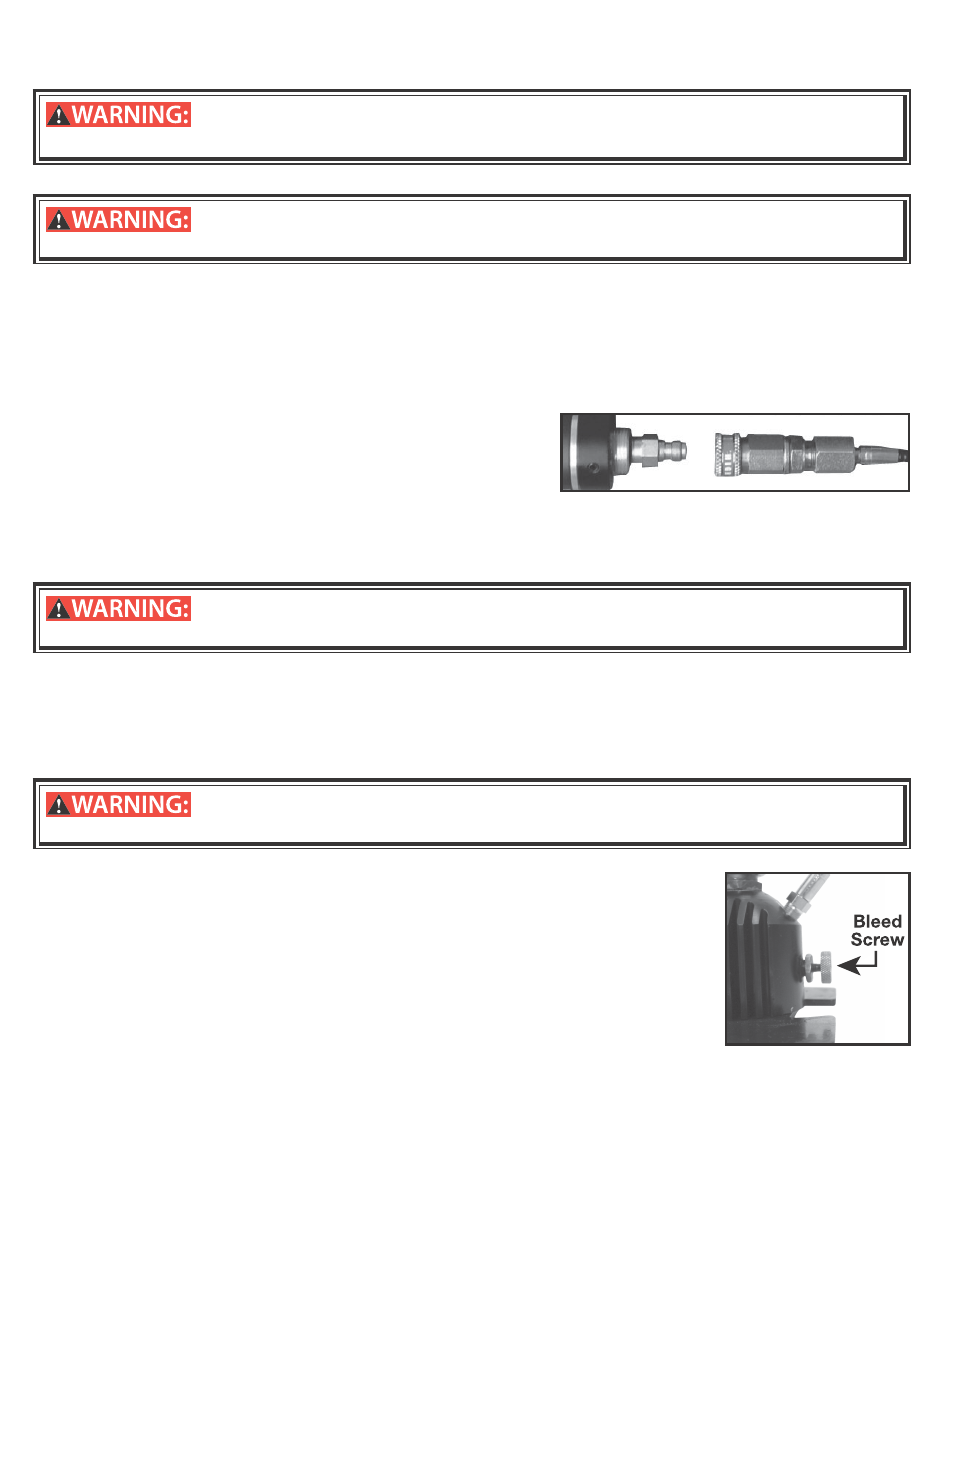
nipple on the airgun
6.
Connect the quick-disconnect fitting on the hand pump
hose to the fill nipple (Fig. 5).
7.
Make certain the bleed valve on the hand pump is fully
closed (tighten in a clockwise direction) (Fig.6).
8.
Start pumping and continue until the gauge needle on your pump and on the airgun are between
1000 PSI (138 Bar) and 2900 PSI (200Bar) depending on your desired fill pressure.
9.
DO NOT fill the airgun to more than 2900 PSI (200Bar). See “Overfill” information (Section 5C).
Do not disconnect the fill hose from the airgun without bleeding the air first. Fail-
ure to follow the instructions may result in serious injury or death.
Open the bleed screw on the pump base rapidly in a counter-clockwise direction to COMPLETELY bleed
the hose. You must bleed the fill hose COMPLETELY to avoid hose whip from pressure in the fill hose.
• Disconnect the pump from the fill nipple on the gun.
• Replace the cap over the fill nipple. Always keep the fill nipple capped to eliminate the possibility of
dirt entering the check valve.
b. Pressurizing (filling) the airgun with a high pressure tank.
Do not disconnect the fill hose before first bleeding the air. Failure to follow these
instructions may result in serious injury or death.
The MAR177 may be filled from a high pressure tank (bottle) like the Benjamin
HPB3K. Use the Crosman FAH002 Universal Fill Adapter with this option. Properly
inspected Scuba tanks can also be utilized for the task. For scuba tanks use the
Crosman FAH003 scuba yoke adapter.
1.
Be sure to wear eye protection.
2.
Make sure the airgun is unloaded (rotary magazine removed)
3.
Read all instructions with your tank so you are familiar with its operation.
4.
Point the airgun in a SAFE DIRECTION.
5.
Remove the cap that covers the fill nipple on the airgun.
6.
Connect the quick-disconnect fitting on the adaptor’s hose to the fill nipple
(Fig. 5).
7.
Slowly open the valve on your tank and start filling the gun SLOWLY. Filling too quickly will cause heat
buildup that can affect accuracy of the fill pressure.
8. DO NOT FILL AT A RATE GREATER THAN 1000 PSI (69BAR) PER MINUTE.
9.
Watch the gauges on the airgun and your tank (if equipped) until the desired pressure is reached (1000
– 2900 psi (200 Bar)).
10.
DO NOT fill the airgun to more than 2900 psi (200 bar). See “overfill” information in (Section 3C).
11.
Turn the value on your tank off when the desired fill pressure is reached.
12.
BLEED the hose COMPLETELY to avoid hose whip from pressure in the fill hose.
13.
Disconnect the tank’s fill hose from the fill nipple on the airgun.
14.
Replace the cap over the fill nipple. Always keep the fill nipple capped to eliminate the possibility of
dirt entering the check valve.
TIP: If your airgun is completely empty (zero pressure) prior to filling, the tension of the hammer
pressing against the valve may keep the valve open which will cause air to leak down the barrel.
In the event this occurs, make certain the airgun is not loaded and there is not a pellet in the
chamber and put the gun “ON SAFE.” Afterwards, try cocking the bolt and leaving it in the rear
(fully open) position to eliminate the force on the valve allowing it to close. Always make certain the
airgun is not loaded and there is not a pellet in the chamber.
3
Fig 5
Fig 6