Crosman MAR177 User Manual
Page 3
3
Learning the names and parts of your new airgun will help you
understand your owner’s manual (Fig. 1).
A. Crosman MAR177
a. Bolt (Cocking Lever)
b. Rotary magazine
c. Protective cap for fill nipple
d. Fill nipple
e. Pressure gauge
f. Barrel
g. Muzzle
h. Air stripper
i. Sling swivel
j. False Magazine (for weight and hand placement)
k. Trigger block
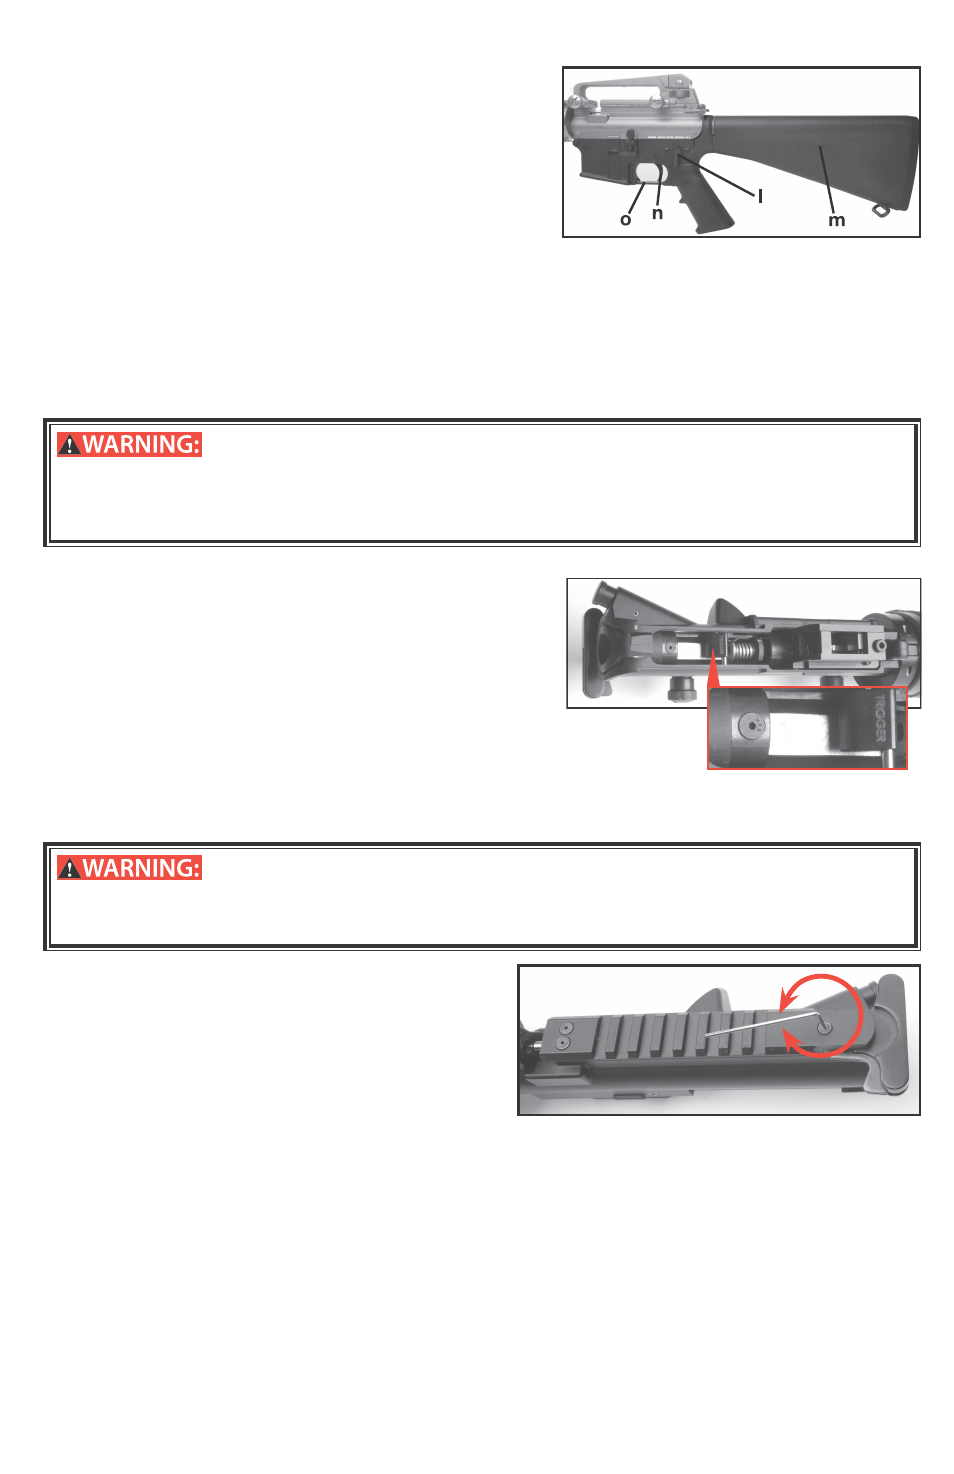
B. AR Compatible Firearm Lower (Not supplied / required. Style may vary)
l. Safety
m. Stock
n. Trigger
o. Trigger guard
The MAR177 CONVERSION KIT IS ONLY INTENDED FOR USE WITH A FIRE-
ARM COMPATIBLE LOWER. The MAR177 conversion kit does not have its own safety mecha-
nisms. Consult your firearms owner’s manual for proper use of your firearm’s safety and trigger
features. Do not store you MAR177 charged with air when not in use. Failure to follow these
instructions may result in serious injury or death.
2. Operating the safety
a. Refer to firearm owner’s manual
Even when the safety is on, you should continue to handle
the airgun safely. Don’t point the gun at anything you don’t
intend to shoot.
Like all mechanical devices, safeties can fail. Even when
the safety is “ON SAFE”, you should continue to handle the
airgun safely. NEVER point the airgun at any person. NEVER
point the airgun at anything you do not intend to shoot.
3. Removal of Firearm Upper
b. Refer to firearm owner’s manual
4. Installation of MAR Conversion Kit (Upper)
When handling the MAR177 Conversion Kit follow warnings engraved on MAR177
Conversion Kit. Do not depress the TRIGGER block located on underside of upper. (Fig. 3) TRIGGER
is engraved on the block. Keep hands clear of TRIGGER block at all times. Failure to follow these
instructions may result in serious injury or death.
1.
Ensure the lower is in the “on safe position”
Typically the hammer must be in the cocked
position to engage safety
2.
Ensure the rotary magazine has been removed.
3.
Install pivot pin and takedown pin.
NOTE: If takedown pin is difficult to insert, remove carry
handle and loosen flathead screw (fig 4) with 1/16 hex
wrench (not included). Insert take down pin, tighten
screw and reattach carry handle.
Fig 2
Fig 3
Fig 4