Clippasafe 118/1 Extendable, Dual Fix Push to Lock Gate User Manual
Page 12
Please make sure that the barrier is properly closed after each use.
10. Ensure that the gate and the pedal are level when installed and closed. Adjust the spindles
and hinge bars at each corner to ensure that the gate is level with the ground.
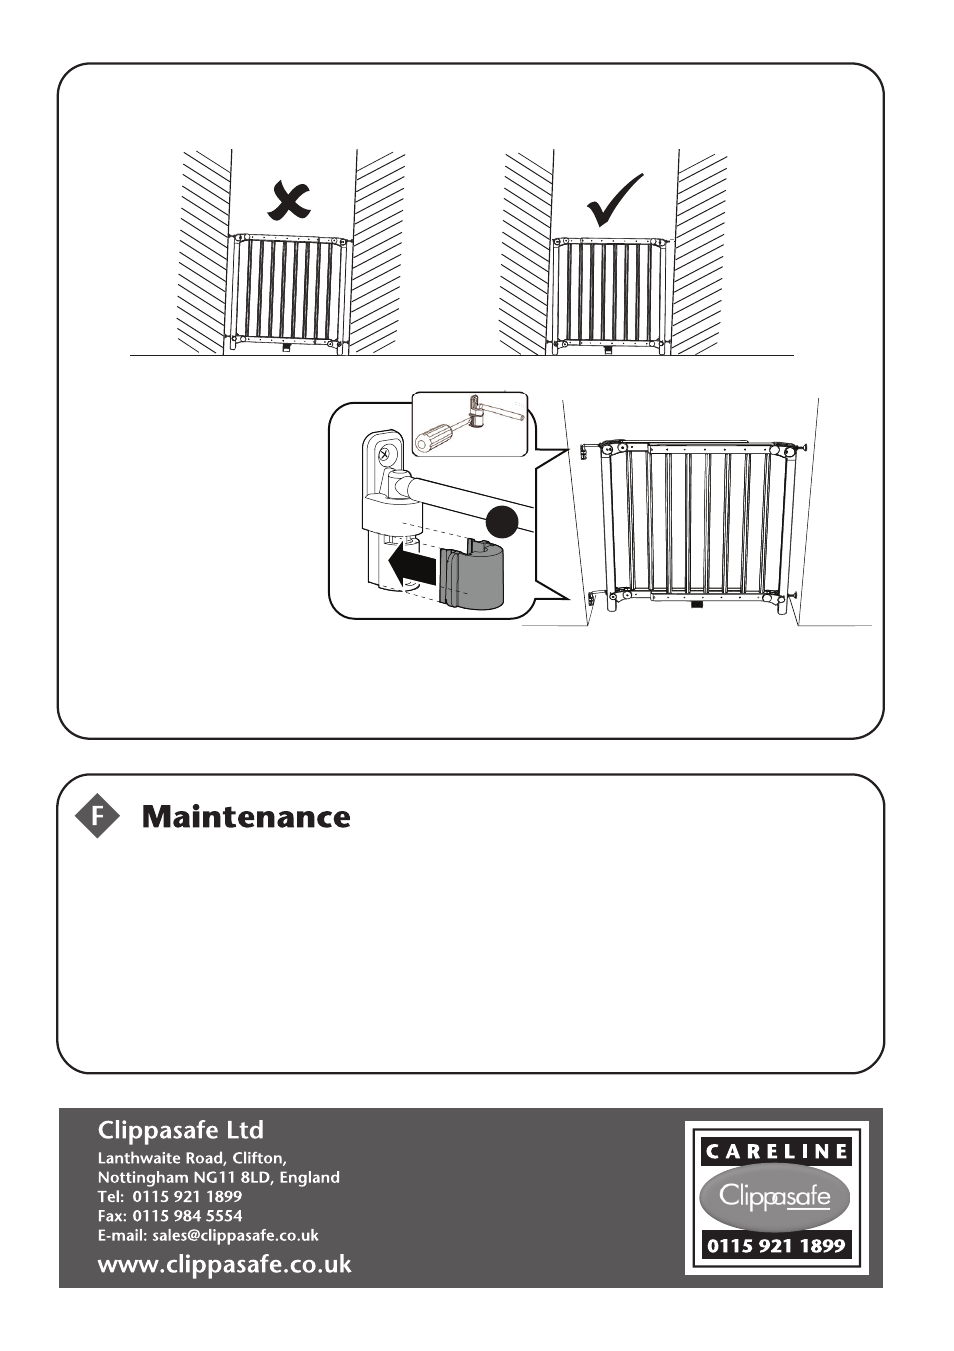
11. Finally close the gate and
clip the hinge covers ‘K’ onto
the hinges. These lock the
hinge bars into the hinges.
They can be removed later,
if required, using a
screwdriver.
K
Model No.118/1
©Clippasafe Ltd 2012 - 118/1/Sep2012
Check the gate periodically to ensure that the wall surface, wall cups, spindles, and
locking devices are all functioning correctly. Adjust as necessary, referring to these
instructions.
Only use original Clippasafe spare parts for this product. Spare parts may be obtained
via the Careline or the e-mail address below.
No part of this gate requires lubrication.
Clean the gate using warm water and a mild detergent.
Never use solvents, chemical scouring powders or sharp tools to clean this gate.