Auto clock setting, Auto clock, Setting – JVC TV 13140 User Manual
Page 9
Attention! The text in this document has been recognized automatically. To view the original document, you can use the "Original mode".
AUTO CLOCK SETTING
The Auto Clock feature ettables the automatic dock setting and updating, and also to set the Time Zone and Daylight
Saving Time by receiving XDS (Extended Data Servics) information carried on №e channel signal.
You must set the antenna connection before №e AC cord plug is Inserted Into the AC outlet.
AUTO CLOCK SETTING
WAIT 30 MINUTES!
when the power
switch is off, after the connections of the
antenna and the power plug. Because the Auto
Clock setting feature is activate.
After the dock is set automaticatly, you may have to set
the Time Zone and Daylight Saving Time.
Press the POWER button to turn on the TVA/CR alter
the Auto Clock operation compleated.
'■OW
eb
> When shipped from factory, the AUTO CLOCK
option is set to AUTO position.
• If you turn the TVAfCR on in Auto Clock setting, the
clock is not set.
> With cable box connection, it the Auto Clock Setting
is unsuccessful, please select the PBS channel
carrying the XDS information, then turn the TVAfCR
off. After 30 minutes, turn the TVA/CR on, and if the
dock is not set automatically, sat the clock manually.
(See page 16.)
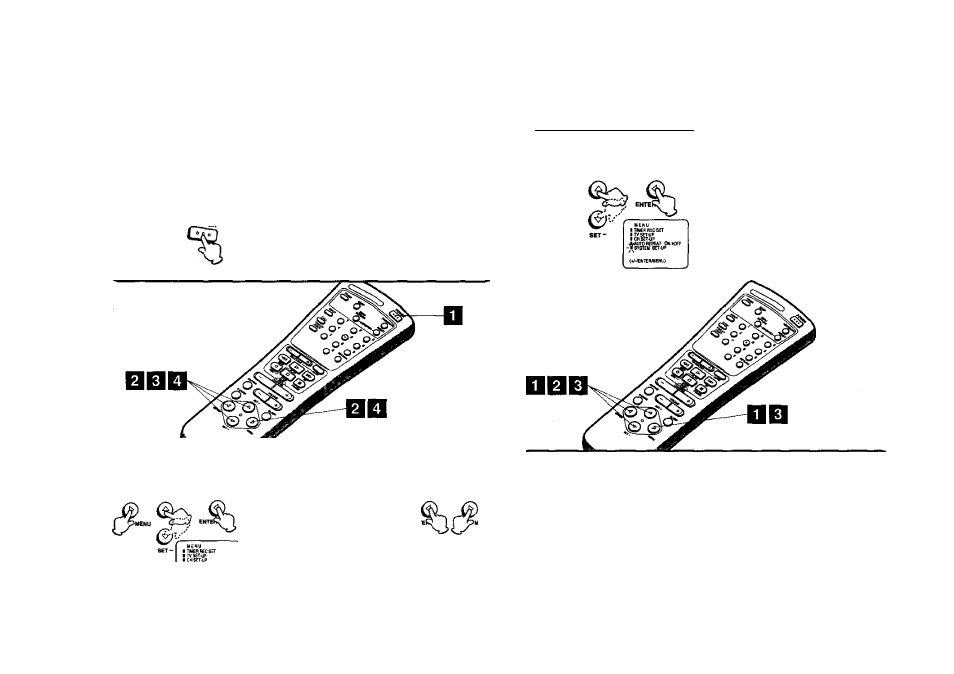
DAYLIGHT SAVING TIME SETTING
You can set the Daylight saving time automatically or manually.
Press the MENU button. Press the SET + or -
button to select the SYSTEM SET-UP option,
then press the ENTER button.
Press the SET + or - button to select the
DAYLIGHT SAVING TIME option, then press the
ENTER button.
3
"
SET-»-
SET +
SET
SV№ SET4JP
iCLdttSCT
■ ичЩиЭЕ1СОНМАМ(ХЕ
iAUTOOOCK KIN OFF
АвТММЯО 7»£
>1CMYUQKT SiiVHG TIME
TIME ZONE SETTING (STANDARD TIME)
Press the MENU button.
Press the SET or - button to
select the SYSTEM SET-UP
option, then press the ENTER button.
Press the SET + or - button
to select the STANDARD
TIME Option, then press the
ENTER button.
SYST£« SETJJP
■ CLOCK ЗЕТ
• LMrЮIJ JyMTlOCLOCK KM OFF '•ST a WARD TWE «ФАТиОНТ SAVHQ TIME (W-/tNTERiUENU} Using tine SET+ or-bution!' select yourTinrte Zone, then press the ENTER button. Press the MENU button until the MENU screen is cleared. SET« SCT- STAMOMC THE ATLANTIC EASTERN CEMmU. UOUNTAH APACFC ALASKA HAWNI А\Д0 <4HENTEB i MENU) Press the SET -»-or - button to select one of the SET + ON: OFF: for manual setting AUTO; for automatic setting (read XDS in the signal) DAVUOHT SAVMQ TtiE KM OFF AUTO { When you want to set the Daylight Saving Tinfte manually, NOTE: * After Auto Clock setting, in some case the clock may display the other time zone’s. You can correct the clock by selecting your Time Zone setting above. * When the clock is not set or you set the clock manually, Time Zone setting is not available. NOTE: * When shipped from factory, the DAYLIGHT SAVING TIME option is set to AUTO position. * When the clock is not set, Daylight Saving Time setting is not available. • When there is no Daylight Saving Time In your area, ^ways select OFF position in step 3. CD 14 15
options, then press the ENTER button. Press the
MENU button until the MENU screen is cleared,
(forward one hour)
tor manual setting
(back one hour)
on the first Sunday in April you set to 'ON", and on the last
Sunday in October you set to "OFP.