Installing the receipt paper – Toshiba MA-215-10 SERIES User Manual
Page 51
Attention! The text in this document has been recognized automatically. To view the original document, you can use the "Original mode".
PAPER ROLL REPLACEMENT AND OTHER MAINTENANCE OPERATIONS
r Journal Winding Reel
Fig. 1
Fig. 2
Fig. 3
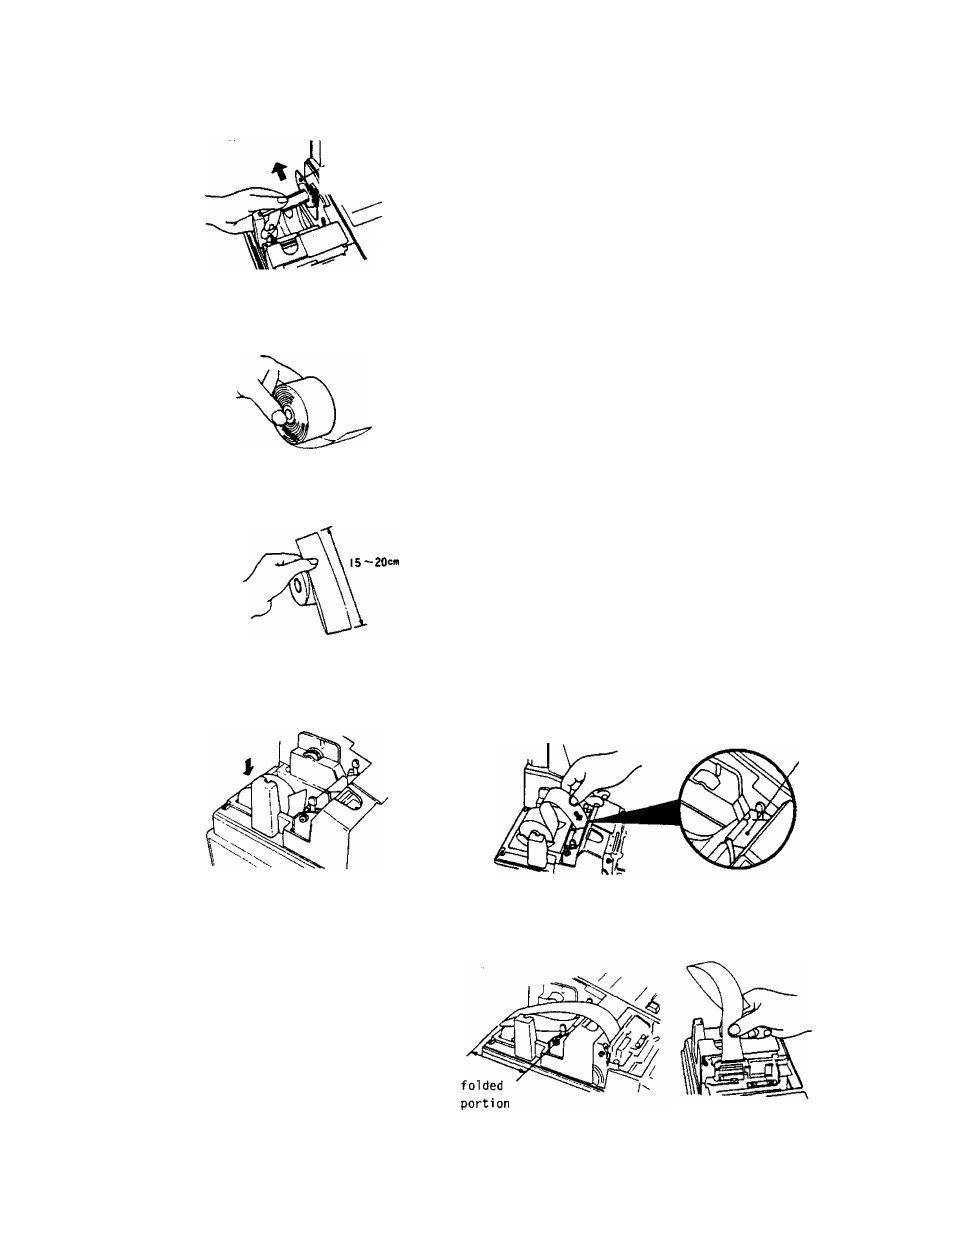
INSTALLING THE RECEIPT PAPER
1. Turn the Mode Lock to the *'REG"
position.
2. Remove the Paper Cover, and remove
the Journal Winding Reel. (Fig. 1)
3. Hold a new paper in the direction as
shown in Fig. 2 so that the paper end
will be fed from the bottom.
4. Fold the paper end firmly as shown in
Fig. 3 to ease the insertion.
5.
Place
the
paper
roll
in
the
outer-side holder of the two roll
holders. (Fig. 4)
6. Insert the paper end into the Receipt
Inlet,
feed
the
paper
in
while
pressing down the [RF] key. (Fig. 5)
7. When all the folded portion comes
out, tear off the unnecessary part
with the attached cutting edge. (Fig.
6
)
8. Go on to INSTALLING THE JOURNAL PAPER
steps if necessary, or go on to Step
9 below if not.
9. Attach the Paper Cover.
10. Depress the [NS] key to issue a
receipt to check if the paper has
properly been set.
Fig. 5
Fig. 4
Receipt
Inlet
Fig. 6
Cut the paper with tne edge.
-47-