Culligan Drinking Water System User Manual
Page 11
Note: Use hand pump to avoid damaging tank. Verify product water faucet is open before pro -
ceeding. Use caution when working with/inside enclosure. Wiring therein connects monitor com -
ponents. If wires, circuit board, or connections are damaged and/or wetted, monitor will not
function.
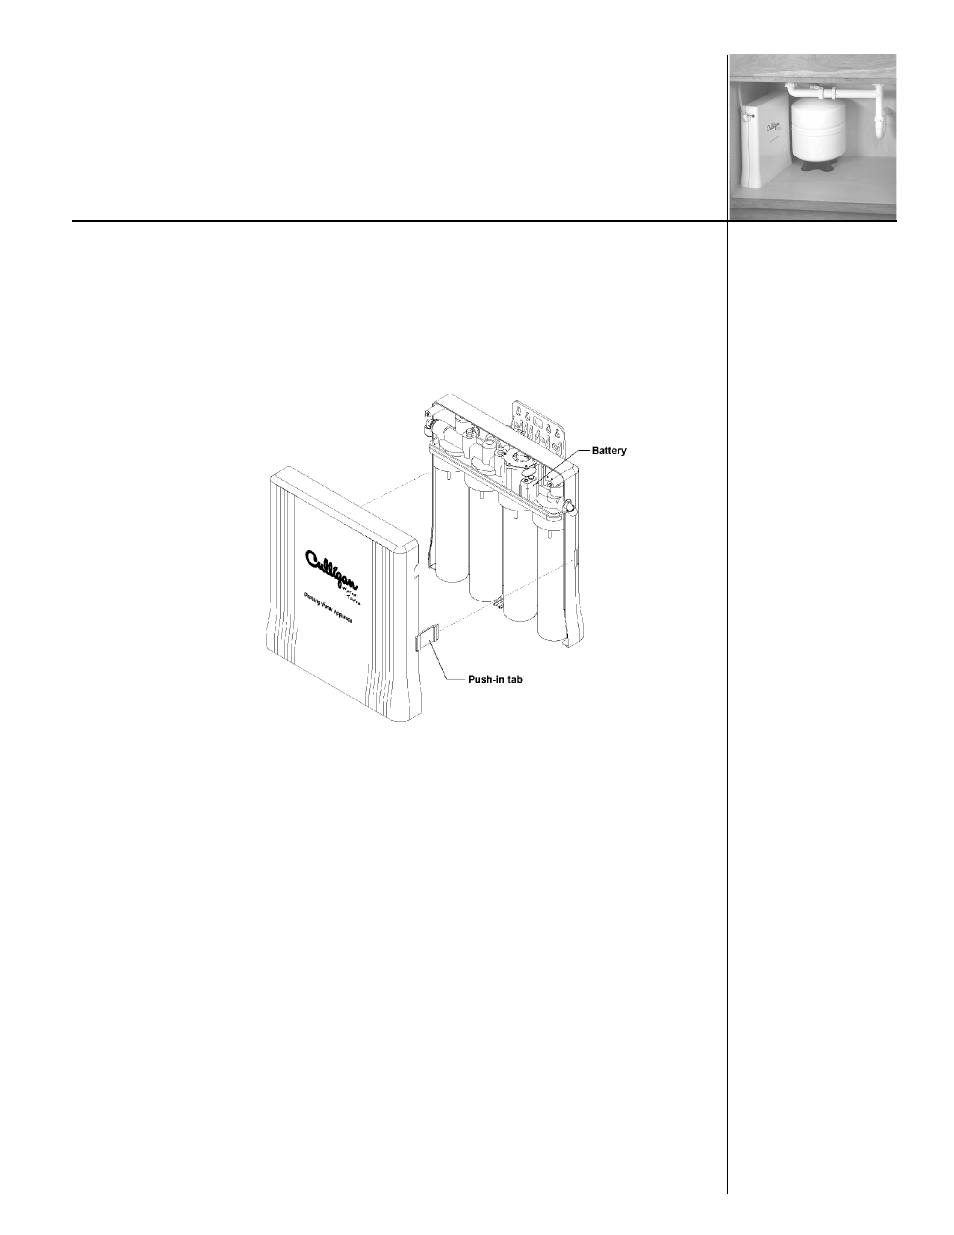
Item callouts refer to Figure 5 unless otherwise noted.
4. Remove enclosure front panel by pressing in push-in tabs and pull cover back. (Figure 4)
Figure 4
5. Remove each filter housing (Item 30) by turning it counter-clockwise. Remove each filter car-
tridge (Figure 5).
a.
Discard sediment (Item 7) and carbon (Item 8) cartridges
b.
Examine membrane (Item 9). If it is performing satisfactorily, proceed to Step 6.
If it is depleted or fouled, discard it and proceed to Step 8.
Note: Wear gloves whenever cleaning/sanitizing system or handling new filter/membrane car -
tridges.
6. Clean membrane outer wrap with washcloth and cleaning solution. Do not immerse membrane in
solution. Do not scrub wrap with abrasive cleaners. Rinse membrane well with clean potable
water.
7. Place membrane into clean plastic bag, close bag.
8. Remove filter housing O-rings and wash them with cleaning solution. Rinse them well with clean
potable water. Inspect them for damage such as nicks or scratches. Replace damaged O-rings.
9. Clean filter housings/manifold, inside and outside, with washcloth and cleaning solution. Do not
use abrasive materials.
10. Rinse housings/manifold with clean potable water.
11. Inspect filter housing O-ring groove and manifold O-ring surface for damage such as nicks or
scratches. Replace if damaged.
11