Carl Goldberg GBGA1091 User Manual
Page 6
6
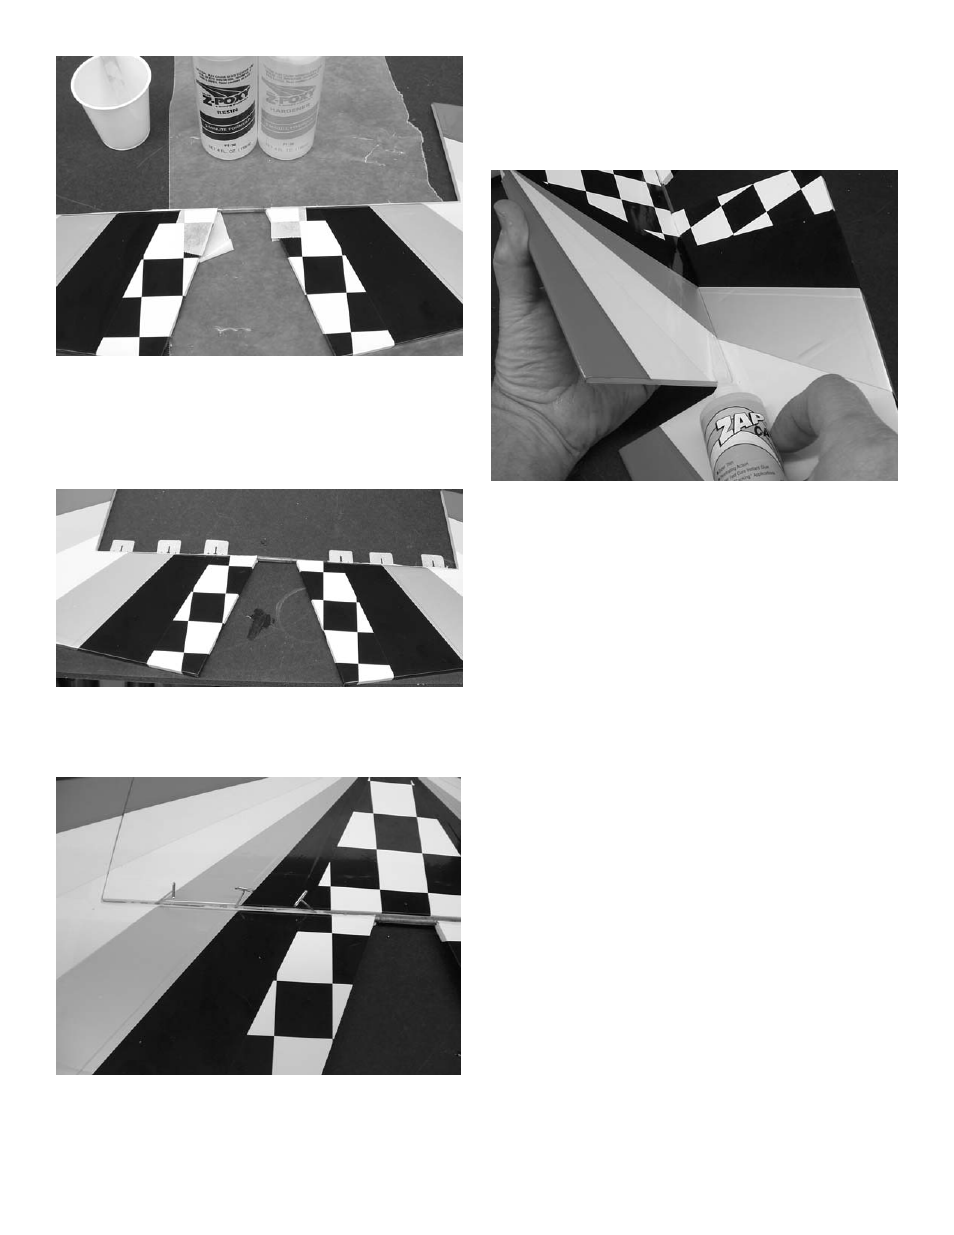
9. Mix some 5-minute epoxy and force into the
holes for the joiner wire in the elevators. Fit
the joiner wire into the holes and cover with
masking tape. Lay flat on some wax paper
and make sure both elevators are flat on the
table. Set aside till epoxy cures.
10. Locate 6 hinges and install in the elevators.
Use straight pins in the holes in the center to
make sure hinges stay centered in holes.
11. Install the elevator on the stab pushing the
hinges in until the pins are flush against the
trailing edge of the stab. When all are in place,
remove the pins and push the elevators flush
against the stab.
12. Deflect the elevator into the up position to the
full limit of its travel. From the bottom side, put
one drop of thin CA on each hinge. Deflect the
elevator to its full travel in the other direction
and apply another drop of thin CA on each
hinge. Repeat the operation for two drops of
CA on each hinge top and bottom.
13. Bolt the wing in place on the fuselage. Mix
some epoxy and install the stab on the fuse-
lage. Sight down the fuselage and make sure
the stab is parallel with the wing. Slight pres-
sure on either side is all that is needed to
make sure stab is aligned with wing. Set
aside till epoxy cures.