5 attaching the dome to the bracket – Costar CDC2500MI User Manual
Page 14
13
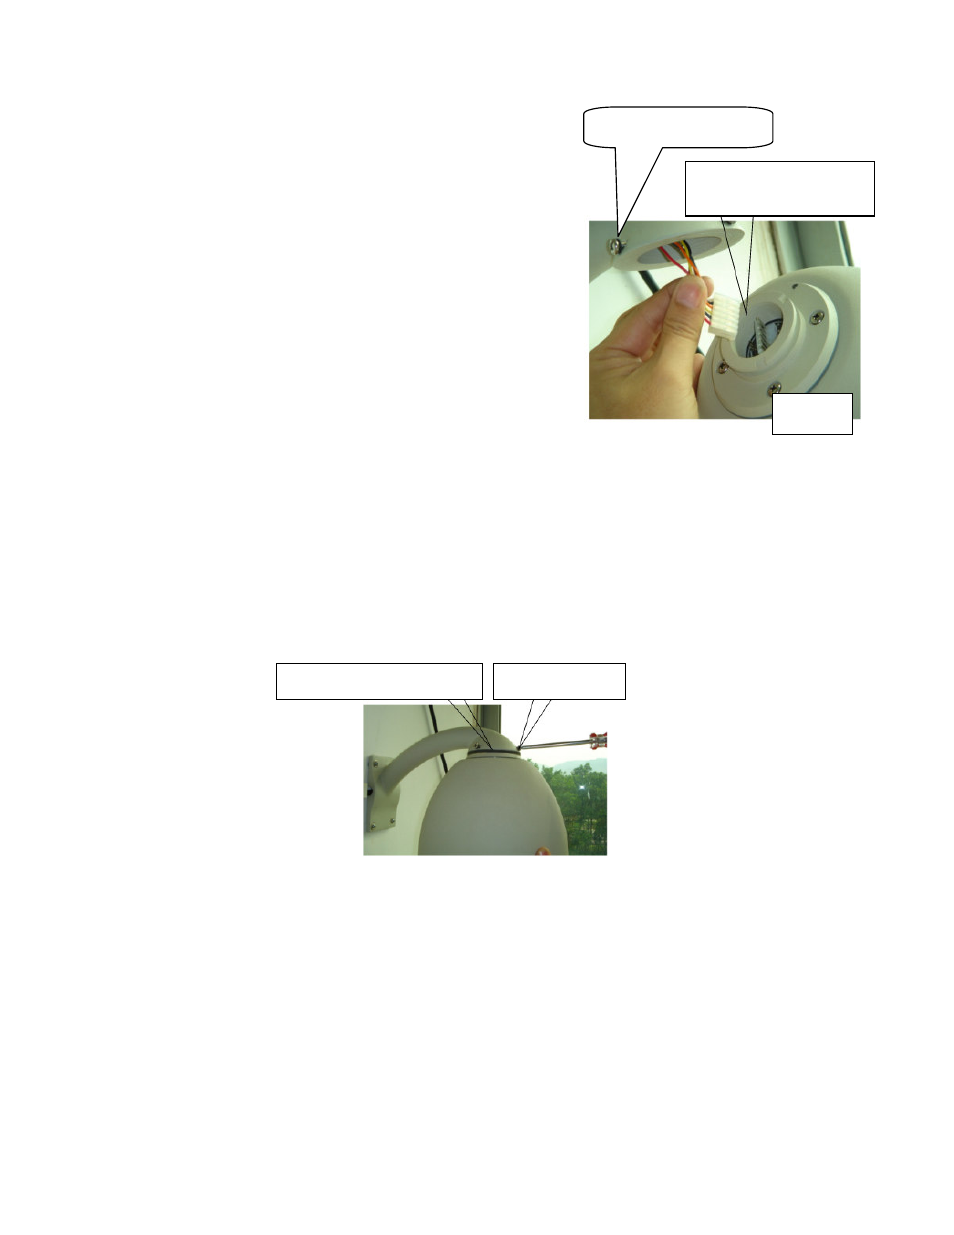
2.5 Attaching the dome to the bracket
Step 1: C
onnect the end of the wiring harness
protruding out of the bracket to the mating
connector on the dome unit. Observe proper
orientation of the connectors (tab facing towards the
back of the connector), as illustrated in Figure 15.
Step 2
: Position the dome upwards so that the top
ring of the dome is flush with the bracket and secure
it in place by tightening the screws as illustrated in
Figure 15.
Caution:
1.
The screws that hold the dome to the bracket are equipped with o-ring seals. Please verify that
they are in place and securely positioned as illustrated in Figure 15.
2.
In between the bracket and the dome there is a weatherproofing seal made from a spongy
material as illustrated in Figure 16. Make sure that it is firmly attached to the dome upper
surface as it will prevent any water from entering into the dome electronics. In contrast with
the outdoor model the seal for the indoor unit is made from silicon.
Fig. 16
Note: Different bracket options may be available. Illustrations are for reference purposes only and may vary from
actual package contents depending selected installation options at time of order.
Waterproof Rubber Seal
3xM5 screws
Attach harness to connector
Fig. 15
Waterproof O-ring