Blinds Chalet SlumberShade 3/8 Blackout Double Cell Shades User Manual
Page 3
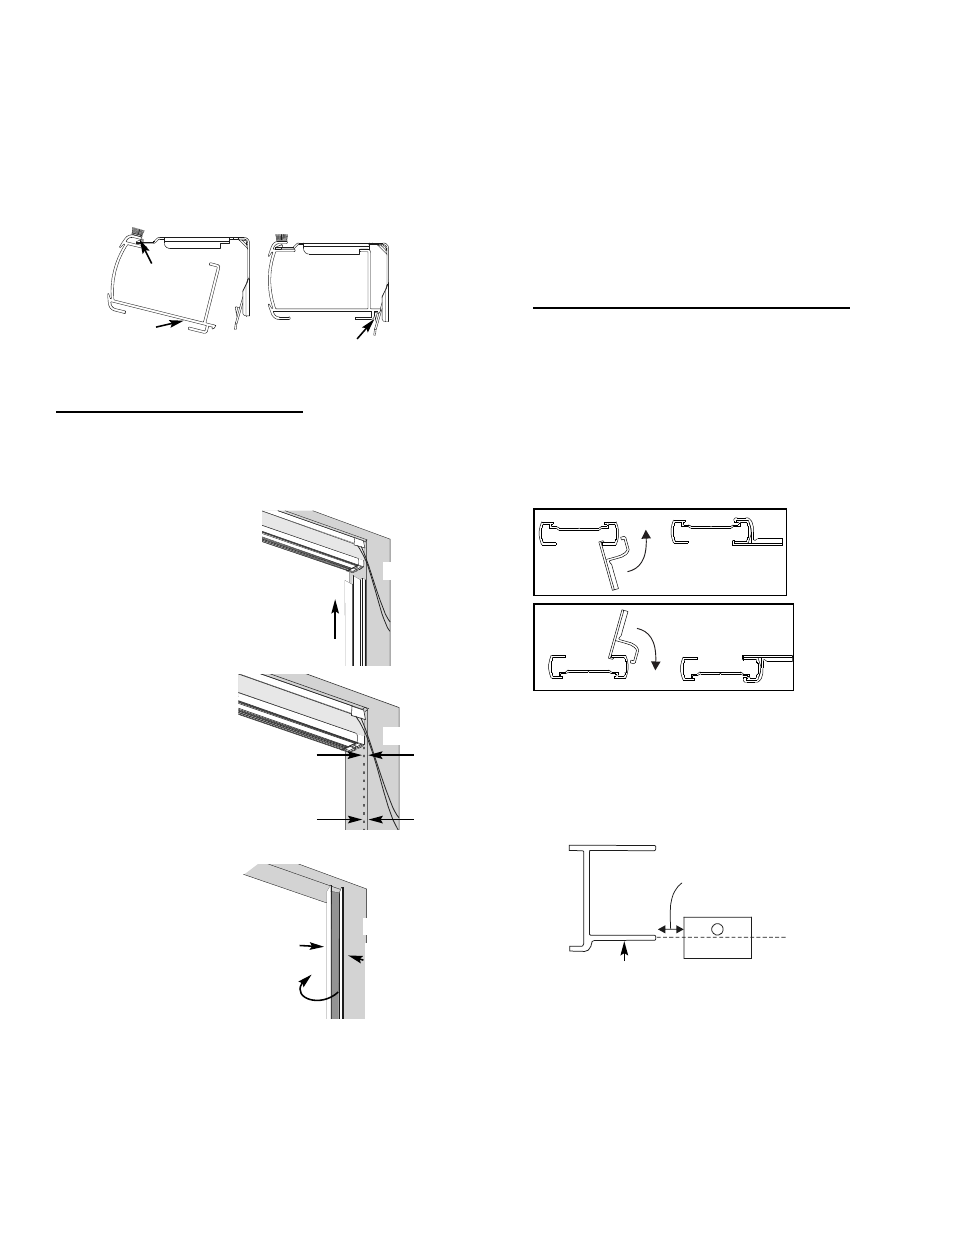
Continuous Loop and Cordless Brackets
Position the headrail with the front lip (A) resting on
the top hooks of all brackets. Make sure no fabric is
pinched between the bracket and headrail.
Push the bottom of the headrail firmly upwards and
toward the window until the groove at the bottom of
the headrail snaps into place, (B) as shown.
Push here upwards and
toward the window.
A
B
Step 3 TRACK MOUNTING
Mount the shade.
NOTE: DO NOT REMOVE THE RELEASE LINER
FROM THE MAGNETS YET.
Place the top end of the
track into the slotted end
caps and carefully slide up
into place (Fig 1).
While holding the track in
place, measure the
distance from the front of
the track to the edge of
the window frame at the
top.
Mark the bottom of the
window at the same point
as the top measurement
(Fig 2). Repeat for other
side.
Fig 2
Fig 1
Top
Measurement
Equals Bottom
Measurement
Slide up into
place
Remove the shade. Peel the release liner back from
the magnet.
Carefully line the front
edge of the track up to
the top and bottom
marks without letting
the tape touch the
window frame (Fig 3).
When correctly lined
up, press the tape against the frame. Push
firmly from top to bottom to ensure a good adhesion.
If the magnet does not seem secure with the foam
tape alone, it can be secured with T-50 Monel
staples, 3/8" long, spaced very 4 inches.
Repeat for the other track.
Pull the tracks off the magnets and reinstall the
shade.
Carefully slide the top of the track into the notch in the
shade and push up.
Let the track snap onto the magnet. Repeat for the
other side.
(b) Rotate
the track
until the
tape
touches.
Fig 3
(a) Line
the front
edge to
the
marks
Step 4 CORDLESS SHADES ONLY
Attach Handles
The bottom rail needs 2 handles, which should be
placed near the ends of the rails or as far from center
as is comfortable to operate. Gently lift fabric out of
the way. Hook the top of the handle over the front lip
on the bottom rail. Rotate handle down until it snaps
into place. If shade is a duofold, attach one handle to
the center of the middle moving rail.
Bottom Rail
Middle Rail
Attach Striker Plates
Cordless shades have magnets on both ends of the
bottom rail. The magnets hold the bottom rail down
securely to minimize light leakage.
The striker plates should be positioned as shown.
Mark the positions of the screw holes. Pre-drill with
a 3/32” drill bit. Attach the striker plates to the sill with
the included screws. If they can not be attached with
screws, a double sided foam adhesive (not included)
can be used.
front leg of track
1/4” from end
of track leg
center of striker
plate centered
on front leg
3
4