Blinds Chalet SlumberShade 3/8 Blackout Double Cell Shades User Manual
Page 2
BASICS
A few simple tools are required:
- Measuring tape
- Power drill, drill bits
- Hex head and/or Phillips driver bit
- Pencil
Additional fasteners other than those sent with your
shade may be required depending on the mounting
surface. Wallboard and plaster require the use of
anchors such as expansion or toggle bolts. Brick, tile
or stone need special plugs and drill bits. Remember
to always pre-drill holes in wood to avoid splitting.
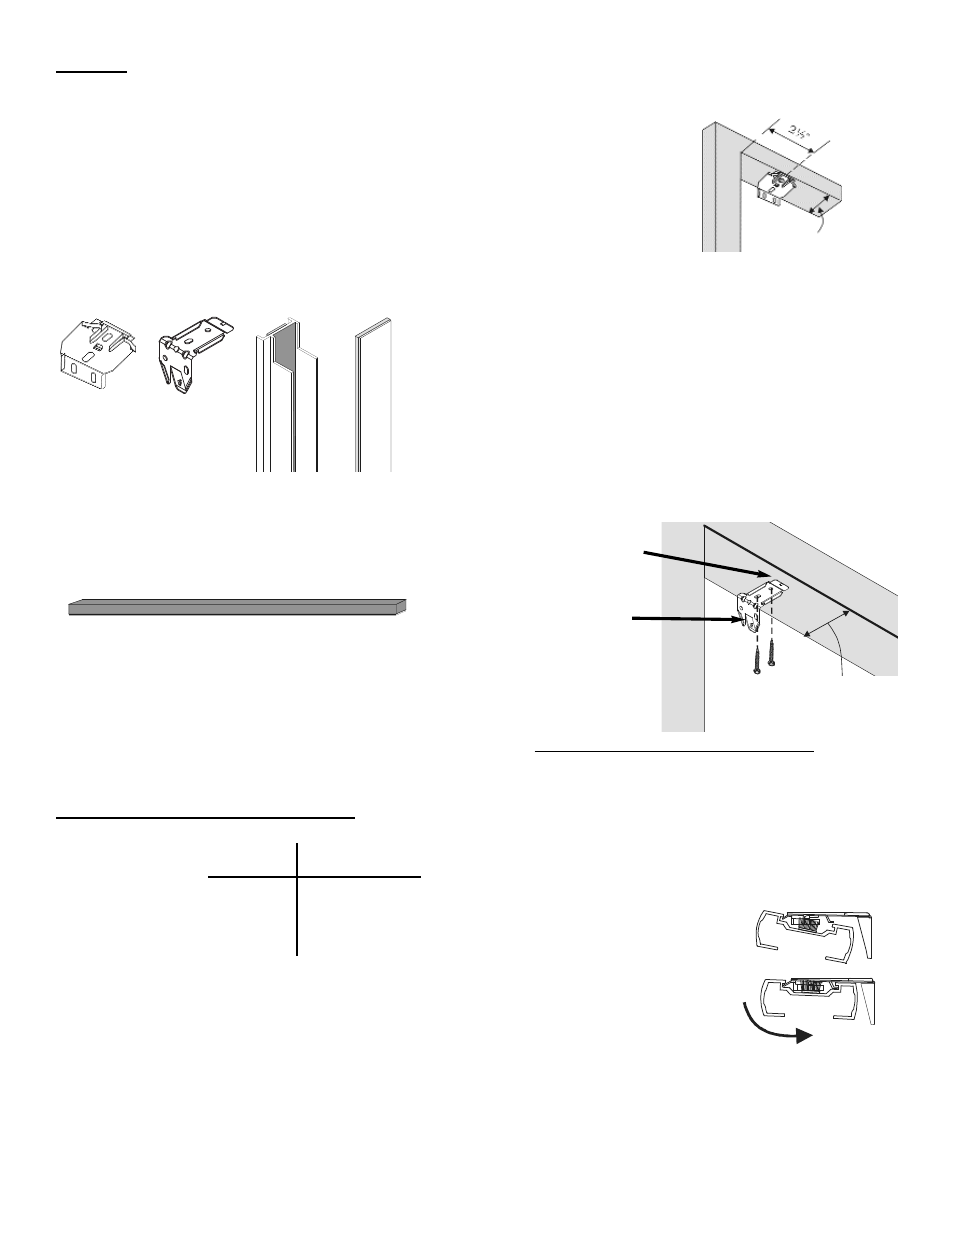
Standard
and
Top-Down
Bottom Up
Installation
Bracket
Continuous
Loop,
Cordless and
Cordless Top-
Down/Bottom
Up Installation
Bracket
Side Track
Rail with
Magnet
Magnet with
Foam Tape
Light Blocking Foam Strip
The minimum required depth for installation is
1-1/2”. The minimum depth required for Flush
mount installation is 2” for cordlock or 2 1/4” for
cordloop and cordless.
Step 1 BRACKET INSTALLATION
Shades are
shipped with the
required number
of brackets for
proper installation.
End brackets
should be located
with centerlines 3-1/2" in from each end. Depending
on the width of the shade, additional brackets may be
necessary evenly spaced between the two end
brackets.
For shade Use this Number
widths of:
of brackets:
Up to 40”
2
40" - 72"
3
72" - 84"
4
84" and up
5
Standard Brackets
The brackets are mounted flat against the top sill
surface.
The minimum depth
required is 1-1/2”.
To fully recess the
shade requires a flat
surface with a
minimum depth of 2".
1-1/2” min. to mount.
2” min. to fully recess.
Continuous Loop and Cordless Brackets
The brackets are mounted flat against the top sill
surface.
The minimum depth required is 1-5/8”. If you are
installing as a shallow mount, you may want to use
additional fuzz bar or light blocking foam strip to
improve light blocking effect. It may be attached to
the back of the headrail or window casing.
To fully recess the shade requires a flat surface with
a minimum depth of 2-1/4".
Top Hook
Note: Release
tab is at the
bottom of the
bracket
Standard Brackets
Insert the front clip of the
installation bracket into the
front groove of the rail.
Push the rail back and up
until the back clips of the
bracket are inserted in the
back groove of the rail.
It may be more difficult to properly engage the rail
into the brackets with the fuzz bar attached. Make
sure to double check the engagement to ensure
safety.
Step 2 SHADE INSTALLATION
Unwind the cord from the shade. Bring the top rail
up near the installation brackets. Center the shade
in the window opening and attach the headrail to the
installation brackets.
1
2
1-5/8” min. to mount.
2-1/4” min. to fully recess.