Blinds Chalet Premier Platinum Woven Wood Shades User Manual
Installation instructions, Natural woven wood, Nstall
SHIM
R O M A N S T Y L E S H A D E S
INSTALLATION
INSTRUCTIONS
L
IMITED
L
IFETIME
W
ARRANTY
B
EFORE
M
OUNTING
T
HE
S
HADE
Damage to the product resulting from misuse,
abuse, direct exposure to salty air or discolor-
ation due to sunlight or the passage of time is
not
covered by this warranty.
This warranty does not apply to conditions
caused by normal wear and tear upon the prod-
uct.
THIS WARRANTY IS EXCLUSIVE AND IN
LIEU OF ALL OTHER OBLIGATIONS,
LIABILITIES OR WARRANTIES.
In no event shall the manufacturer/fabricator
be liable for any INCIDENTAL or
CONSEQUENTIAL DAMAGES or for any
other direct or indirect damage, loss, cost,
expense or fee. Some states do not allow the
exclusion or limitation of incidental or conse-
quential damages, so this exclusion or limitation
may not apply to you.
In the event of a defect under this warranty,
we will repair or replace the product, at our
option, provided it is returned to the dealer
of original purchase.
Our warranty obligation excludes shipping
charges and labor costs for measuring and
installation. Repairs will be made with like or
similar parts.
This warranty gives you specific legal rights,
and you may also have other rights which may
vary from state to state. If you require further
assistance, contact the dealer of original pur-
chase.
N
OTE
: The fabric used to make your shade is a
natural wood product. Certain irregularities in
color, grain and texture are inherent and add to the
uniqueness of your shade. They are not to be
considered defects of the shade.
N
OTE
: This warranty does not apply to
Commercial Orders.
Y
our quality Woven Wood Shade has been
custom crafted to your ordered measure-
ments and comes with the necessary instal-
lation hardware for mounting the shade
inside or outside the window frame.
H
OW
T
O
I
NSTALL
Y
OUR
W
OVEN
W
OOD
S
HADE
Please take a few minutes to read these
instructions. When properly installed, your
shade will provide many years of beauty
and dependable service.
H
ARDWARE
I
NCLUDED
Installation
Brackets
Mounting
Screws
Additional Mounting Brackets
(If required for extra support)
T
OOLS
N
EEDED
Pencil
Drill
Screw Driver Drill Bits (
7
/
64
" &
1
/
16
")
Level
Scissors
The screws provided are for mounting the
shade to a wood surface only. For other surfaces,
use the following:
1. Wallboard or Plastic - Pre-drill holes for
suitable hollow wall anchors or toggle bolts.
2. Metal Surfaces - Pre-drill holes and use
short metal screws.
3. For Concrete, Stone, Brick or Tile -
Use a carbide drill and appropriate plugs,
or anchor with screws.
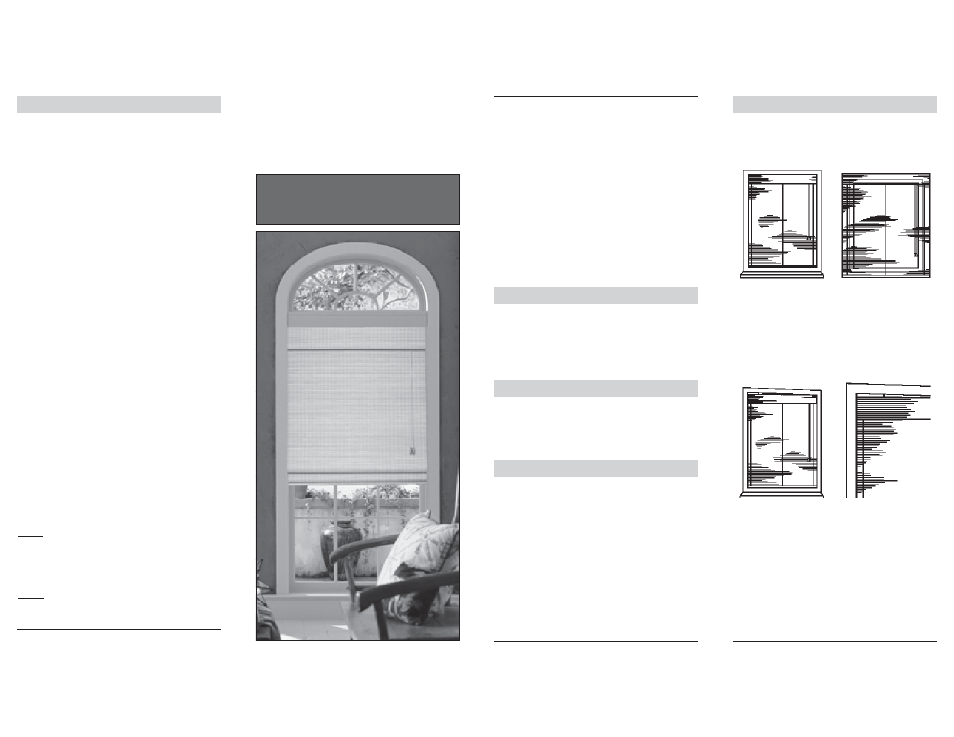
1. Hold the shade against the window opening
to determine if shade is made for inside or
outside installation.
(See Figs. 1 and 2.)
2. If shade is for inside window installation,
and if the window frame is not even or
level
(Fig. 3 )
, use shims to make sure that
the headrail will be level when installed.
(See Fig. 4)
3. Even if the headrail is mounted on the
frame, wall or ceiling, it must be level, so
the shade will operate properly. Also make
sure that shade is the proper length and
that it will clear any obstructions.
(Spacers or extension brackets may be
required for shade to clear any obstructions.)
Uneven Frame
F
IG
. 3
Shim as necessary
F
IG
. 4
Inside Mount
F
IG
. 1
Outside Mount
F
IG
. 2
© 3/01
F
ASTENERS
FOR
O
THER
S
URFACES
(
NOT
INCLUDED
)
Natural Woven Wood