Blinds Chalet Good Housekeeping 2 Wood Blinds User Manual
Page 4
4
Inside Mount Depth Requirements
Slat Size
Bracket Depth
Flush To Valance Depth
1-3/8”
1-1/8” 3-1/2”
2”
1-1/8” 3-1/2”
2-3/8”
1-1/8” 3-7/8”
2-1/2”
1-1/8” 3-7/8”
OUTSIDE MOUNTS:
For outside mounts, ensure that a 1-3/4” high, flat vertical surface is available for
securing the brackets. The brackets will be screwed through the back holes.
MARK THE BRACKET POSITIONS:
Mark where the ends of the headrail will be positioned. Either…
Hold headrail up and mark or measure headrail and mark length.
Then mark ¼” from the headrail marks for the installation brackets.
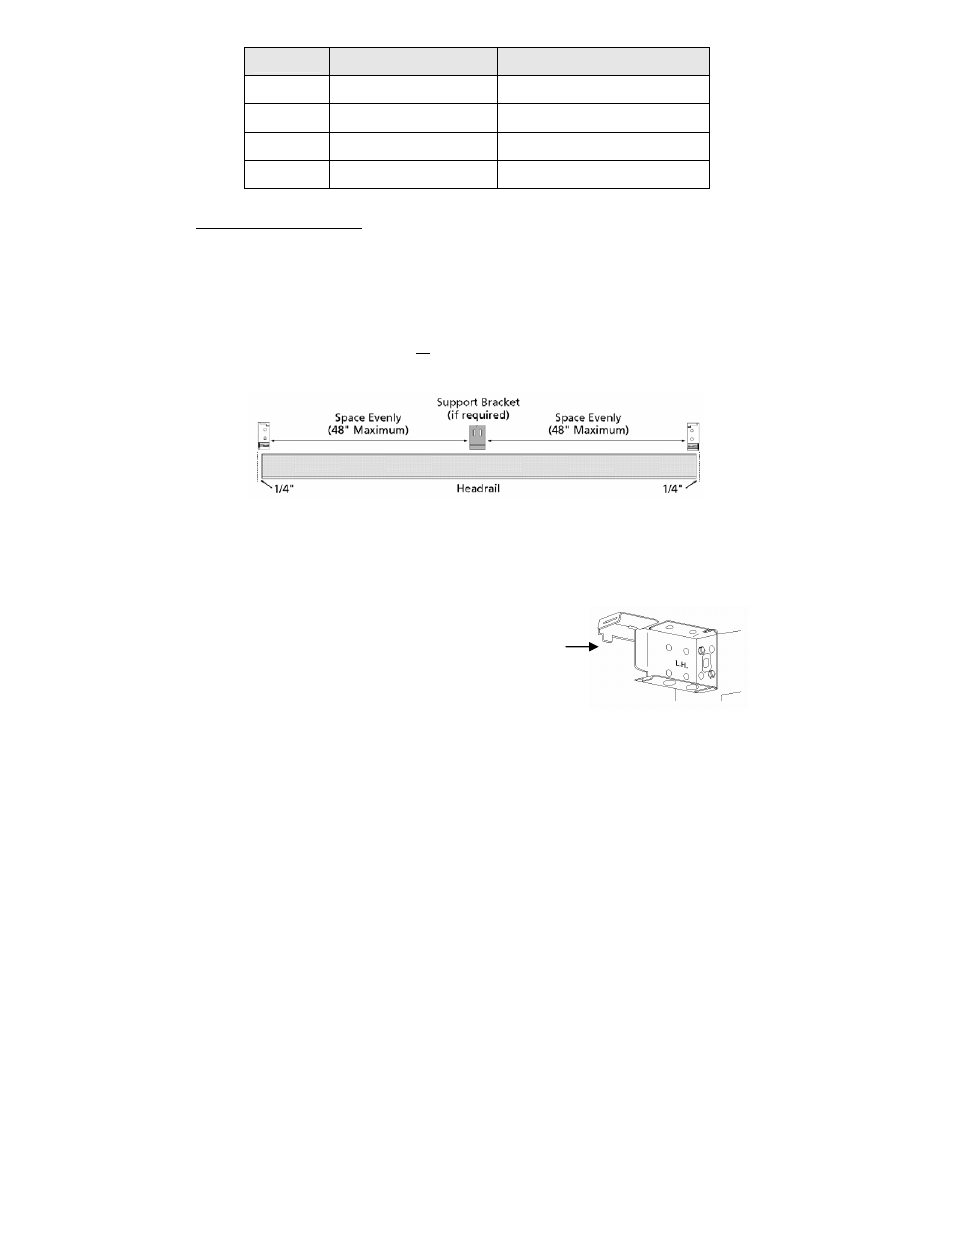
ATTACH THE BRACKETS:
Position the outside edge of the brackets to the outer markings.
The bracket tops must be aligned and level to one another.
Attach the brackets with screws through two diagonal holes.
Outside mount bracket screwed
diagonally through back holes.
CENTER SUPPORT BRACKETS (if required):
Space the center bracket(s) evenly between the two end brackets.
Adjust if necessary to avoid interference with headrail mechanisms.
Attach with screws through two diagonal holes.
EXTENSION BRACKETS (optional):
Position the extension brackets to the wall markings made above.
The bracket tops must be aligned and level to one another.
Mount the extension brackets with screws through diagonal holes.
Attach the installation brackets to the extension brackets.