Step 1, Step 2: step 3: step 4 – AERCO AERClean User Manual
Page 4
Page 4
Benchmark Low NOx Series
AERClean Filtration System Instructions
Doc#
TID-0001-0A
Created: 10/13/2010
Revised: 11/11/2010
Owner: BS-Manager_V.D.
DOC#: TID-0001-0A
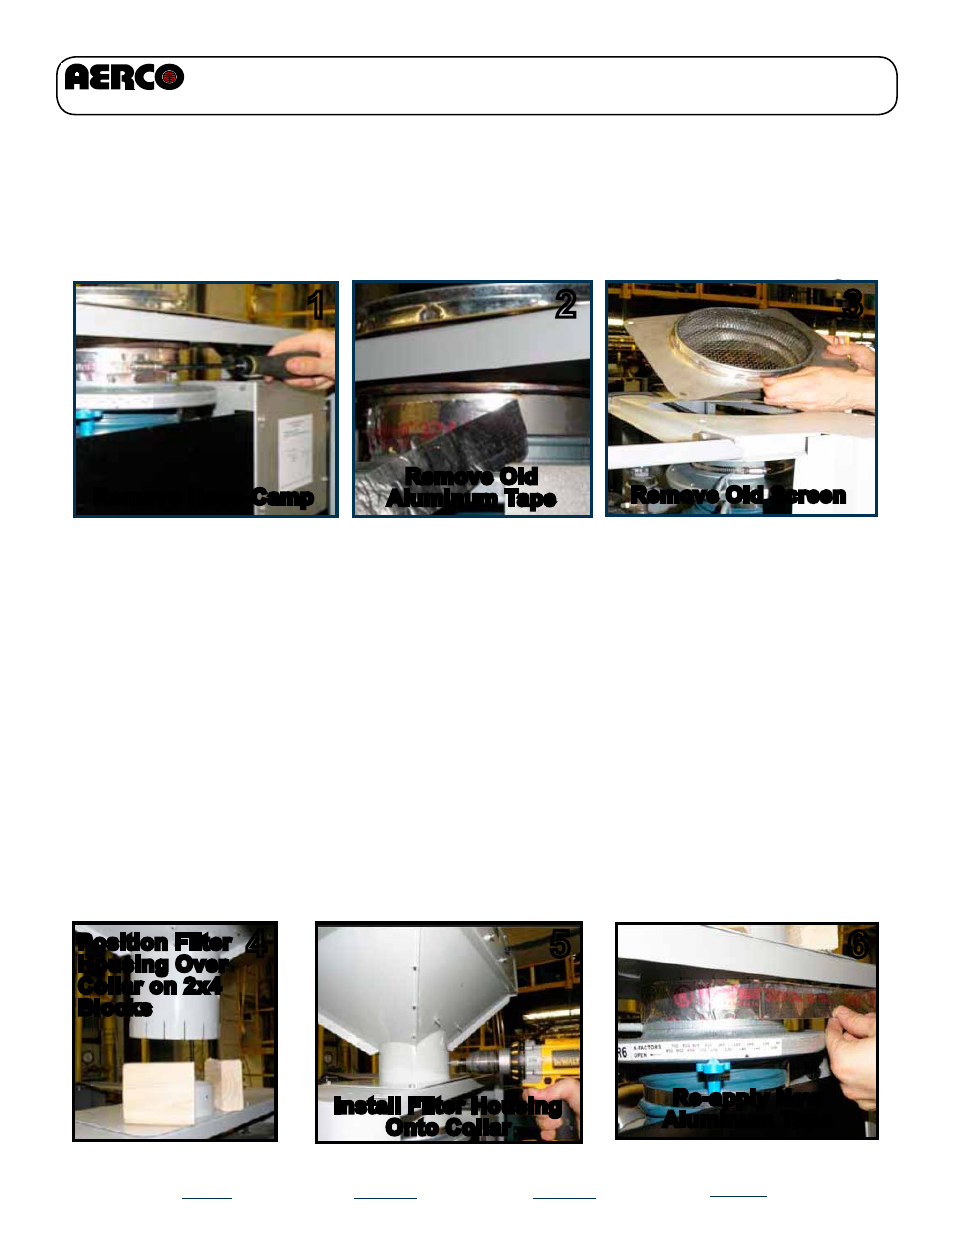
STEP 1:
Insert filter housing into the lock collar. You may use two 2”x4” wood pieces (approx.
8” long) to help keep the filter housing vertically oriented (
4), so that collar remains
proper distance above top surface until affixed with screws. Ensure filter is oriented
correctly wirh 20” of clearence in front of the filter access door to enable easy filter
replacement. The air filter assembly also requires at least 2” of headroom above it
for sufficient air intake.
Install the filter holder to the lock collar with kit screws (
5). Next, slip hose assembly
upward onto collar. It may be a tight fit. Make sure that the 6” hose is not kinked.
After the hose assembly is connected to filter, reapply new aluminum adhesive tape
to seal any leaks (
6). Once tape is applied, replace hose clamp and tighten to se-
curely attach hose assembly to the filter housing.
5
4
Benchmark 1.5 & 2.0 Filter Installation (All Models)
Loosen and remove the hose clamp (
1) from hose connection and remove
foil tape (
2). Remove nuts affixed to existing screen cover and then remove screen
cover from the top of boiler (
3).
1
2
2
3
6
STEP 2:
STEP 3:
STEP 4:
Remove Hose-Camp
Remove Old Screen
Remove Old
Aluminum Tape
Position Filter
Housing Over
Collar on 2x4
Blocks
Install Filter Housing
Onto Collar
Re-apply New
Aluminum Tape