Checkline DT-5TS User Manual
Page 12
12
Setting Functions (continued)
Instructions to set functions are as follows:
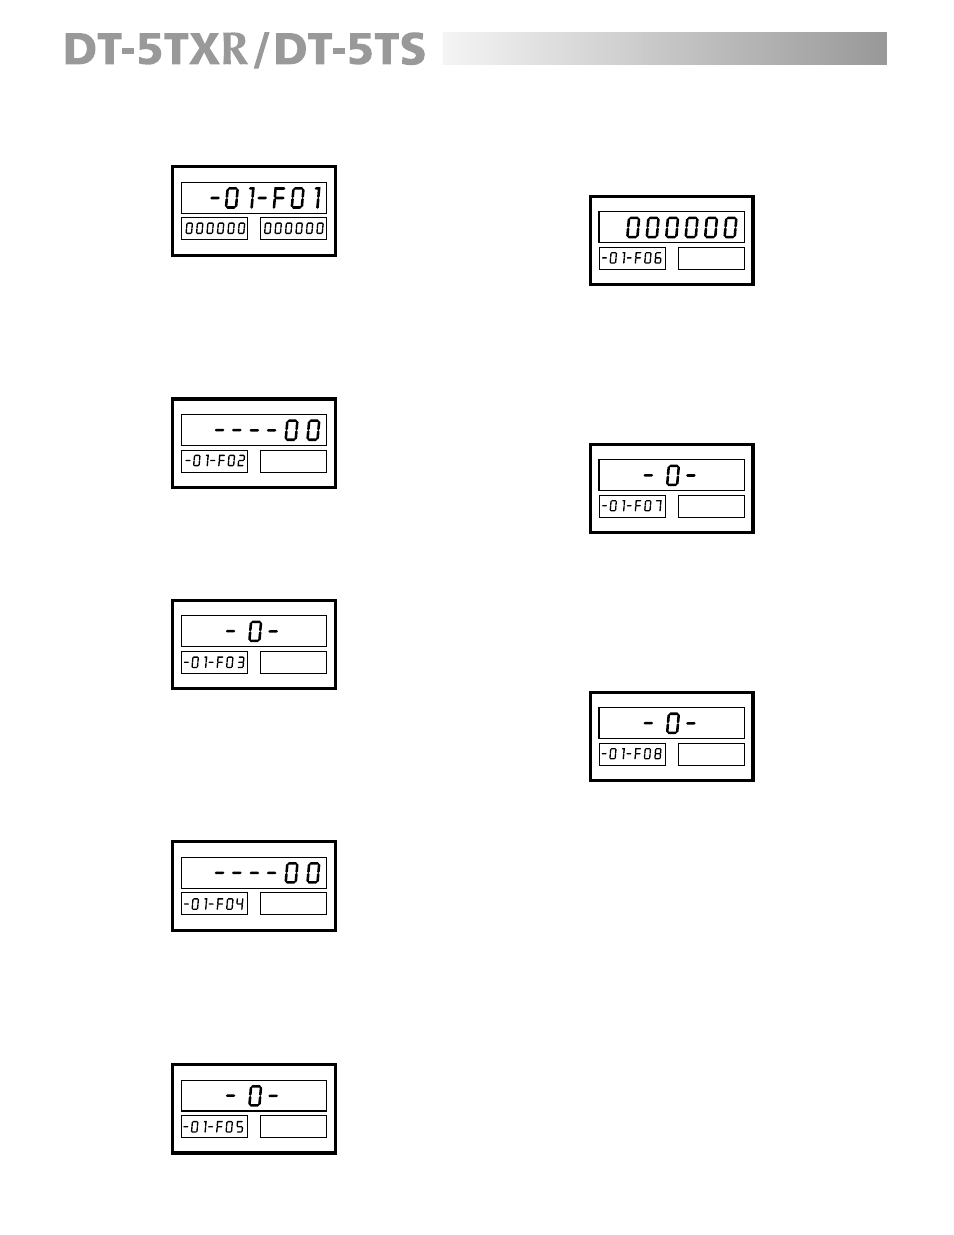
1.
Press the FUN button; the display will indicate:
NOTE
: The display will always show what operating
mode is set (mode -01- in this example) and what
function (1) is being displayed.
2.
Use the lower keys to set secondary high and low
limits (follow the same instructions listed under
“Setting High and Low Limits” section on page 7).
3.
Press the FUN button; the display will reflect:
Function 2 is now showing on the primary display
(factory setting).
4.
Use the NUMERIC buttons to set the hysteresis of
the upper and lower limits.
5.
Press the FUN button; the display will show:
Function 3 is being reflected on the primary display
(factory setting).
6.
Use any of the lower buttons to toggle between
securing and not securing (see tables on page 11)
the primary high and low settings.
7.
Press the FUN button; the display will reflect:
Function 4 is now showing (factory setting).
NOTE
: This function is mainly used with mode -01-
only.
8.
Use the NUMERIC buttons to set the output activation
of any set limit.
9.
Press the FUN button, the display will show:
Function 5 is now showing (factory setting).
Memory Feature
The function of the MEM button is to aid the
DT-5TXR/DT-5TS to memorize and display through the
secondary displays the maximum and minimum value of
the main display for as long as it has been activated.
Simply activate the MEM button by pushing it
momentarily. The lower left secondary display will reflect
the maximum value of the main display and the lower
right secondary display will reflect the minimum value of
the main display. Also a small LED will begin to flash.
To de-activate the memory feature, simply push the MEM
button again. The LED under it will stop flashing and
the secondary displays will return to their previous state.
10. Use any of the lower buttons to toggle between
the three settings (see tables on page 11) for what
the secondary displays (A and B) will show.
11. Press the FUN button; the display will reflect:
Function 6 is now showing (factory setting).
12. Use the NUMERIC buttons to enter the number at
which the primary display should read zero.
For example: if it is desired for the display to read
zero when the RPM drops below 600, then 6 0 0
should be entered.
13. Press the FUN button; the display will show:
Parameter 7 is now showing (factory setting).
14. Use any of the lower buttons to scroll between the
three types of averaging (see tables on page 11) for
an unstable sensor. The number of times that the
meter will average the frequency is directly related
to the update time chosen (parameter 4).
15. Press the FUN button; the display will reflect:
Parameter 8 is now showing (factory setting).
16. Use the lower keys to toggle between either having
the deceleration to zero value “on” or “off” (see tables
on page 11).
17. Press the SET button to store the function settings
and exit.