Ti-44n operating instruction guide – Checkline TI-44N User Manual
Page 6
4.3
Turning The Power ON
Turn on the power by pressing the
POW
key. The current acoustic velocity
setting will be momentarily displayed prior to entering the Measurement
Mode (Mode H). The display should then read 0.000 inch (or 0.00 mm).
If the Good Coupling Indicator is flashing on and off, the red transmit
connector of the probe is not connected properly.
4.4
Turning The Power OFF
The Power will turn off automatically after three (3) minutes of non-use.
To manually turn off the power, press & hold the
POW
key for 3 sec.,
then release.
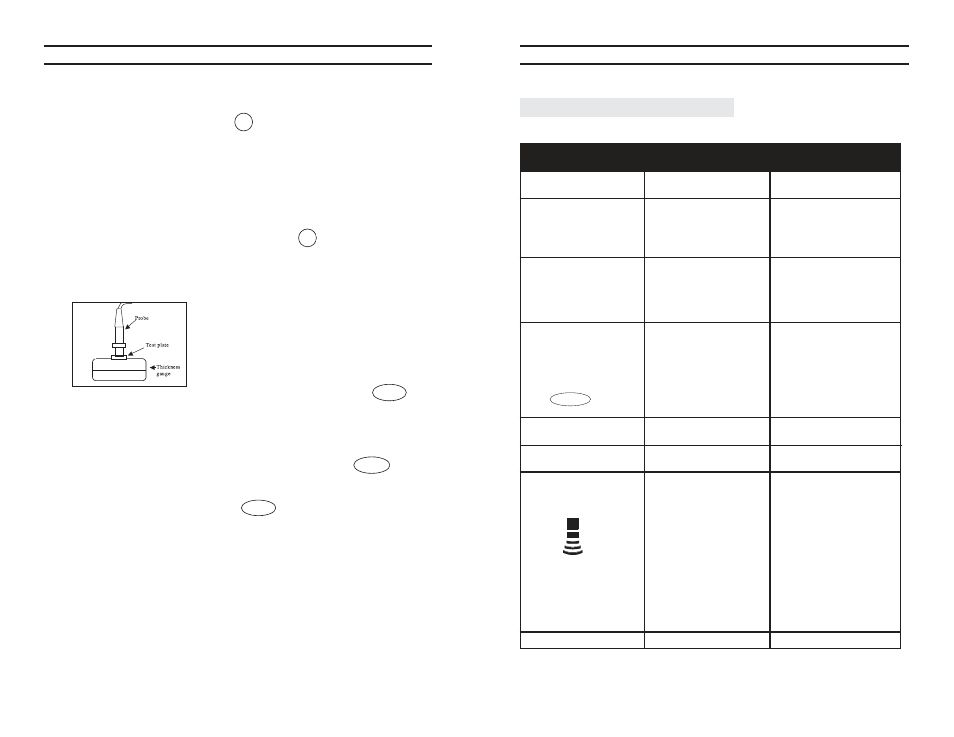
4.5 Zero Adjustment
This operation adjusts the zero point of the probe. Zero adjustment data is stored in
the instrument. It is recommended that the zero
adjustment data be refreshed once a day, preferably
before starting the day’s work.
1 .
Apply couplant on the test plate surface and
place the probe on it.
2 .
Make sure the probe is in good contact with
the test plate surface and press the
ZERO
switch.
3 . The zero adjustment procedure takes place and the display reads 0.197" or
5.00 mm when the process has been successfully completed.
NOTE: When the sonic velocity is set to a value other than 5390 m/s, the
display reads 0.197" or 5.00 momemtarily when the
ZERO
switch
is pressed. Zero adjustment is nonetheless proceeding correctly.
If the material to be tested is signifcantly larger or smaller than
0.197" or 5.00mm, and the ZERO switch is pressed, the display
will read --- -and the zero adjustment process becomes invalid. In
this case, the zero adjustment should be made on a sample of known
thickness of the test material itself.
4.6 Using Couplant Fluid
Apply couplant fluid to the mesuring surfacae before measurement. The
couplant eliminates air between the probe and test surface, promoting the
transmission of the ultrasonic pulse.
NOTE: Never use organic solvents, including thinners and alcohols.
The surface must be cleaned of couplant after measurement.
TI-44N Operating Instruction Guide
6
8.0 T
ROUBLE
-S
HOOTING
G
UIDE
Description of Problem
Possible Cause
Action To Be Taken
Gauge will not power
Battery voltage may be
Replace with new AA
up
too low
battery
Gauge will not power
• New battery may be
• Check battery voltage
up even though battery
too weak
(should be
≈
1.5 Volt)
has been replaced
• Back-up battery (lithium)
• Return gauge for a new
could be too weak
lithium battery
Good Coupling
• Probe or cable could be
• Clean probe & surface
Indicator flashes on/off
defective
and retry measurement
• Foreign substance may
• Return to manufacturer
be trapped between
for inspection/repair
probe and sample
Good Coupling
• Insufficient couplant fluid
• Add more couplant
Indicator not shown
• Paint or coating is too
• Grind off paint and/or
thick or voids and/or
corrosion
corrosion lies under paint
“......” is displayed
Probe could be degraded
Return to manufacturer
when ZERO key is
or defective
for inspection or repair
pressed
Displayed thickness
Acrylic probe face is
Carefully sand face of
value is unstable
deteriorated
probe using #500 paper
Can’t obtain measure-
Pipe diameter (OD) may
Consult factory
ment on small dia. pipe
be less than 1”
(25 mm)
Couping indicator does
• Insufficient amount of
• Apply additional couplant
not appear while measure-
couplant
ment is being taken
• Test material surface is
• Grind/polish measuring
too rough
surface to 50-100-s
smoothness
• Test material bottom
• Change measurement
surface is too rough
point
• Too much ultrasonic
• Change measurement
attenuation due to
point
material composition
• Test material thickness is
• Change measurement
outside the proper
point
measuring range
Fluxuating readings
Defective probe
Return to manufacturer
TI-44N Operating Instruction Guide
15