Warning, Brick loading – Steffes 6140 User Manual
Page 13
Step 7 Remove the sheet metal screws around the outer edge of the galvanized front panel. Remove the panel
and set it aside.
Step 8 Starting at the bottom, carefully lift each of the insulation blankets and drape them over the top of the
system.
Use face mask, gloves, and long sleeved garments when handling insulation materi-
als in compliance with generally accepted safety practices.
Step 9 Remove the front air channel by pulling out on the top of the air channel.
BRICK LOADING
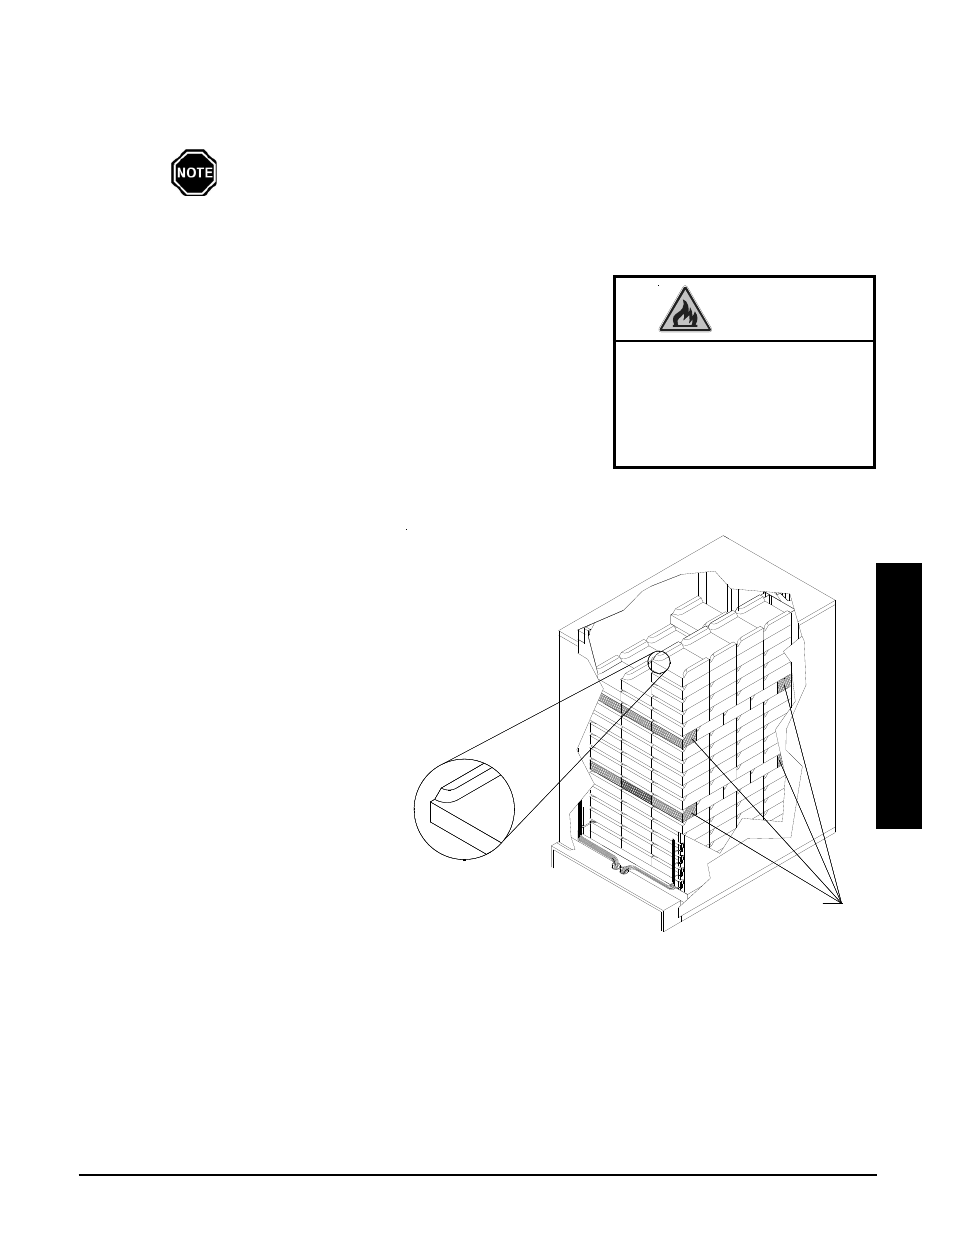
Load the brick, one row at a time, using a left side, right side, center pat-
tern. Start at the back of the brick core and work forward. Make sure the
brick are placed so the grooved side is facing up, the notch is facing for-
ward, and the ridges are on the left and right (See Figure 4).
BRICK INSTALLATION TIPS:
Install bricks carefully to avoid damage to the insulation panels.
Remove loose brick debris to prevent uneven stacking of brick as
this can make installation of the elements and the brick core
temperature sensor difficult.
Brick rows MUST line up front to
back and side to side.
Half brick makes brick loading
easier by evening out the stacks.
Use the HALF BRICK (boxes
marked) in the proper rows and in
the correct positions as indicated in
Figure 4. The back half of the brick
MUST be installed in the back rows
and the front half (the notched brick
piece) MUST be installed in the
front rows.
Comfort Plus Commercial
Installation
n
3.04
Installation
Risk of fire. Can cause personal
injury or death. DO NOT operate
the Comfort Plus Commercial
system if damage to the insula-
tion panels on the inner sides of
the brick core occurs.
WARNING
BRICK LOADING
FIGURE 4
Load in row 6 and 12
HALF BRICK
FR
ON
T O
F U
NIT
NOTCH IN BRICK