Remarks,etc – Panasonic PV-PD2000 User Manual
Page 43
Attention! The text in this document has been recognized automatically. To view the original document, you can use the "Original mode".
Digital Video Camera
(sold separately)
Use the ^ Sutton to select
[SET].
MENU
PRirJT
FORMAT
1
[STD]
SET
PICTURE
[STD]
SET
[®= FRAME
OFF ■ " IISEDID
TFHE
(OFF)
SET
OSD
ION]
OFF
WIDE
[AUTO] ON OFF
^ ► ISELECT [ENTERJEND
Use the ▼ Button to
select one of the two
methods, and then use
the ^ Button to select
[YES].
FRAME
”:'N0
:[YES]Z1
[^SELECT“
OVERLAY
[ < ^
► ]SEUCT tENTERlEND
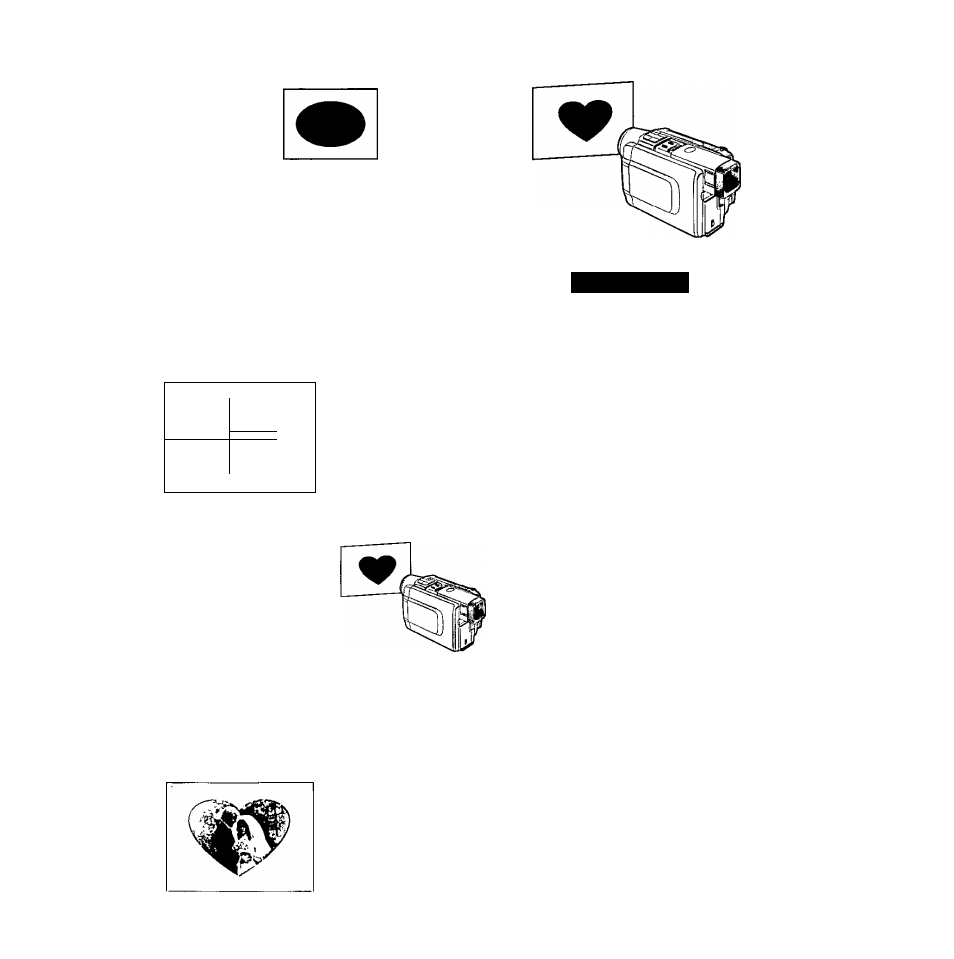
o When “OVERLAY” is
chosen
A trimming frame that you
created is captured with your
Video Camera, and the
trimming frame is adjusted for
optimum appearance.
•The value can be adjusted
over a range from —9 to 4-
9. Positive values make the
trimming frame lighter, and
negative values make the
trimming frame darker.
Press the EffTER Button.
(If the menu is
displayed, hold down
this button until the
menu disappears.)
8
Print the trimming frame.
Remarks,etc.
•When a trimming frame is stored in memory,
[ON] appears on the MENU Screen.
•A trimming frame stored in memory is lost
when the Digital Photo Printer is turned off.
•When a new trimming frame is stored in
memory, the previous trimming frame is
erased.
•When a preset title is used, the previous
trimming frame is lost.
•When capturing the title or trimming frame
with a Video Camera, shine the lighting at a
45-degree angle to prevent reflection.
•To temporarily turn off a trimming frame
stored in memory displayed on the screen,
set “FRAME" in MENU Mode to [OFF].
(When the setting is switched back to [ON],
the stored trimming frame reappears on the
screen.)
•When creating your own frame, use a black
marker on white paper.
■INSIDE, OUTSIDE
INSIDE :The image is inserted inside the
stored frame.
OUTSIDE :The image is inserted outside the
stored frame.
■D cn
0
» C
u o
E
n <0
fl)
a
O
43