Electrical connection – Panasonic CQ-R145U User Manual
Page 23
Attention! The text in this document has been recognized automatically. To view the original document, you can use the "Original mode".
Electrical Connection
•
This unit can be connected to an optional CD changer (CX-DP801EUC). For details consult your
nearest Panasonic dealers.
•
For connection to a CD changer, refer to the operating instructions of the CD Changer (CX-
DP801EUC).
i
Caution:
• This product is designed to operate of a 12 volt, negative ground battery system.
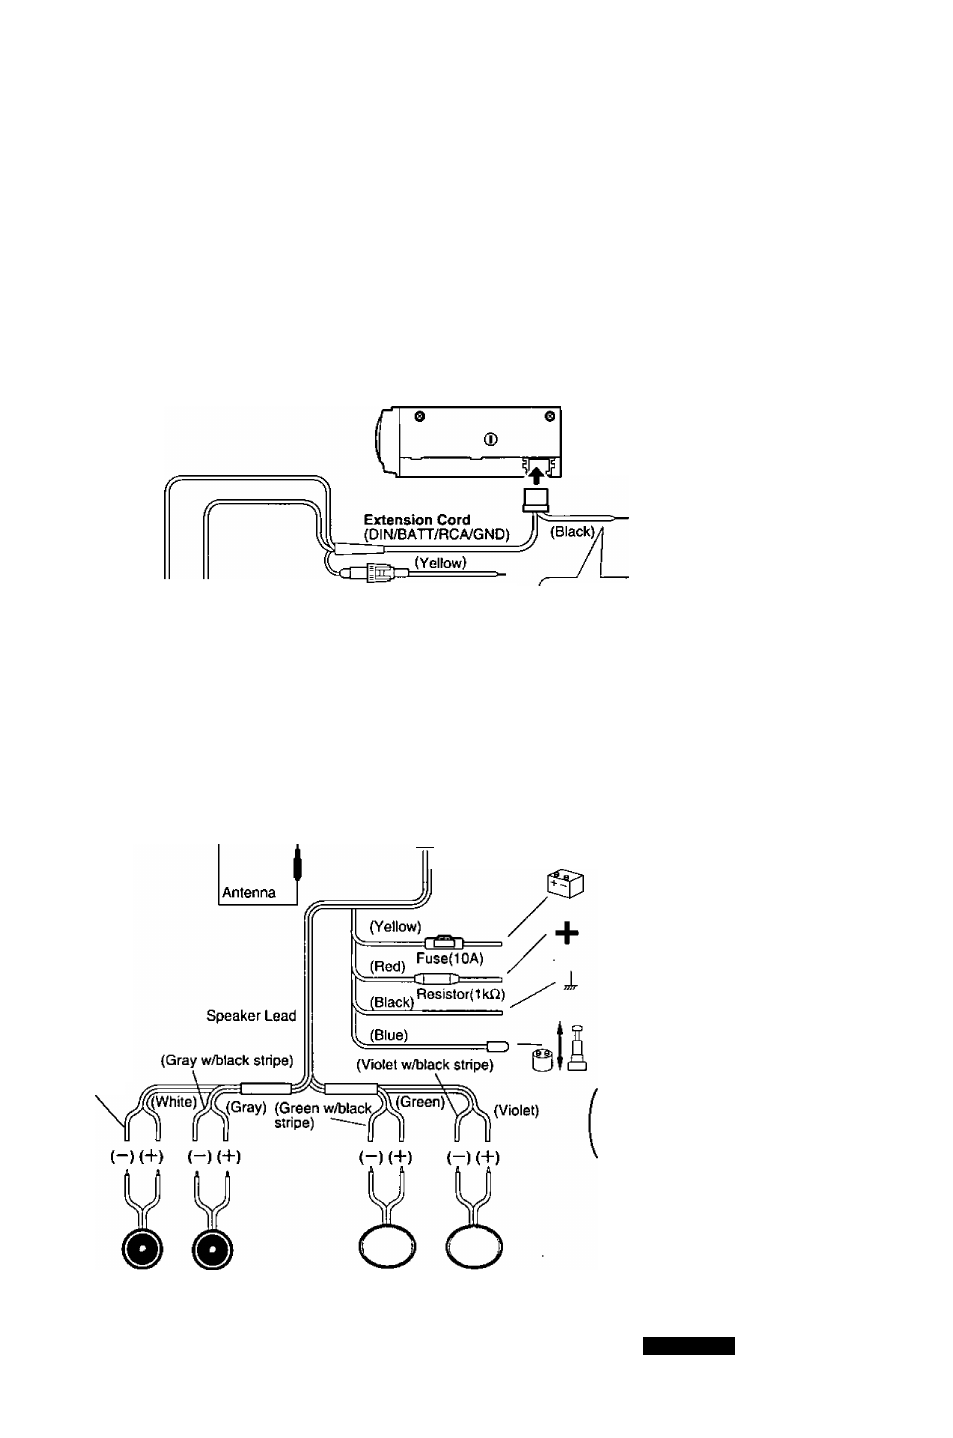
• To prevent damage to the unit, be sure to follow the connection diagram below.
• Remove the covering of the leads about 5 mm long from their end before connecting.
• Do not insert the power connector into the unit until the wiring is completed.
• Be sure to insulate any exposed wires from a possible short-circuit from the car chassis. Bundle all
cables and keep cable terminals free from touching any metal parts.
CX-DP801EUC
Fuse(3A)
DIN Extension Cord
Battery Lead
To the car battery,
continuous +12V DC
Ground Lead
To a clean, bare metallic
part of the car chassis
Be sure to connect to a well grounded
metallic part of your car because noises
or troubles may occur.
CQ-R145U
(Red)
L(White)
R(Red)
- CD Input Connector
Preamp-out Connector
A____CD Changer
^
'
Control Connector
rm (6)Power Connector
•hi
(White
w/btack
stripe)
Battery Lead
To the car battery, continuous
+12V DC
Power Lead (ACC or IGN)
To ACC power, +12V DC
Ground Lead
To a clean, bare metallic part of
the car chassis
Motor Antenna
Relay Control
moves antenna up
and down
Amp Relay Control
\
Power Lead
\
This lead is for connec
tion to Panasonic power
j
amplifier.
/
Left Speaker Right Speaker
(Front) (Front)
Lett Speaker Right Speaker
(Rear)
(Rear)
CQ-R145U
23