Timer recording, Check list before you begin, Press at and – Panasonic PV-8665S User Manual
Page 22: Important notes when using a dss receiver
Attention! The text in this document has been recognized automatically. To view the original document, you can use the "Original mode".
Timer Recording
*lmportant: If the remote control POWER, ACTION, PROG,
CHA/T,
INDEX or ADD/DLT button does
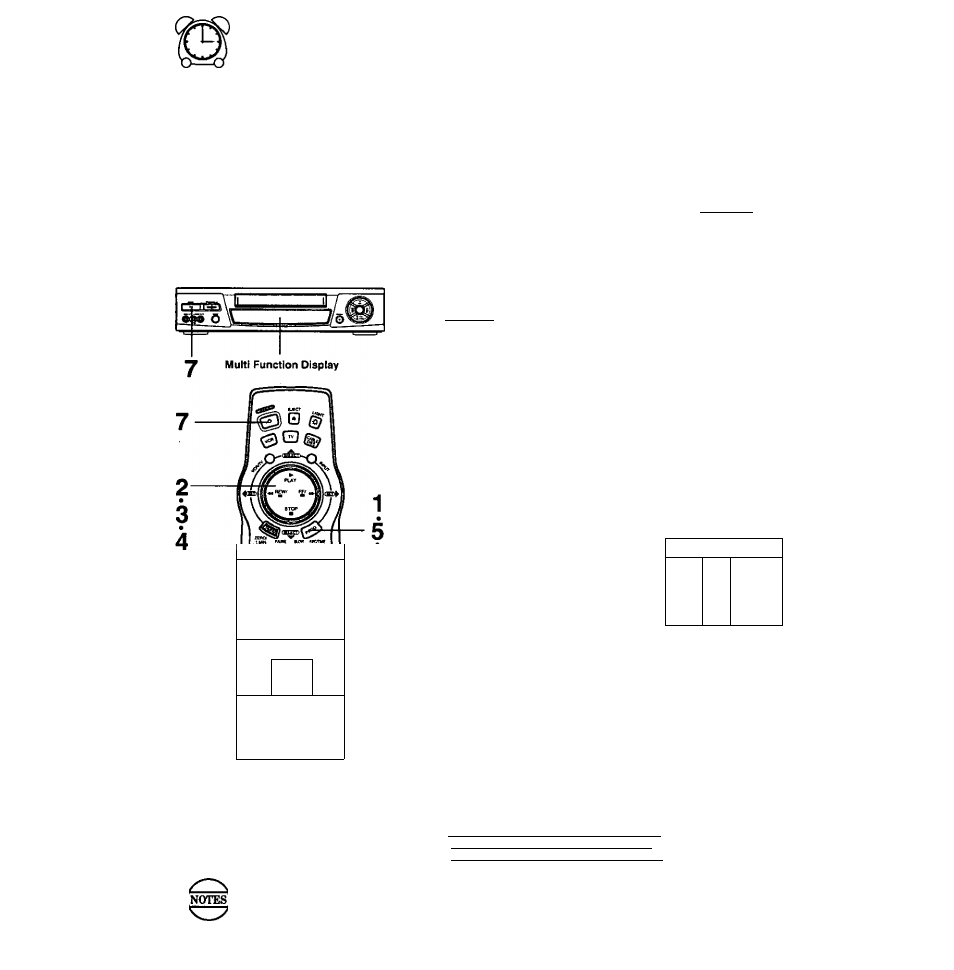
not work when pressed, press the VCR button on the remote and try the button again.
You can set up the VCR to record a one
time, daily, or weekly program while you are
away or otherwise occupied. Up to 8
programs can be stored in memory.
[^^Check list before you begin.
Q All connections are made.
(See pages 6~9.)
n TV and VCR are plugged in and turned on.
tU VCR/rv selector is set to “VCR."
□ Clock is set to correct time.
Q Record tab in place. (See page 5.)
( O 0 0 O )
O
© ©
© © ©
©
0
©
_ _ WDCXT
© ©
©
cxxMTtM kiifT D«puty
O CD
HfXt
□ I
O
0 Q j
Q 0 0 -
--------SET PRCCRAM................
VCR Pit«* PROGRAM
TIWEfi PROGRAM
SELECT:* ▼ KEY
SET :► KEY
END :PROG KEY
START STOP CH
1
Press PROG*
to display the
“SET PROGRAM” screen.
2
Press
AW
to select “TIMER
PROGRAM,”
and
then press
►
to display the program screen.
• If a program is already in memory, press
AW
and ^ to select an unused program number.
3
Press
AW
and
►
to select and
set one of the following:
• 1-31 =Onetime recording
• DAILY =Same time MON-FRI
• WEEKLY (SUN-SAT) =Same time once a week
Example
^8—9
.....'31
1 — 2 ' ..... 6
Today’s Date —
7 SELECT
A
/ ▼ Selection Order DAILY
(^WEEKLY...........WEEKLY___ WEEKLY_J
Wf\
CATEGORY :N/A
BiiBBHaKQB
SELECT
SET
END
* ▼ KEY
► KEY
PROG KEY
(SAT)
(MON)
(SUN)
Press
AT
and
to select and set each
of the remaining
items at right.
4 P№ee A^ and ^ ^
Remaining Items to be set:
“T Kress AT ana
,
start
time -
stop
time
• CH(annel) number, or LINE
for outside source recording
• Category (N/A [not applicable],
SPORTS, MOVIE, COMEDY,
MUSIC, DRAMA)
• Speed (SP. LP. SLP)
To Make Corrections
Repeatedly press ► to move the cursor to the right, or to
move to the left to the incorrect entry and make the correction.
5
Press PROG
to end the program.
• This screen appears for confirmation.
If you use a DSS receiver and enter a
channel number of 100-125, the screen
at right appears.
Press
AT
to select “DSS" or
“CABLE,”and then press ►
to enter.
• The confirmation screen appears
above right after this selection.
P DT START STOP CH SPD
2----------
3 --------
4 --------
CANCEL
SELECT
ENTER
END
ADO/D
1 -8:*
► KEY
PROG
-T KEY
▼ KEY
CEY
IS IT CABLE OR OSS
RECEIVER?
SELECT:* ▼ KEY
SET :► KEY
To Enter More Programs
Press
AT
and ► to select and set a blank
program number, and then repeat steps 3 and 4.
Important notes when using a
DSS receiver
• When recording programs via a DSS
receiver, the DSS receiver must be left on.
• When recording programs via an antenna or
cable, the DSS receiver must be turned off.
Press PROG
to exit this mode.
Press POWER
off to set the timer.
• When recording programs via a cable
box, make sure the cable box Is left
ON and tuned to the desired channel.
-¡¡13113-
Multi Function Display
A cassette with no record tab is ejected and “TIMER” flashes when the power is turned off to set the timer.
If the start times of two programs oveilap, ttie lower numbered program will have priority.
If the start time for a timer recording comes up during a normal recording or One Touch Recording (page 20),
the timer recording will not be performed.
If there is a power interruption of more than one minute, the recording will not be performed or continue.
22