Option 2: flush-mount bracket – Dynon Avionics EMS-D10 Installation Guide User Manual
Page 41
Instrument
Installation
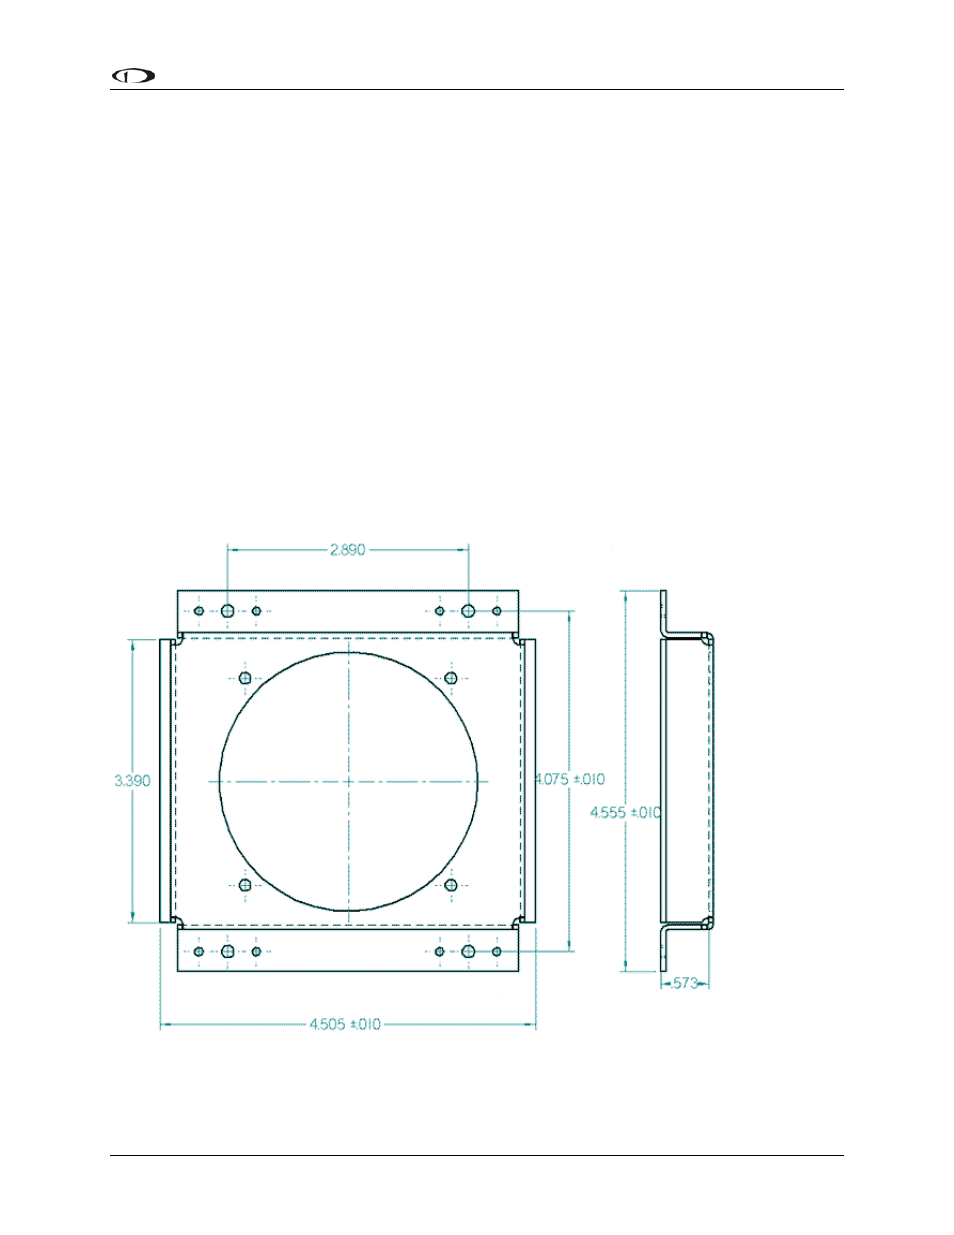
The diagram above shows the dimensions expected for the proper installation of the EMS-D10
into your panel using no mounting bracket. All units are in inches. Push the EMS-D10 through
the main panel hole. The four studs on the back of the EMS-D10
will fit into the four mounting
lar cutout in your panel, ensuring that it allows the front panel of the EMS-D10
to fit. The cutout required should have the dimensions 4.09” wide by 3.39” tall with corner radii
of 0.125”. You also need to drill four 0.164” holes in your panel at the four locations shown on
holes having dimensions listed in the diagram. Place one of the four supplied washers on each
stud before pushing the EMS-D10 into place in the panel, putting the washers in between the
EMS-D10 and the panel. Place one of the 4 supplied mounting nuts on the end of each of the 4
studs protruding from the back of the panel. Secure the nuts tightly against the panel to complete
the installation.
OPTION 2: FLUSH-MOUNT BRACKET
Make a rectangu
the diagram below (two above and two below the rectangular cutout). Install #6 plate nuts on the
back side of the bracket. Place one of the supplied washers onto each of the four mounting studs
on the EMS-D10 and then slide the flush mount bracket over the EMS-D10. The bracket should
wrap around the bezel of the EMS-D10. Place one of the 4 supplied nuts on each of the 4 studs
and tighten the nuts. The EMS-D10/bracket can now be installed from behind your panel using
the #6 screws through the previously drilled holes.
EMS-D10 Installation Guide
4-9