Clarion DXZ768RMP User Manual
Page 3
280-8334-00
DXZ768RMP
3
8
DXZ768RMP
280-8334-00
280-8334-00
DXZ768RMP
4
English
English
Contents
1.
PRECAUTIONS .............................................................................................................................. 3
Sloping Console .............................................................................................................................. 3
Handling Compact Discs ................................................................................................................. 4
2.
CONTROLS ..................................................................................................................................... 5
3.
NOMENCLATURE .......................................................................................................................... 6
Names of the Buttons and their Functions ...................................................................................... 6
Major Button Operations When External Equipment is Connected to This Unit .............................. 7
Display Items ................................................................................................................................... 9
4.
DCP ................................................................................................................................................ 11
5.
REMOTE CONTROL ..................................................................................................................... 12
Inserting the Battery ...................................................................................................................... 12
Functions of Remote Control Unit Buttons .................................................................................... 13
6.
OPERATIONS ............................................................................................................................... 14
Basic Operations ........................................................................................................................... 14
Radio Operations ........................................................................................................................... 16
RDS Operations ............................................................................................................................ 17
CD/MP3/WMA Operations ............................................................................................................. 21
Operations Common to Each Mode .............................................................................................. 24
7.
OPERATIONS OF ACCESSORIES .............................................................................................. 29
CD Changer Operations ................................................................................................................ 29
TV Operations ............................................................................................................................... 30
Digital Radio/DAB Operations ....................................................................................................... 31
8.
IN CASE OF DIFFICULTY ............................................................................................................ 34
9.
ERROR DISPLAYS ....................................................................................................................... 35
10. SPECIFICATIONS ......................................................................................................................... 36
1. PRECAUTIONS
1. This unit is applicable for on-road 4 wheel
vehicle purpose only. Use for tractor, fork
truck, bulldozer, off road vehicle, 2 or 3 wheel
motor bicycle, marine boat or other special
purpose vehicle is not appropriate.
2. When the inside of the car is very cold and
the player is used soon after switching on the
heater moisture may form on the disc or the
optical parts of the player and proper play-
back may not be possible. If moisture forms
on the disc, wipe it off with a soft cloth. If
moisture forms on the optical parts of the
player, do not use the player for about one
hour. The condensation will disappear natu-
rally allowing normal operation.
3. Driving on extremely bumpy roads which
cause severe vibration may cause the sound
to skip.
INFORMATION FOR USERS:
.
CHANGES OR MODIFICATIONS TO THIS
PRODUCT NOT APPROVED BY THE MANU-
FACTURER WILL VOID THE WARRANTY.
Sloping Console
This unit uses sloping console to make
large-screen displays possible.
When you use the sloping console, be sure to
close it.
BE CAREFUL NOT TO GET YOUR FINGERS
CAUGHT WHEN OPENING AND CLOSING
THE SLOPING CONSOLE.
1. For safety’s sake, always close the SLOPING
CONSOLE before leaving this unit unused
for a prolonged period or switching OFF the
ignition key.
If you switch OFF the ignition key with the
SLOPING CONSOLE tilted, the SLOPING
CONSOLE does not close.
2. Before the SLOPING CONSOLE closes,
there may be a braking sound from the
safety mechanism. This is normal.
CAUTION
Handling Compact Discs
Use only compact discs bearing the
or
mark.
Do not play heart-shaped, octagonal, or other
specially shaped compact discs.
Some CDs recorded in CD-R/CD-RW mode
may not be usable.
Handling
• Compared to ordinary music CDs, CD-R and
CD-RW discs are both easily affected by high
temperature and humidity and some of CD-R
and CD-RW discs may not be played.
Therefore, do not leave them for a long time in
the car.
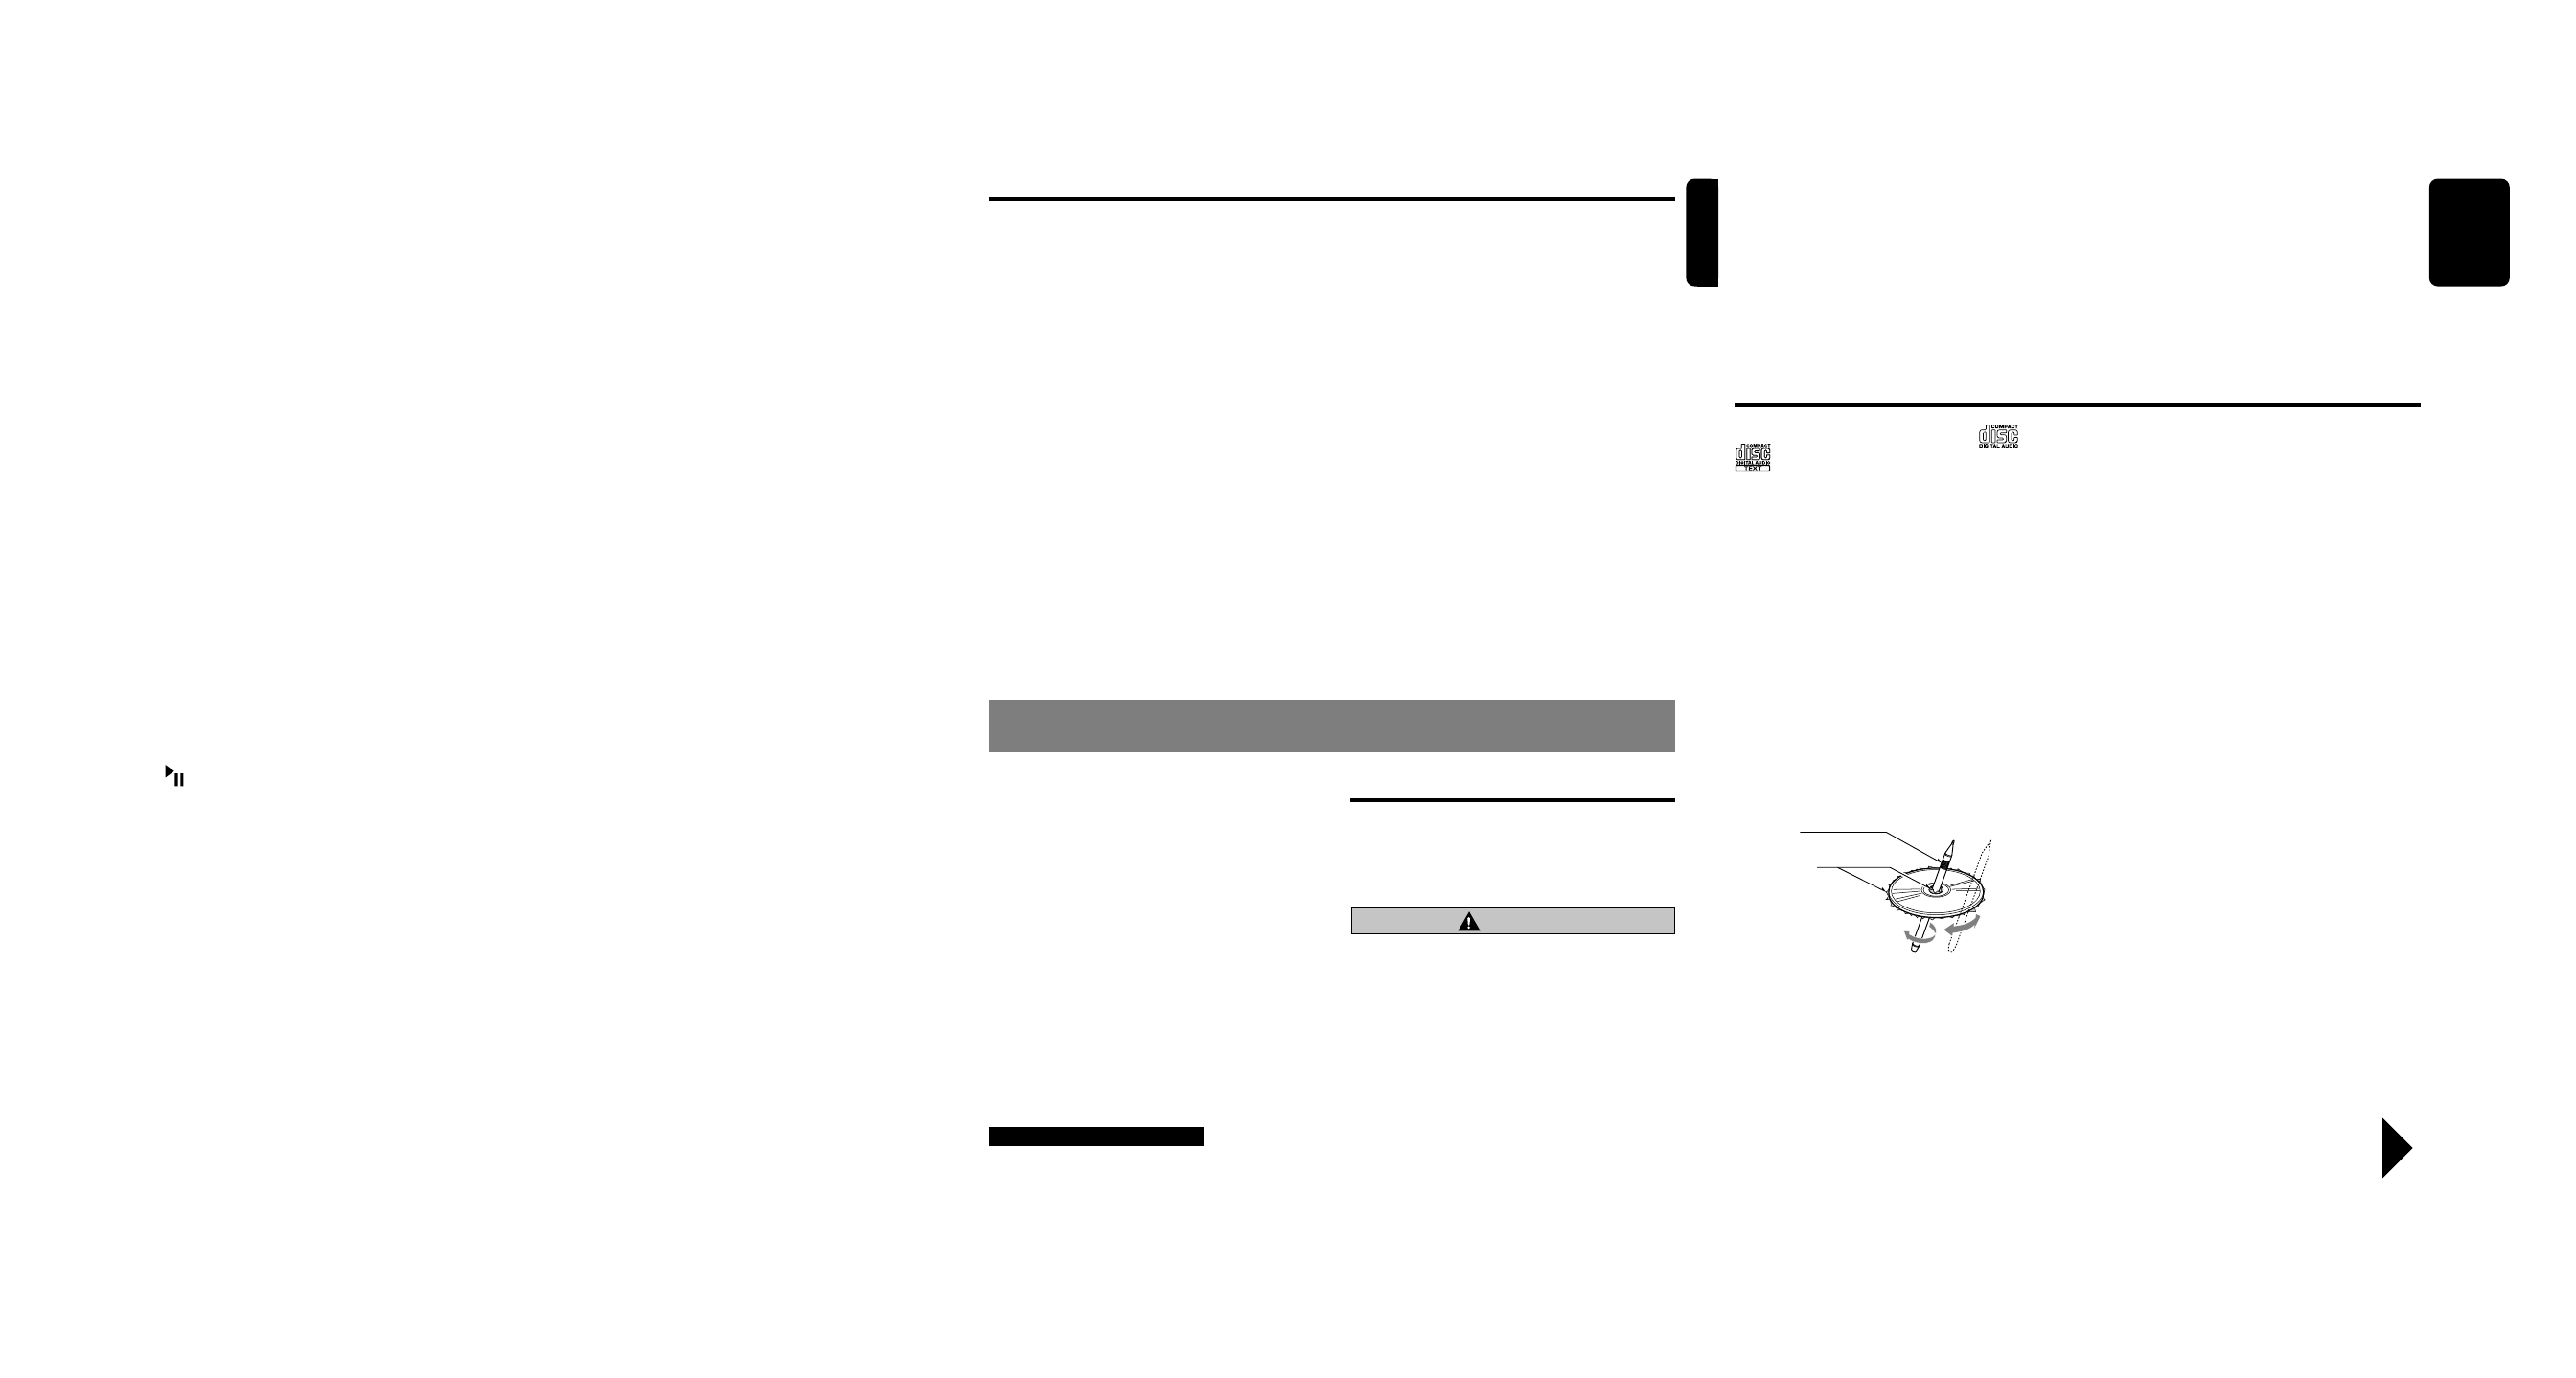
• New discs may have some roughness around
the edges. If such discs are used, the player
may not work or the sound may skip. Use a
ball-point pen or the like to remove any
roughness from the edge of the disc.
Ball-point pen
Roughness
• Never stick labels on the surface of the
compact disc or mark the surface with a pencil
or pen.
• Never play a compact disc with any
cellophane tape or other glue on it or with
peeling off marks. If you try to play such a
compact disc, you may not be able to get it
back out of the CD player or it may damage
the CD player.
• Do not use compact discs that have large
scratches, are misshapen, cracked, etc. Use
of such discs may cause misoperation or
damage.
• To remove a compact disc from its storage
case, press down on the center of the case
and lift the disc out, holding it carefully by the
edges.
• Do not use commercially available CD protec-
tion sheets or discs equipped with stabilizers,
etc. These may damage the disc or cause
breakdown of the internal mechanism.
Storage
• Do not expose compact discs to direct
sunlight or any heat source.
• Do not expose compact discs to excess
humidity or dust.
• Do not expose compact discs to direct heat
from heaters.
Cleaning
• To remove fingermarks and dust, use a soft
cloth and wipe in a straight line from the cen-
ter of the compact disc to the circumference.
• Do not use any solvents, such as commer-
cially available cleaners, anti-static spray, or
thinner to clean compact discs.
• After using special compact disc cleaner, let
the compact disc dry off well before playing it.
Be sure to unfold and read the next page. /
Veuillez déplier et vous référer à la page suivante.
Bitte ausbreiten und die nächste Seite lesen. /
Assicurarsi di aprire e leggere la pagina successiva.
Volgende pagina uitvouwen en doorlezen a.u.b. /
Cerciórese de desplegar y de leer la página siguiente.
Glöm inte att vika ut och läsa nästa sida. /
Não deixe de abrir e ler a próxima página.
3. If you move the SLOPING CONSOLE by
hand, this may create play. To correct this
play, with the power on for the unit, press the
[
Q
] button to close the SLOPING
CONSOLE.
4. After a disc is ejected, the SLOPING
CONSOLE automatically returns to the tilted
or closed state. If there is any obstruction
when the SLOPING CONSOLE tries to
close, the safety mechanism is triggered and
the SLOPING CONSOLE returns to the open
state. If this happens, remove the
obstruction, then press the [
Q
] button.
5. To avoid scratching the compact disk, keep
the 12 or 8 cm CD level when inserting or
removing them.
●
When the TV/DAB is connected
∗
For details, see the section “TV
Operations” or “Digital Radio/DAB
Operations”.
[ADJ] button
• Press and hold the button for 1 second or
longer to switch to the TV picture mode or
VTR (external) picture mode.
[
] button
• Perform preset scan while in the TV mode.
When the button is pressed and held, auto
store is performed. (This function is only TV
tuner.)
• Perform service scan while in the DAB mode.
[BND] button
• Switch the band.
• When the button is pressed and held, switch
seek tuning or manual mode.
[DIRECT] buttons
• Store a station into memory or recall it directly.
[TA] button
• Use the button to set the TA (Traffic
Announcement) standby mode in the DAB
mode. (This function is only DAB tuner.)
[
å
,
∂
] lever
• Select a station.