Ab a a b – Workrite Sierra HXL Assembly Instructions for 3-Leg Front-Crank Workcenters User Manual
Page 7
Workrite Ergonomics | 800.959.9675 www.workriteergo.com
7 of 10
Workrite Sierra HXL™ 3-Leg Crank Workcenters - Assembly Instructions
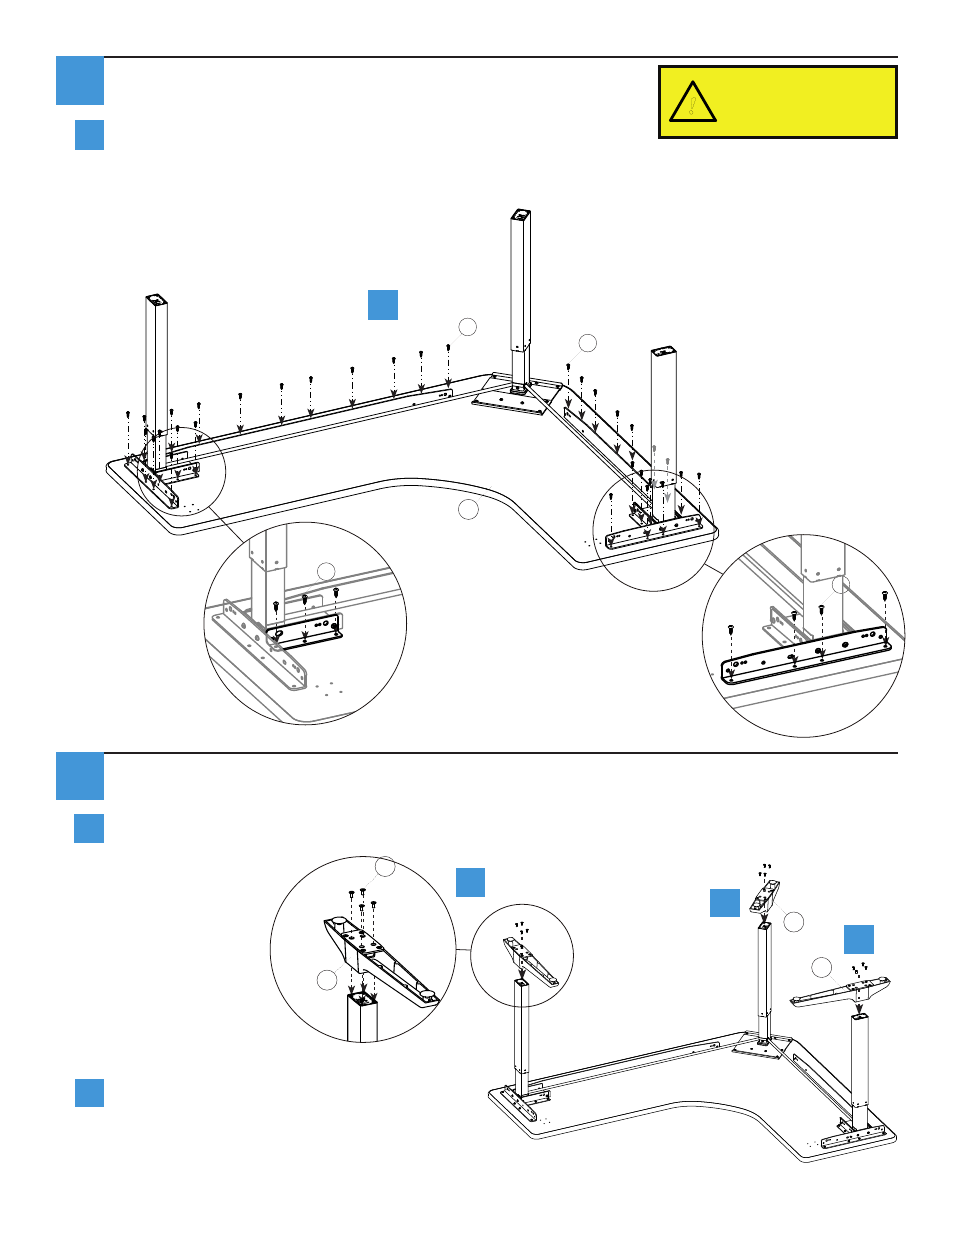
Attach Side Legs to Worksurface
Position leg assembly to align mounting holes to pre-drilled holes
in Top (V) - it might be necessary to adjust brackets - then attach
loosely using Pan Head Screws (M). If you use an electric screwdriver,
be sure it is on the lowest torque setting to avoid stripping the
threads.
Attach Feet to Leg Assemblies
Attach Outside Feet (U) to Outside Leg Assemblies with M6 ×16 mm Flat Head Machine Screws
screws (L) and tighten securely.
a
Attach Center Foot (Q) to Center Leg with
M6 ×16 mm Flat Head Machine Screws
screws (L) and tighten securely.
V
If you have a Silhouette ½"
top, be sure to use #10 - 24
× ½” Pan Head Self-Tapping
Screws or you will damage
your top.
!
Left Leg
assembly
Right Leg
assembly
Center Leg
assembly
6-10 screws per
Long Bracket
3 screws per
Short Bracket
4 screws per
Medium Bracket
M
M
M
M
L
U
Q
U
8
a
9
a
b
a
a
b