Parts grouped by carton – Workrite Sierra HXL Assembly Instructions for 3-Leg Front-Crank Workcenters User Manual
Page 2
2 of 10
Workrite Ergonomics | 800.959.9675 www.workriteergo.com
Workrite Sierra HXL™ 3-Leg Crank Workcenters - Assembly Instructions
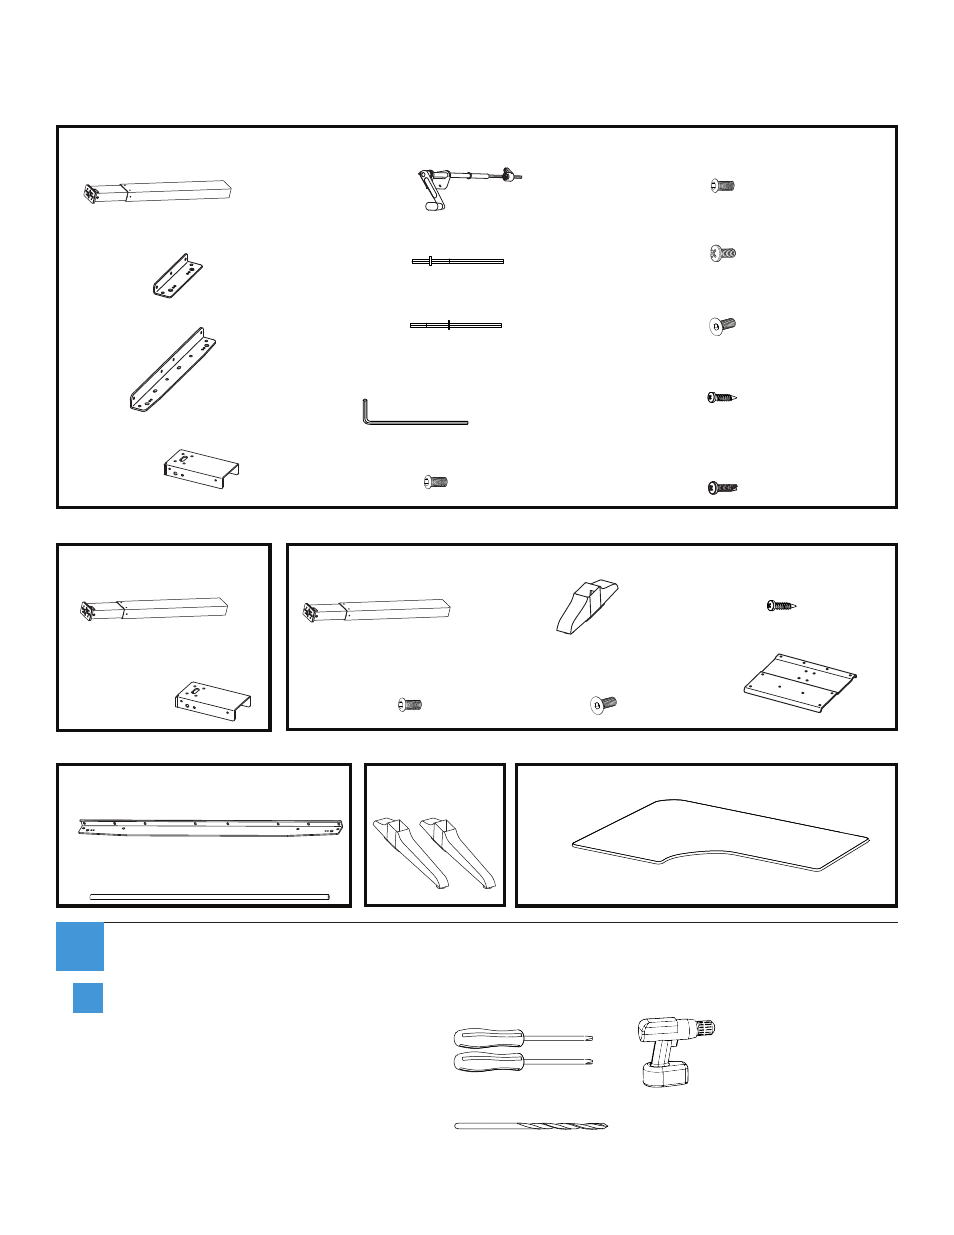
Parts grouped by carton
For assembly of two-piece tops, please refer to separate instructions.
V
Tabletop (size and shape differ for each model)
Qty: 1
Main carton:
Second Leg carton:
Long Component carton:
Foot carton:
Worksurface carton:
Center Leg Kit carton:
H
4 mm Allen Wrench
Qty: 1
T
Crank Tube
Qty: 2
O
Top Leg Bracket
Qty: 1
D
Top Leg Bracket
Qty: 1
N
Leg, Type I*
Qty: 1
*
part# 6195026-01
A
Leg, Type I*
Qty: 1
*
part# 6195026-01
P
Leg, Type III*
Qty: 1
*
part# 6195026-03
U
Feet
Qty: 2
S
Long Bracket
Qty: 2
B
Short Bracket
Qty: 2
C
Medium Bracket
Qty: 2
E
Crank Handle Assembly
Qty: 1
G
Deep Hex Shaft
Qty: 2
F
Shallow Hex Shaft
Qty: 2
Q
Center Foot
Qty: 1
R
Center Leg Bracket
Qty: 1
I
M6 × 12 mm Pan
Head Screw
Qty: 4
J
M6 × 8 mm Button Head Machine
Screw
Qty: 12
K
#12 × ½" Self Tapping Phillips
Head Screw
Qty: 1
or
M
#12 × ¾" Pan Head Laminate Top
Screw
Qty: 42
#10 - 24 × ½" Self Tapping Pan
Head Silhouette Top Screw
Qty: 42
Verify that you have all the hardware and tools needed for the assembly
Check your cartons against the list above to verify that you have all the parts needed.
You will also need the following tools:
#2 tip Phillips screwdriver or drill/driver
#3 tip Phillips screwdriver or drill/driver
If you do not have a Workrite tabletop
you will also need: ⅛” pilot drill bit
L
M6 × 16 mm Flat Head Machine
Screw
Qty: 8
L
M6 × 16 mm Flat
Head Machine
Screw
Qty: 4
I
M6 × 12 mm Pan Head
Machine Screw
Qty: 8
M
#12 × ¾" Pan Head Screw
Qty: 10
or
1
a