Stage two test, Cleaning, Continued) – Welch Allyn RL-150 Rhinolaryngoscope - User Manual User Manual
Page 11: Stage-two test
Cleaning
(continued)
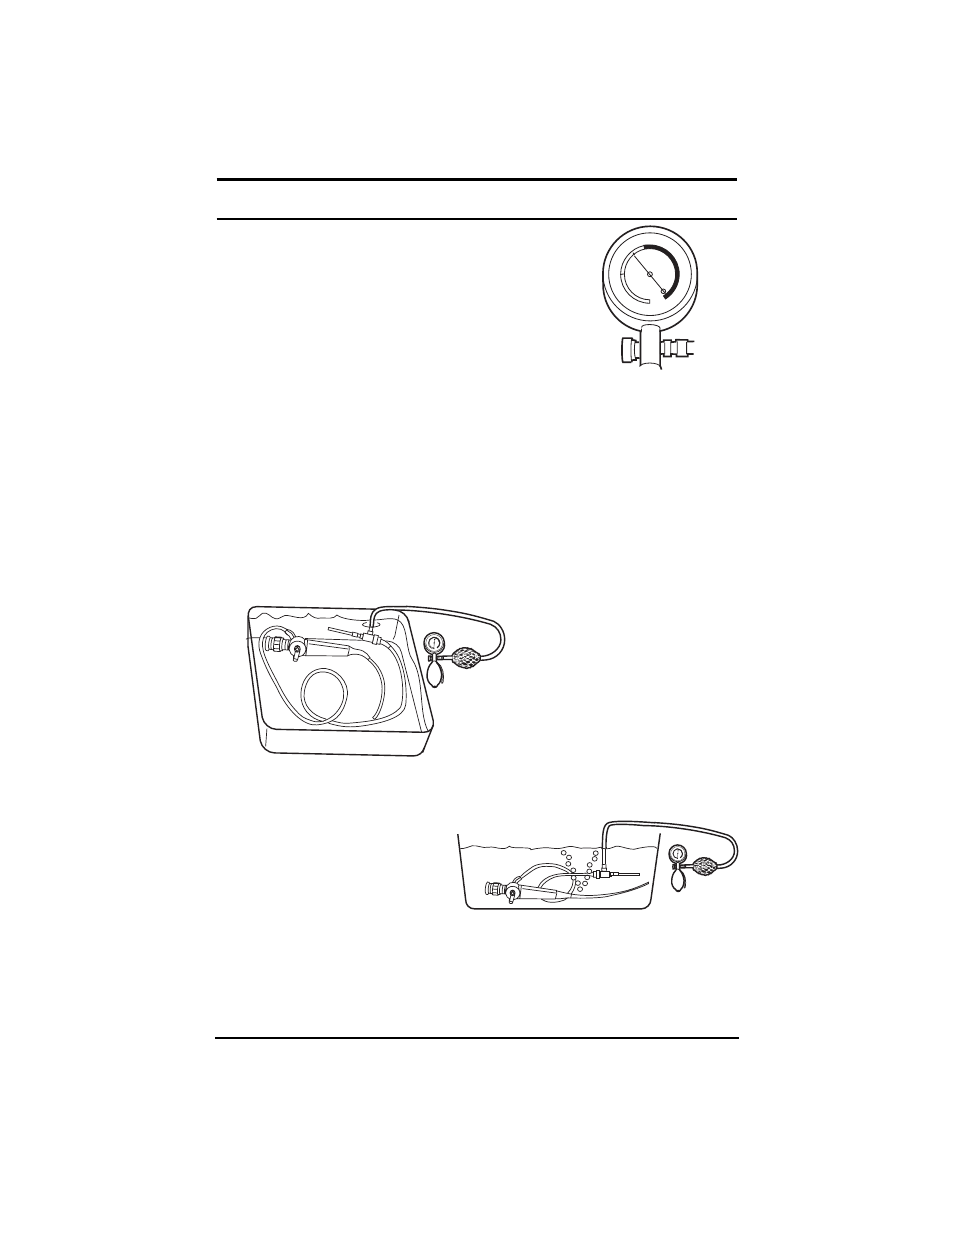
3. Pressurize the scope by pumping the hand bulb
until the indicator on the gauge is in the green
zone. DO NOT pressurize into the red zone; it
may cause serious damage to the scope.
4. Observe the gauge pressure to determine if the
indicator remains in the green zone. If the
indicator drops from the green zone rapidly,
a major leak may be indicated.
NOTE: Be certain that the pressure release valve on the handle of
the leakage tester has been tightened. DO NOT IMMERSE the entire
instrument if the gauge indicator does not remain in the green zone.
Instead, contact Welch Allyn Customer Service.
Stage-Two Test
After determining the absence of any major leak in stage-one testing, the
instrument may be immersed in clean water to test for loss of integrity in
the watertight construction.
1. With the leakage tester securely attached to the instrument and the
scope pressurized with the gauge indicator in the green zone, the
entire scope may be immersed in clean water.
NOTE: Only the leakage tester
connector and a small portion of
its tubing should be immersed.
Never immerse the entire
leakage tester.
2. Observe the instrument carefully. A few bubbles may initially rise
from recessed areas of the scope. This is normal. If a continuous stream
of bubbles is observed from
the same spot, a leak is indi-
cated. Immediately remove the
scope from the water. DO
NOT use the scope. Contact
Welch Allyn Customer Service
immediately.
3. After removing the instrument from water, release the air pressure by
opening the pressure release valve on the handle of the leakage tester.
After the gauge indicates “zero”, disconnect the leakage tester from
the scope.
9
T
ES
T
DA
N
G
E
R
0.1
0.2
0.3
0.4
0
T
ES
T
DA
N
G
E
R
0.1
0.2
0.3
0.4
0
T
ES
T
DA
N
G
E
R
0.1
0.2
0.3
0.4
0