Configuration, Configuring the aps scanner – Vinten Radamec Fusion APS User Manual
Page 10
8
Configuration
Configuring the APS Scanner
Before the APS system is fully operational, reflective targets must be
correctly installed into the studio environment and the APS scanner
must be configured to work with them. For configuration purposes, the
APS scanner has a built in user interface which is accessed by
connecting up a computer with compatible network settings running a
web browser such as Internet Explorer.
Reflective Target Installation
The APS scanner will only function in a studio with APS reflective
targets installed. For more information on the correct installation and
use of the APS reflective targets, refer to the APS Reflective Targets
Installation Guide, publication part No. V4109-4981.
The APS Scanner User Interface
The network settings of the computer must be changed for successful
connectivity with the APS scanner. The procedure for changing the
settings differs between Windows XP and Windows 7.
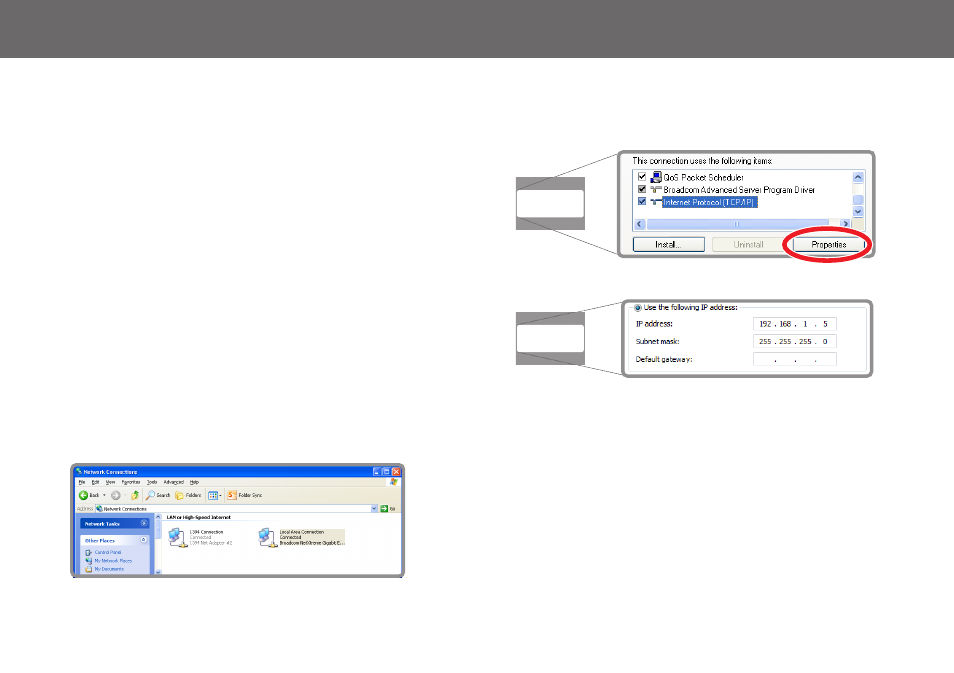
Changing the Network Settings Using Windows XP
1.
From the Windows Start menu navigate to Control Panel >
Network Connections to open the Network Connections
window.
2.
Right-click on the Local Area Connection icon and select
Properties from the menu.
3.
Scroll down and select Internet Protocol (TCP/IP) and click the
Properties button.
4.
The Internet Protocol (TCP/IP) Properties window opens.
a) Make a note of any current configuration settings in this
window so that they can be restored when required.
b) Click to select the Use the following IP address option.
c) Enter 192.168.1.5 (or an address appropriate for the device or
system) into the IP address field.
d) Press the Tab key to automatically populate the Subnet mask
field.
5.
Click Ok to save the changes and exit the window.
6.
Click Close to exit the Local Area Connection Properties
window.