Optional exterior grille – Vintage Cellars Extreme ti Series User Manual
Page 17
www.whisperkool.com | Page 15
Exterior Grille Installation
The exterior grille is required on all installations where the exhaust side of the unit is exposed to the outside of the
dwelling (i.e. rain and weather).
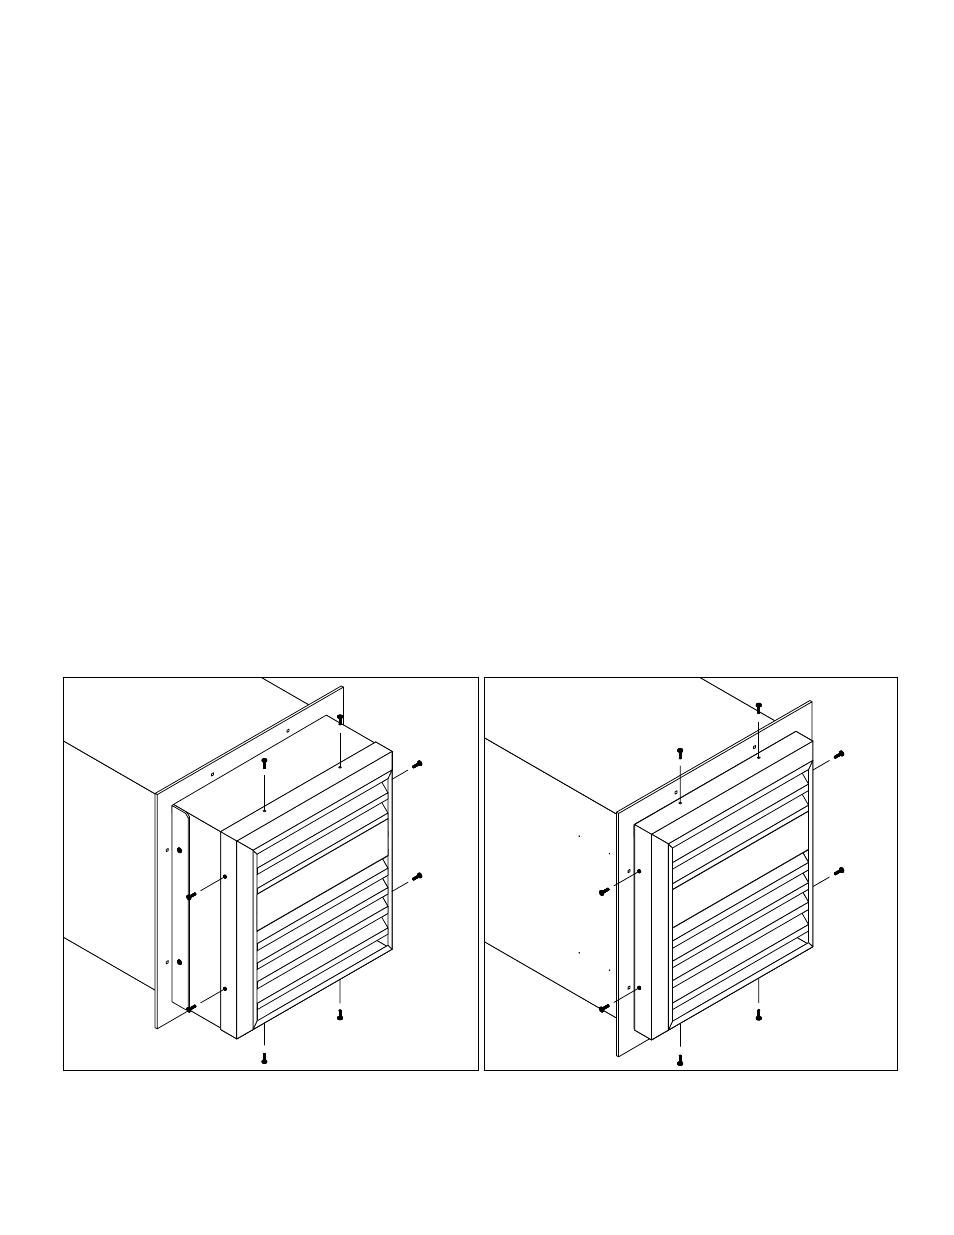
Non-Flush Installation
Install the unit according to the standard through-the-wall procedure. After the unit is installed, place the exterior
grille over the exhaust side filer grille and line up the screw holes on the top, bottom, and sides. Use the supplied (8)
self tapping screws to fasten the grille to the unit.
Flush Installation
This installation is slightly different because you are utilizing the same holes for both the mounting bracket and exte-
rior grille.
1. Slide the mounting bracket onto the unit followed by the exterior grille, bring the two pieces together by slid-
ing the exterior grille over the mounting bracket side flanges.
2. Align the (2) top screw holes of the exterior grill with the top screw locations on the unit, use the supplied self
tapping screws to fasten the grille.
3. Repeat step 2 on the bottom of the unit.
4. You will notice the side holes do not line up, use the supplied self tapping screws to fasten the grille and
bracket to the unit ensuring the bracket stays perpendicular/square.
5. Continue through-the-wall installation.
It is required to use the 1/2” self tapping screws provided. Do not drill screws into unit.
OPTIONAL EXTERIOR GRILLE
Non-Flush Installation
Flush Installation