3 electrical interface to the indicator – Rice Lake RoughDeck FXB Flexure Lever Floor Scale User Manual
Page 12
8
RoughDeck HE AutoLift
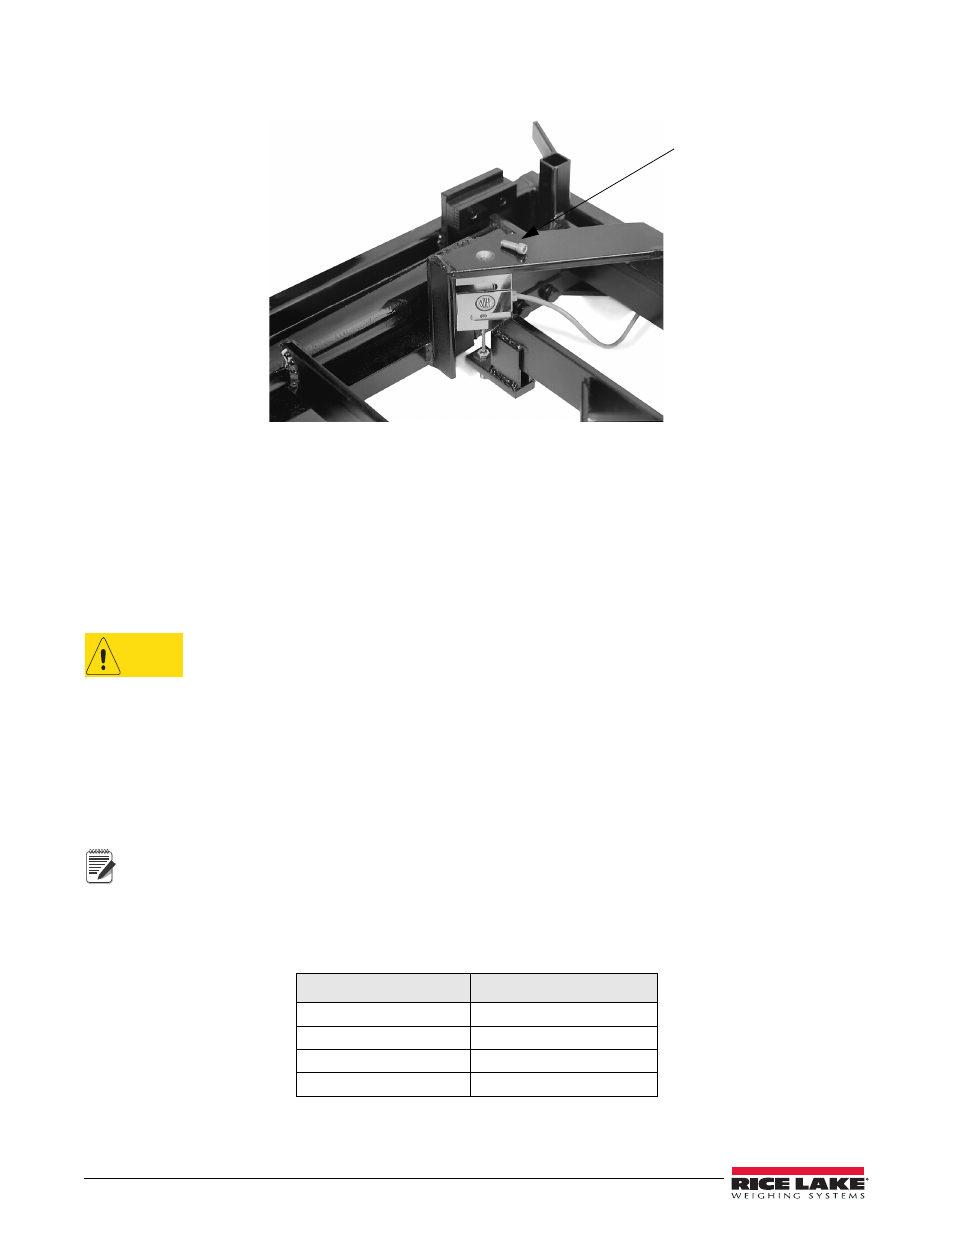
8. Position the load cell so the signal cable will travel directly out of the exit hole in the base as shown in
Figure 3-2 below.
Load Cell
Mounting
Bolt
Figure 3-2. FXB Interior
9. Position the load cell vertically and lift until it touches the load cell support frame. Align the top hole of the
load cell with the mounting hole of the support frame and thread the load cell mounting bolt down through
the housing into the load cell. Do not tighten.
10. Place the bottom nut on wire rope. Do not tighten.
11. Position the load cell so it is not rubbing or touching the sides of the support frame or lever system.
12. Tighten the mounting bolt.
13. Carefully raise the lever nose iron and tighten the bottom nut finger tight. Using a wrench, carefully tighten
the bottom nut. Be sure to remove the block from under the primary lever.
Note
CAUTION
When tightening the bottom nut, do not allow the wire rope to twist. Twisted rope causes side forces in the cell,
which cause weight errors when the scale is loaded.
14. Screw the strain relief fitting into the side of the base.
15. Route the load cell cable through the strain relief fitting. Verify that the cable is not touching any portion of
the live weighing deck or levers.
16. Connect the load cell cable to a digital weight indicator.
17. Inspect under and around the lever arms, pivot heads, and load bridge for any foreign material which could
interfere with the live portion of the scale.
18. Re-install the weigh platform and deck plate. The scale base is ready for calibration.
The weigh platform frame and scale base are match marked on the corner near the load cell for proper assembly.
3.3
Electrical Interface to the Indicator
Twenty feet of 4-wire cable is supplied to connect the scale to the weight indicator. Use the wiring scheme from the
following table to connect the RoughDeck FXB to the indicator.
Table 3-1. Wiring Color Codes
Color Code
Function
Red
+ Excitation
Black
- Excitation
Green
+ Signal
White
- Signal