0 installation, Calibrate with test weights, 1 unpacking the scale – Rice Lake Floor Scales - SURVIVOR FB Series Electronic Flexure Base User Manual
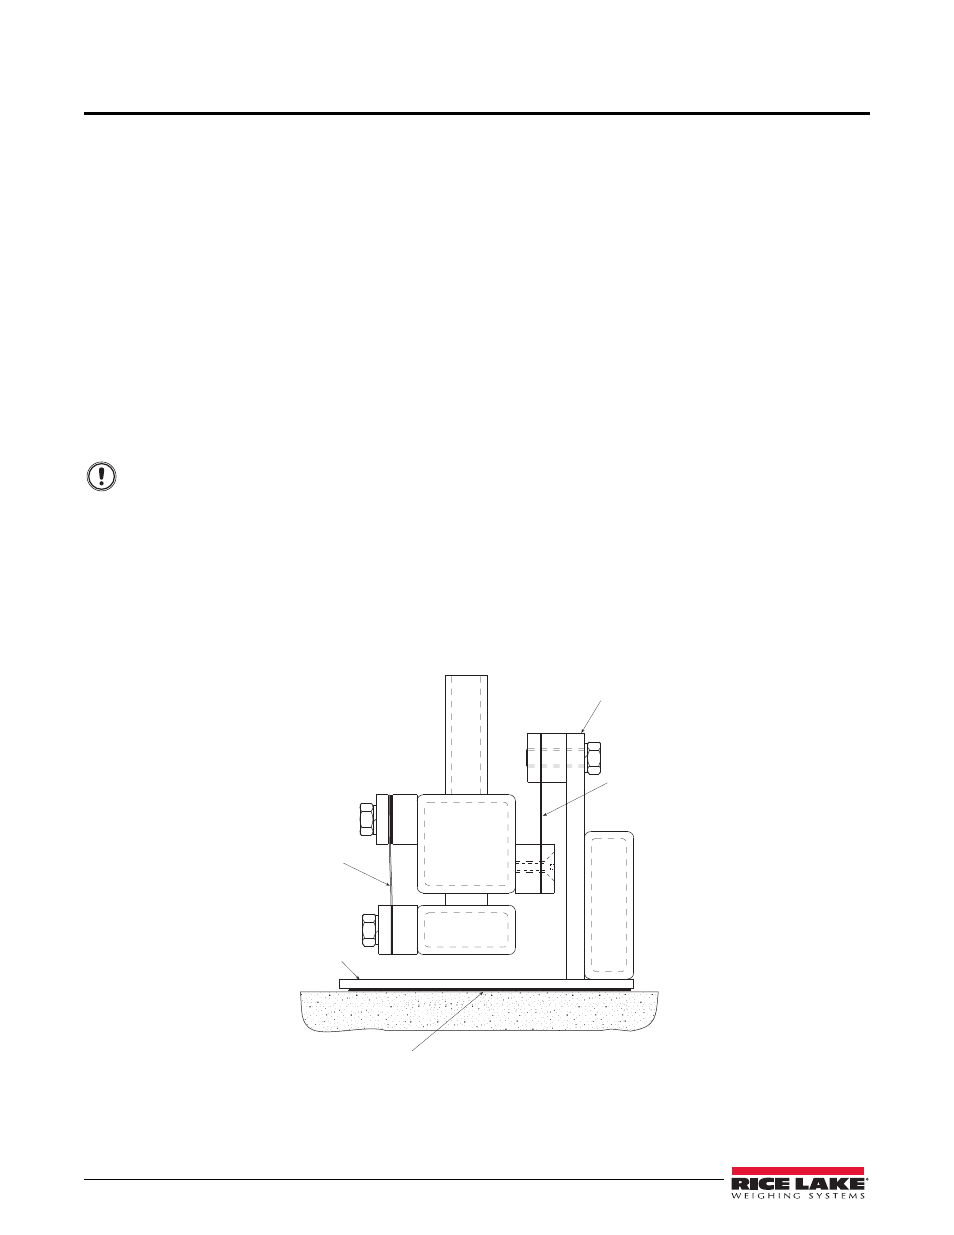
Page 6: 2 scale setup, Figure 2-1. side view - pivot head
2
FB Series
2.0
Installation
Installation can be done in a matter of minutes with six main steps:
1. Place scale in final position and carefully remove it from the packing skid.
2. Level the corners by shimming under the corner gusset plates.
3. Back off all shock-stop bolts that were tightened down for shipping safety and adjust them to 1/16"
clearance for weighing.
4. Route the load cell cable to the digital weight indicator and connect.
5. Drill anchor holes, and bolt or lag the scale to the floor using the tie downs.
6. Calibrate with test weights.
A troubleshooting guide is included in this manual, as is information on load cell replacement, and corner
correcting after load cell replacement or other major service work.
2.1
Unpacking the Scale
The FB scale will arrive on a packing skid. Place the skid near the final installation area. Cut the shipping bands
and remove the shipping cover.
The deck assembly, deck plate, and base assembly are all match-marked near the I.D. tag on the base
assembly. Note the marks and always replace the deck with the marks matching.
The deck assembly can be removed safely with hooks placed into the tube ends and lifted with overhead chains.
2.2
Scale Setup
The installation area should be firm and fairly level.
1. Lift the base assembly off the skid with hooks and chains in the same manner as the deck assembly,
position it in the desired location.
2. Add shims as necessary under corner gusset plates until all corners are firm and the base does not rock.
Figure 2-1. Side View - Pivot Head
To prevent damage during shipping, six shock-stop bolts are tightened down.
Important
Fulcrum Stand
Fulcrum
Flexure
Base
Tube
Pivot
Head
Load Bridge
Tube
Load
Flexure
Corner
Gusset
Shim between floor
and gussets until stable