Enclosure disassembly, Installing option cards – Rice Lake CLS-920 WLAN Option User Manual
Page 2
2
CLS WLAN Installation Instructions
Enclosure Disassembly
The indicator enclosure must be opened to install the WLAN components.
WARNING
The CLS-920i has no on/off switch. Before opening the unit, ensure the power cord is disconnected from
the power outlet.
1. Disconnect power to the indicator and remove unit from the forklift.
2. Place the indicator face-down on an anti-static work mat.
3. Remove the screws that hold the backplate to the enclosure body.
4. Lift the backplate away from the enclosure and set it aside.
Installing Option Cards
Install the WLAN option card is as follows:
WARNING
Option cards are not hot-pluggable. Disconnect power to the CLS-920i before installing the WLAN option
card.
1. Ensure that power has been disconnected from the indicator.
2. Remove backplate as described in the previous section.
3. Carefully align the WLAN option card onto connector J6 (slot 2) on the CPU board.
4. Press down to seat the option card in the CPU board connector.
5. Use the screws provided in the option kit to secure the other end of the option card to the threaded
standoffs on the CPU board.
6. Set up the WLAN configuration parameters as explained on page 5.
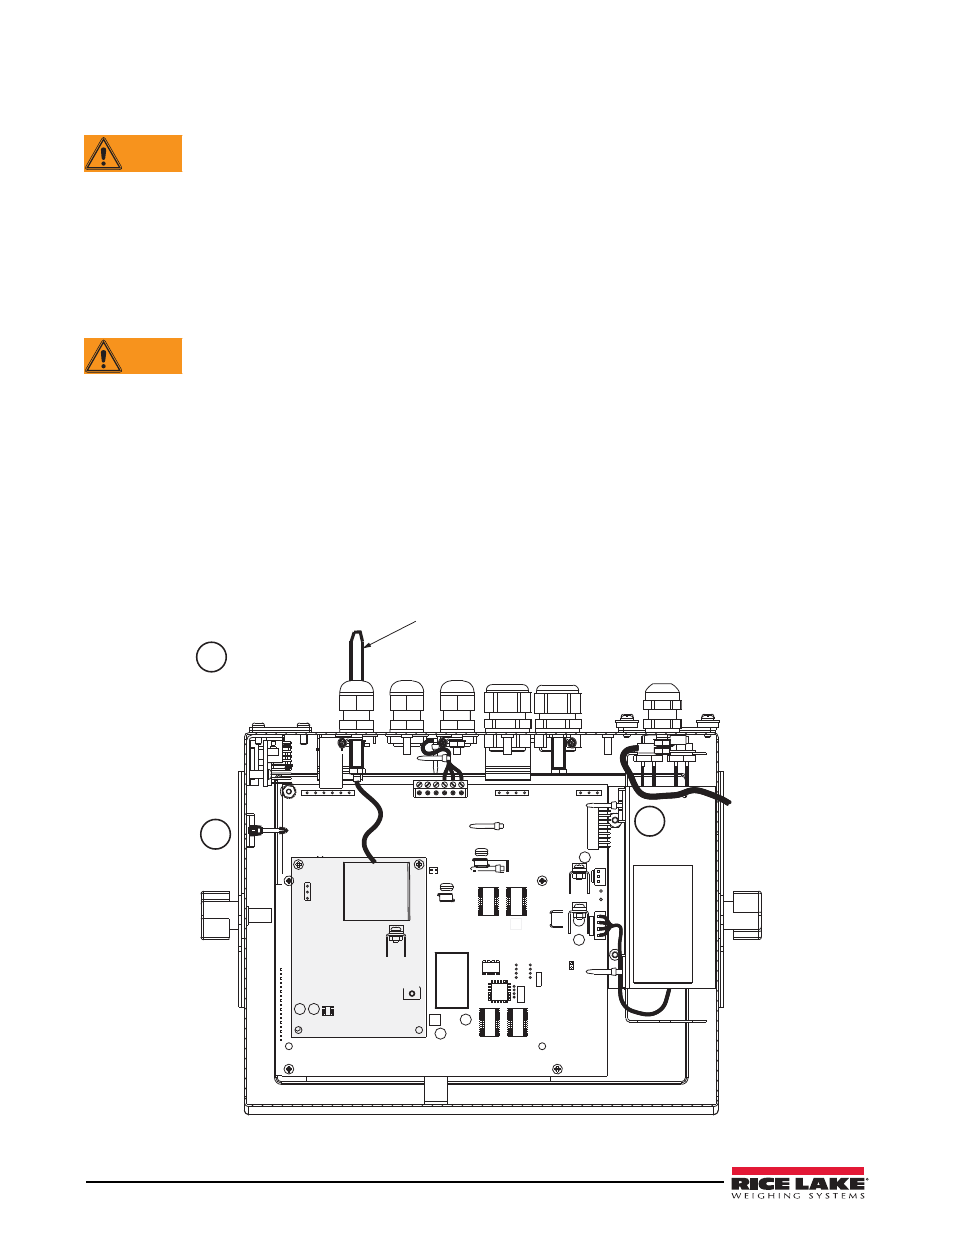
7. Make connections to the option card as required. Use cable ties to secure loose cables inside the enclosure
as shown in Figure 2.
8. When installation and configuration is complete, reassemble the enclosure as shown on page 11.
Wireless Antenna
LANTRONIX WiPORT
FC
Indicates
Option Card
Cable Ties
CT
CT
CT
Figure 2. Installed Option Cards, Showing Secured Cables