Fig. 17: removing the cover – Kontron KISS 1U Short KTQM77 Users Guide User Manual
Page 21
8. Assembly, Disassembly
KISS 1U Short – User’s Guide (V1.10)
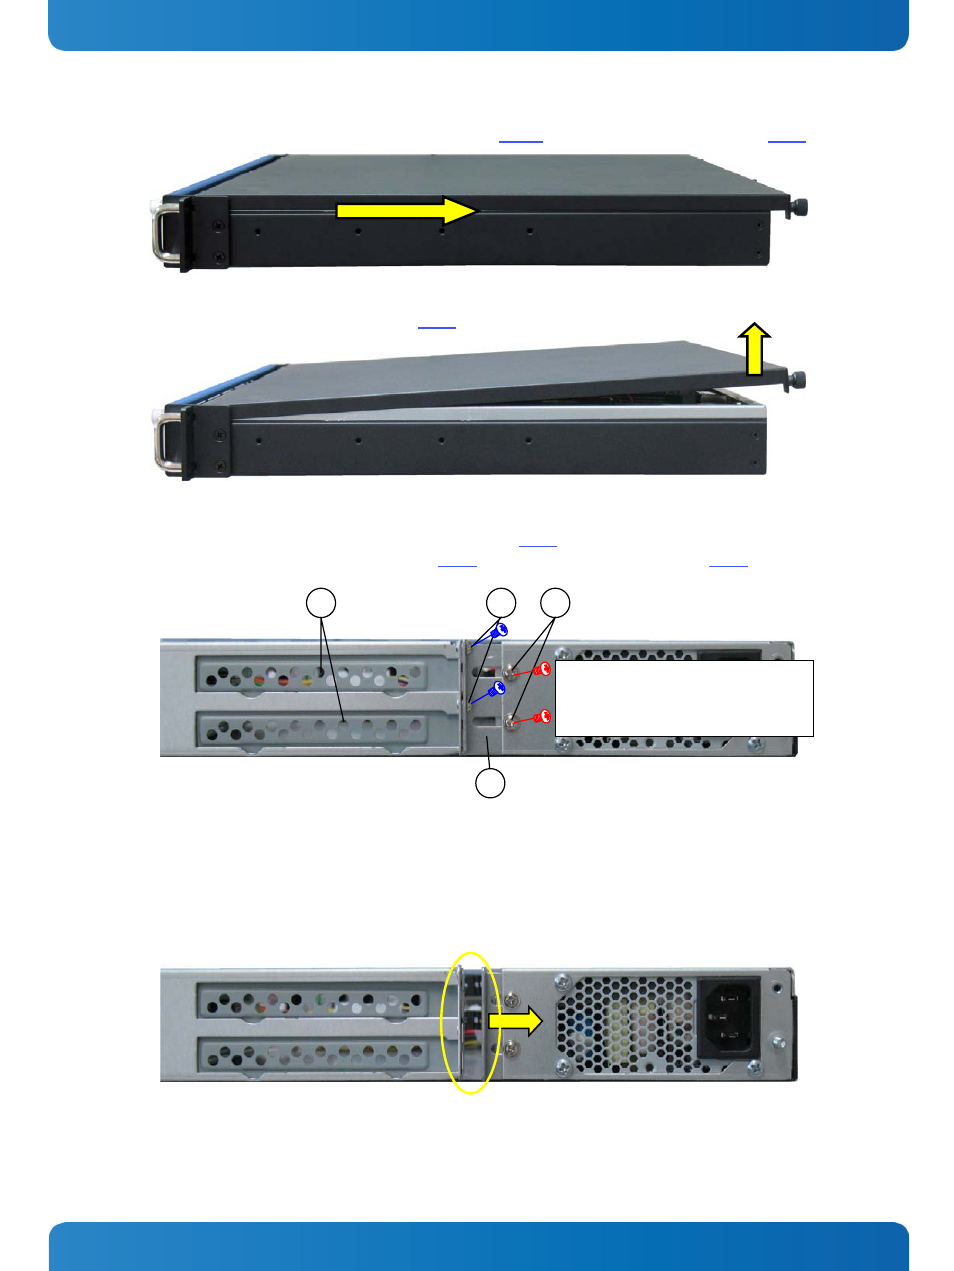
3. Pull the cover back (to remove the cover fixing brackets (see Fig. 13, pos.3) from the retaining brackets Fig. 5, pos. 6).
Fig. 16: Sliding the cover back will pull out the cover fixing brackets from the retaining brackets of the chassis
4. Lift the cover (on the rear edge) and remove it (
).
Fig. 17: Removing the cover
5. In order to remove the slot or card brackets remove the screws (
, pos. 2). Retain these screws for later use.
Loosen (turn 1/2 to the left) the fastening screws (
, pos. 4) to unlock the slide bracket (
, pos. 3) .
1
2
Only loosen the fastening screws
(pos. 4) fort the slide bracket (pos. 3)!
Don’t remove the screws!
4
3
Fig. 18: Detail: Rear side with slide bracket closed (for fixing the expansion cards/slot brackets)
1 Slot bracket
2 Fastening screws for the slot bracket
(card slot bracket)
3 Slide bracket
4 Fastening screw for the slide bracket
6. Move the slide bracket to the left. The slot brackets are disengaged now and can be removed from the system.
Fig. 19: Detail: Rear side with slide bracket( opened)
www.kontron.com
19