Care and cleaning – Gastroback 41400 Design Mincer User Manual
Page 11
3. Unscrew the closing ring and take out the mincer plate and
crossed-blade knife. Operate according to the instructions
›Disassembling the appliance‹.
WArNING:
Do not cut yourself removing the crossed-blade
knife.
4. Assemble the appliance this time with the chopper attach-
ments.
IMPOrTANT: Never assemble the appliance with the chop-
per attachment and the crossed-blade knife with the grinding
disc.
a. Assemble the worm housing in the opening of the drive
shaft. Place the worm inside the worm housing (operate
according to the instructions ›Assembling the appliance‹; see
fig. 1 and 2).
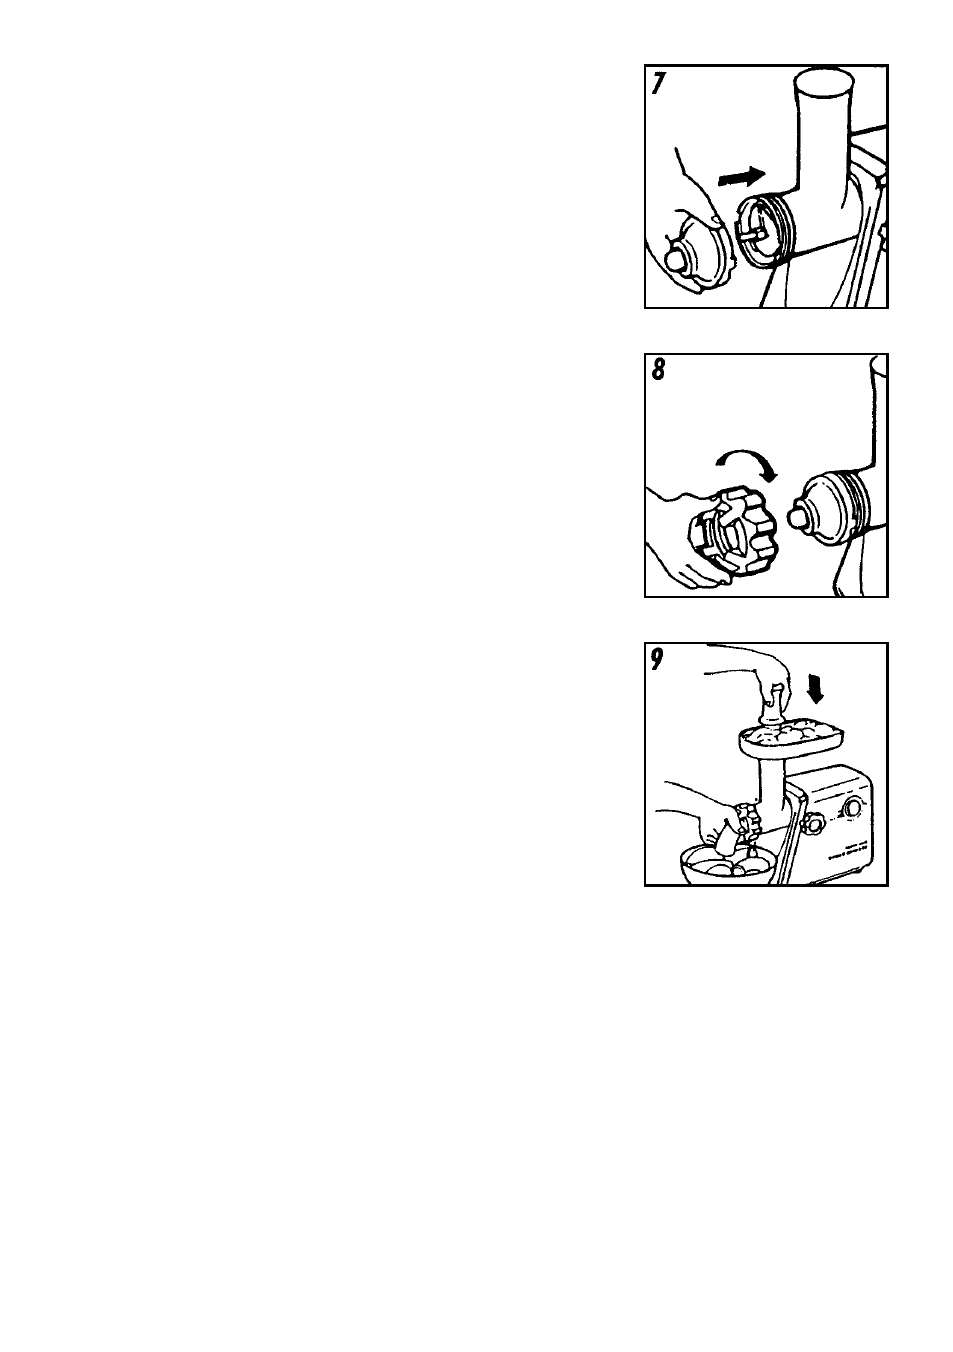
b. Place the chopper attachment A on the axis of the worm.
The slim end has to face the front (see fig. 7). Turn the chopper
attachment a little bit while pushing it into the worm housing.
c. Place the chopper attachment B on top of the chopper
attachment A. The wide opening of the chopper attachment
B should be facing the chopper attachment A. The chopper
attachment B has a gap on the outside edge which should
slide over the guiding pin on the inside of the worm housing
(see fig. 8).
d. Attach the closing ring to the worm housing and screw it on
tight with your hands.
5. Process the wrapping mixture in the mincer with the attached
chopper attachments (see fig. 9). The finished product will be
one long wrapping. Cut the wrapping into convenient seize.
6. Freeze the wrapping shortly.
7. Fill the wrapping with the filling mixture.
8. Fry the wraps with some olive oil until it has the favored browning.
care and cleaning
WArNING:
Never hold your face or other body parts over the feed tube when the
motor is running because little pieces of food could be thrown out of the feed tube. Never
put foreign substance or hard objects into the feed tube.
Before the mincer is used for the first time, all parts – with the exception of the motor block
– must be thoroughly cleaned in warm soapy water.
27