Dynojet 250i: Control Panel Interface Upgrade (S/N 202xxxx) User Manual
Page 13
11
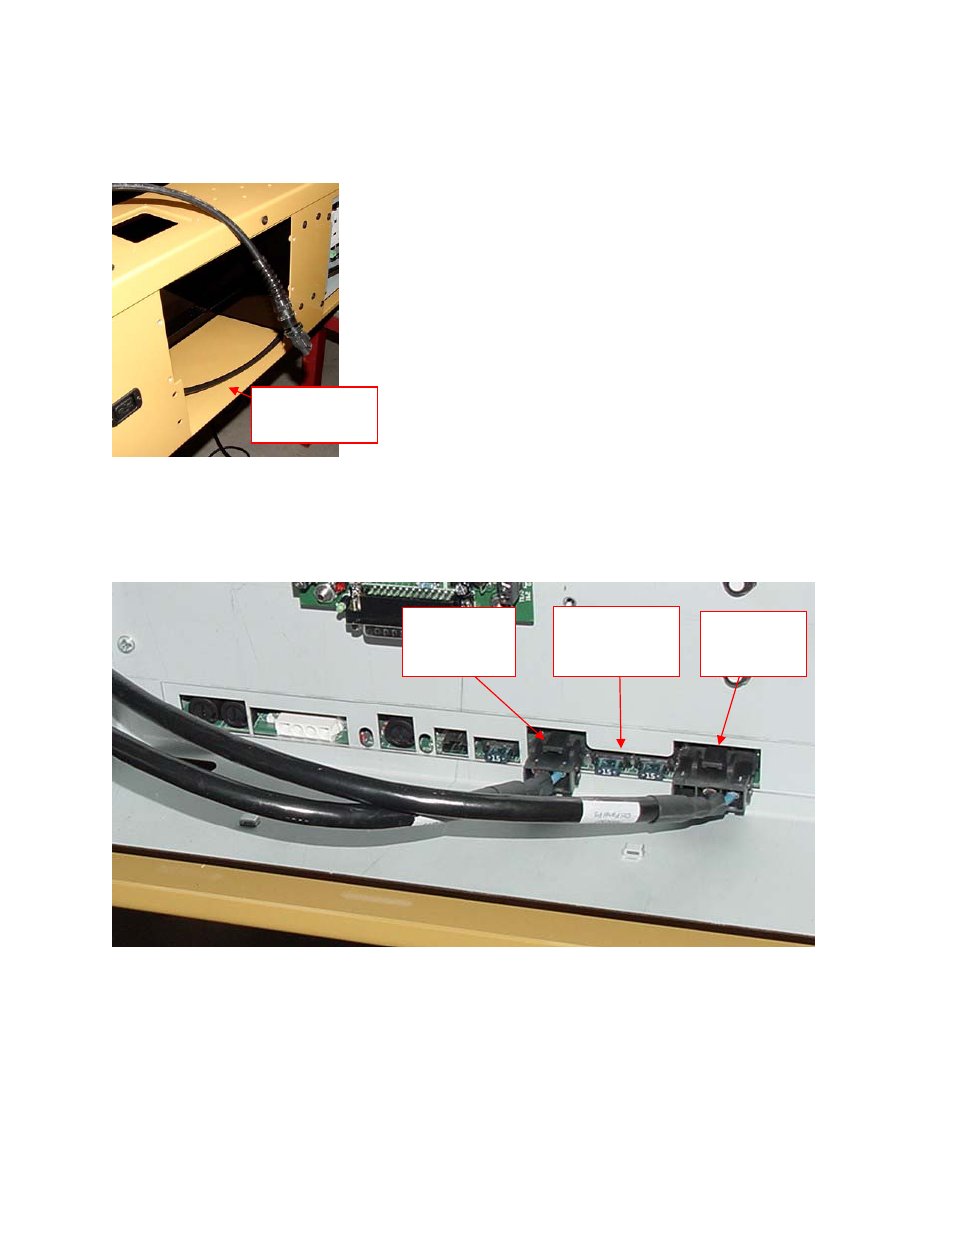
31. Route the wiring to the optional Wheel Clamp and Power Carriage through the dyno. You may find it
easier to slide the Stack Box out of the side of the dyno and remove its support bracket for routing
these cables. Even if you have not purchased these optional accessories it is better to install the
cables now for an easy upgrade in the future.
32. Remove the front cable access plate. Route the P/N 76950307 Pod to Clamp cable from P5 on the
Control Panel Interface board to the front cable hole on the dyno. The cable passes under the center
partition in the carriage module and in front of the vertical angle piece that forms the structure of the
front of the dyno. Make sure that the cable strain relief end with the conduit nut is at the end of
the cable that will connect to the Wheel Clamp.
Remove
bracket
P5 – Wheel
Clamp
connection
Control Panel
Interface
board
P8 – Power
Carriage
connection