Sill, Guides – Coral Industries Steam Bypass - 2SR1-P (If Purchased from a Plumbing Wholesaler) User Manual
Page 5
2SR1-P 7/05
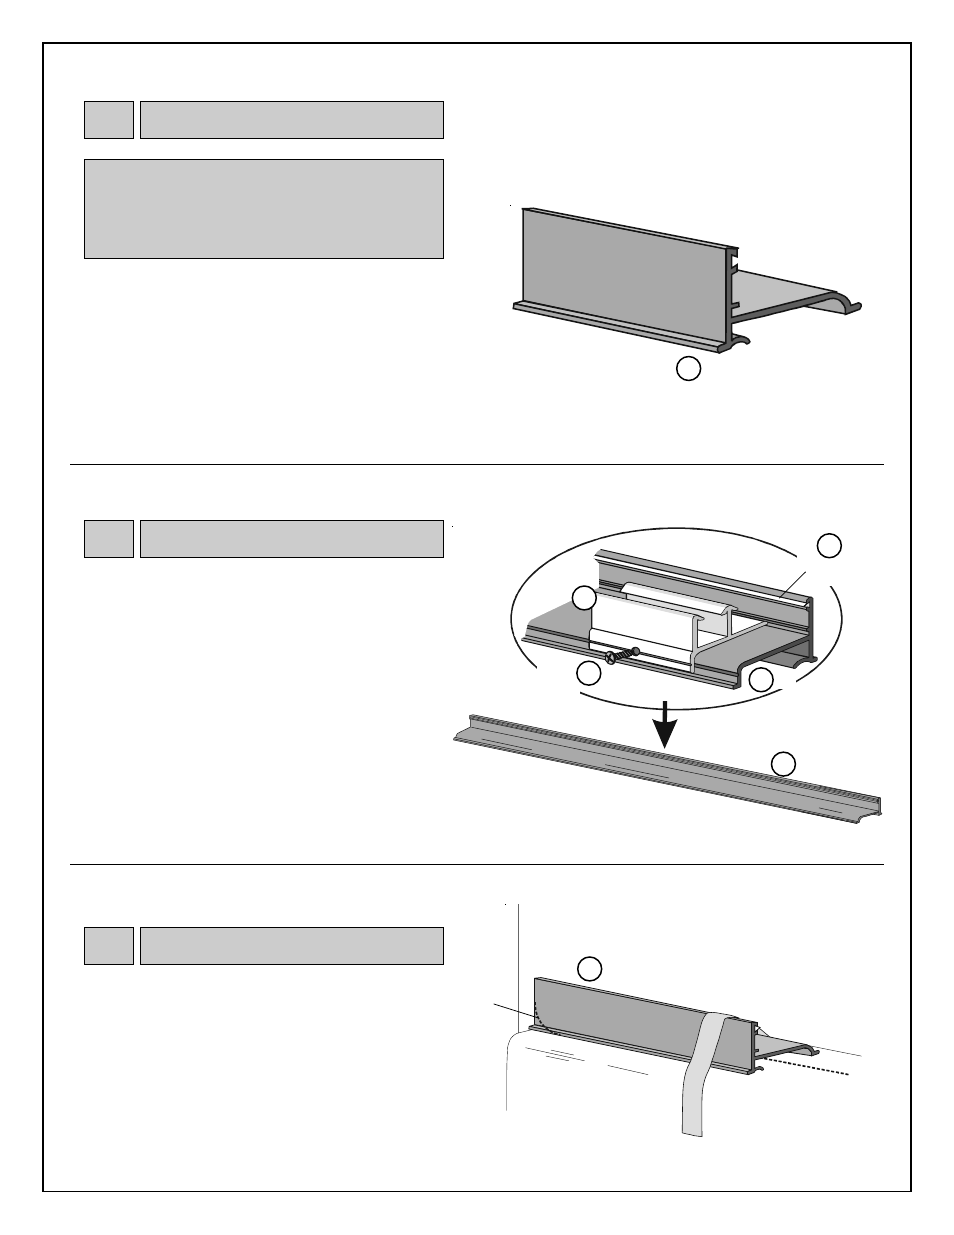
Slide vinyl track guide (J) into small groove on upright
of sill. Trim end flush with edge of sill.
Locate center of sill. Position guide (G) at center of sill
with curved leg fitting over curve of sill, and back of guide
fitting under small lip on back upright of sill.
Drill through hole in guide using 1/8" drill bit.
(Chrome
and gold units include a self-drilling screw which does not
require a pilot hole.)
Secure guide to sill with 8A x 3/8"
pan head screw (N).
Vinyl Track
Guide
J
Place guide at
center of sill
Sill
INSIDE OF BATH
Sill
A
A
Guide
G
8A x 3/8"
Pan Head
Screw
N
Position sill on centerline of tub with tall edge of sill
toward outside of tub. If necessary for a smooth fit,
file ends of sill to fit contour of unit.
Tape sill to tub with masking tape. This will help
hold sill in place while positioning jambs.
Centerline
Masking
Tape
Sill
A
Tub
OUTSIDE OF BATH
4
Sill
(A)
/ Guides
(J), (G)
5
Sill
(A)
File to fit
contour of
unit
Due to the manufacturing process, there may be
rack marks present at one end of your sill and
header. Sill and header must be trimmed to fit your
individual opening. When cutting sill and header,
make certain to trim off end with rack marks.
Cut your sill (A) using the following guidelines:
a)
Units with A901 Jambs - cut sill 5/8" less
than Centerline Measurement recorded in
Step 2.
b)
Units with A531 Jambs - cut sill 1 3/4" less
than Centerline Measurement recorded in
Step 2.
Sill
A
3
Sill
(A)